
Nakasendo Trail Guide: Best Sections, Distance, Difficulty & How to Hike It
If you have searched “Nakasendo Trail” before landing here, you have probably already hit the confusion that trips up nearly every first-time visitor: some pages say the Nakasendo is 530 km, others describe it as a comfortable 8 km walk between two post towns. Both are true. The Nakasendo was an Edo-period highway connecting Tokyo’s Nihonbashi with Kyoto’s Sanjo Ohashi, and roughly 530 km of it passed through 69 post towns. What modern travelers actually walk — and what almost every Nakasendo hike guide is really about — is a set of preserved sections in the Kiso Valley, the mountain corridor halfway between Kyoto and Tokyo.
Short answer: if you have one day and want the classic first Nakasendo experience, walk from Magome-juku to Tsumago-juku (about 8 km, easy to moderate, English signage, roughly 3 hours of walking). If you want a quieter forest hike that starts and ends at JR stations with no bus coordination, walk from Yabuhara to Narai-juku over Torii Pass. If you want the historic atmosphere without the climb, spend your time in Narai-juku alone, strolling its roughly 1 km of preserved streets straight from Narai Station.

This guide compares those three options by the things that actually decide whether you enjoy the day — distance, difficulty, transport logistics, food, and luggage — rather than by scenery alone. Getting to the trailheads on your own is very doable, and the sections below explain exactly how. If you would rather hand the transport to someone else, a guided day trip from Nagoya covers the classic Tsumago–Magome stretch with round-trip transfers; I will get to that comparison later in the article.
Want the classic hike without juggling the rural connections? Check current dates, start times, and recent traveler reviews for the guided Nakasendo day trip from Nagoya. It covers the classic Tsumago–Magome hike with round-trip transport from Nagoya.
What Is the Nakasendo Trail — and How Long Is It?
The Nakasendo (“central mountain route”) was one of five official highways built during the Edo period (1603–1868). Merchants, daimyo lords, and pilgrims traveled it between Nihonbashi in Edo (now Tokyo) and Sanjo Ohashi in Kyoto. The full historic route runs roughly 530 km through the mountains of central Honshu, passing 69 post towns where travelers slept, ate, and changed horses.
Only fragments of the original road survive in walkable form today. The best-preserved and most visited stretch is in the Kiso Valley (Kisoji), a narrow river valley in Nagano and Gifu prefectures that sits near the midpoint of the old highway. Kiso post towns such as Magome, Tsumago, Narai, and Kiso-Fukushima kept their Edo-era layouts because the region’s remoteness and its timber industry protected them from modern redevelopment. When people say they are “hiking the Nakasendo,” they almost always mean one of the Kiso Valley sections described below — not a 530 km thru-hike.
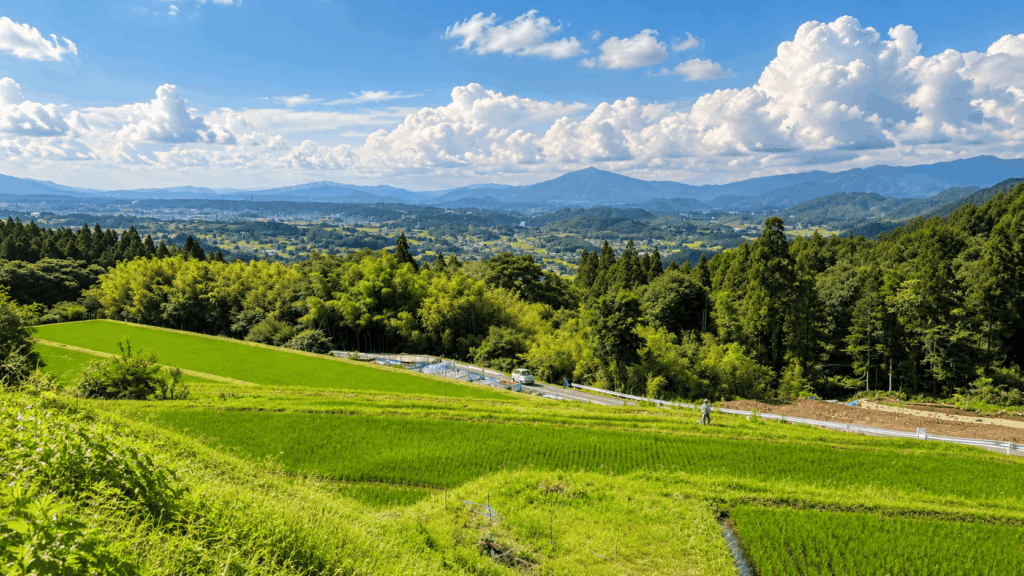
That 530 km figure is an approximation of the historic route, and sources round it differently. What matters for trip planning is simpler: no traveler on a normal Japan itinerary needs to decide between walking 8 km or 530 km. You pick a section, walk it in a few hours, and connect the ends by train and bus.
Which Nakasendo Section Should You Walk?
The honest answer is that no single section is “the best” — the right choice depends on how much walking you want, whether you are comfortable with bus transfers, and how much time you have. When travelers ask me about the Nakasendo, the real question underneath is almost always how much hike am I actually signing up for? The table below is designed to answer that before you read any further.
| Section | Best for | Distance & time | Difficulty | Access | Main drawback |
|---|---|---|---|---|---|
| Magome → Tsumago | First Nakasendo hike; classic post towns and forest trail in one morning | About 8 km; roughly 2.5–3.5 hours walking | Easy to moderate; one pass (801 m) with a gentle climb, then a longer descent | Bus required: Nakatsugawa Station → Magome, or Nagiso Station → Tsumago | The busiest section in the valley; you must coordinate bus and train times at both ends |
| Yabuhara → Narai (Torii Pass) | Quieter forest hike with a proper mountain pass; rail-only logistics | About 8.5 km including both towns (the forest core is roughly 6 km); 2.5–4 hours | Moderate; a sustained climb of about 400 m to Torii Pass (roughly 1,197 m) | JR Chuo Line stops at both Yabuhara and Narai — no bus needed | Steeper and more remote than Magome–Tsumago; fewer facilities along the way |
| Narai-juku only | Edo-era streetscape without a hike; travelers with limited time, mobility, or weather tolerance | About 1 km of main street; 1–2 hours at a slow pace | Easy and flat (paved, with some stone sections) | JR Narai Station is a short walk from the street | You see a post town but not the forest trail between towns |
Distances and walking times above are approximations from the Kiso regional tourism board and commonly cited hiking references; your pace, photo stops, and weather will change them. Trail conditions can also change — the Torii Pass trail on the Narai side was closed for bridge repair from March 2 to April 24, 2026; the work was subsequently completed and the normal route reopened. Check current local notices before you go in case weather, maintenance or wildlife affects access.
Magome to Tsumago — Best for a First Nakasendo Hike
This is the section you see in almost every Nakasendo photo: two beautifully preserved post towns connected by a forest path that crosses Magome Pass. The regional tourism board rates it easy to moderate and notes that it is well signposted in English, which makes it the most forgiving introduction to the trail.
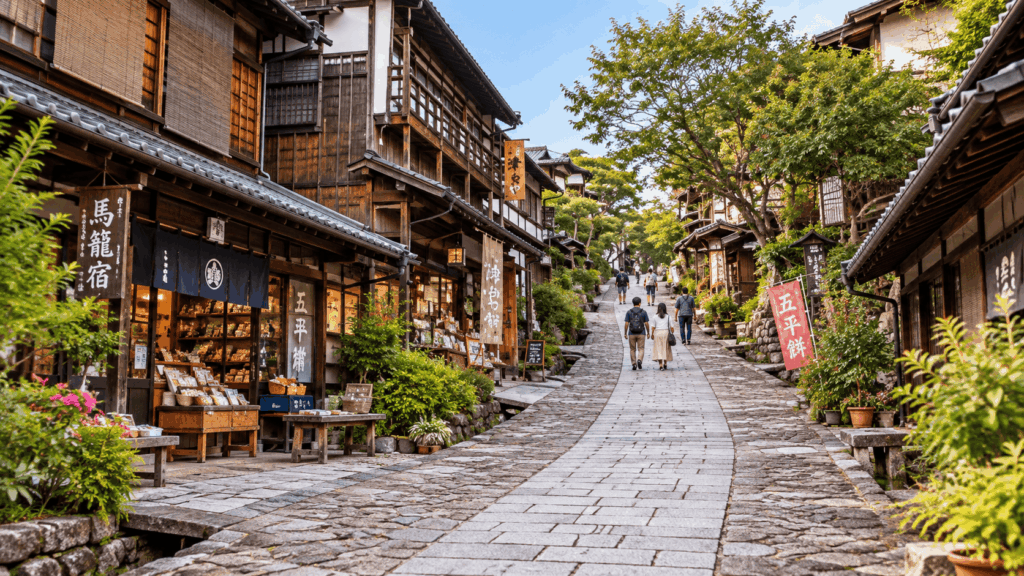
Walk it from Magome to Tsumago, not the reverse. Magome sits at roughly 600 m and Tsumago at about 420 m, so the recommended direction means a gentle climb over the first hour or so to Magome Pass at around 800 m, followed by a longer downhill into Tsumago. The other direction involves more overall uphill and most people find it less pleasant.

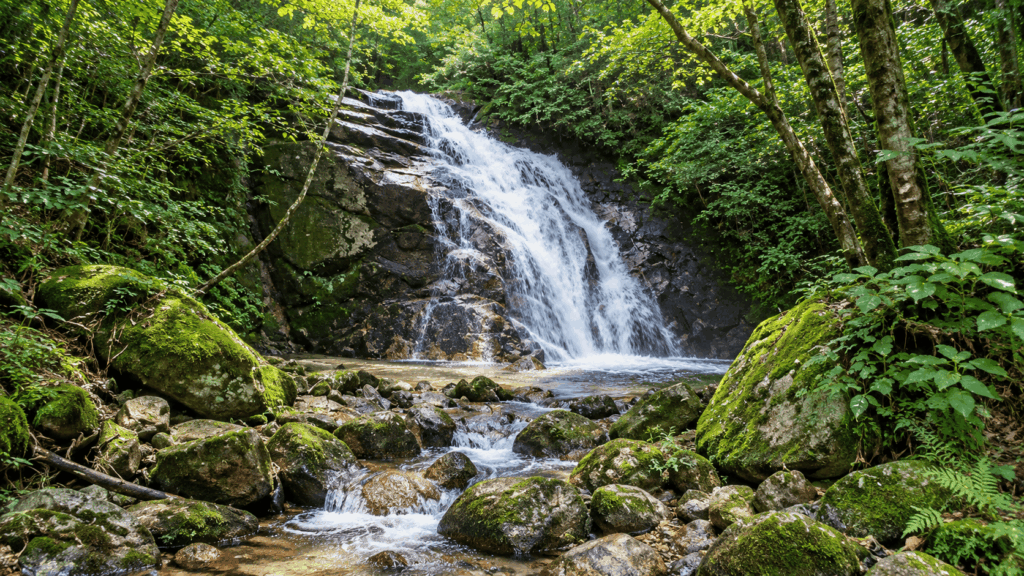
Shortly after the pass, the path drops past the paired O-daki (male) and Me-daki (female) waterfalls — the most photographed point on the route after the towns themselves. Expect a genuine mix of surfaces: forest trail, mossy stone paving, and short asphalt segments where the old road meets the modern one. The trail is easy to follow, but where it crosses local roads you are still walking through a populated valley, so keep an eye out for traffic on the short roadside stretches.
Practically, you need a bus at one end or the other: buses run from Nakatsugawa Station up to Magome (about 25–30 minutes), and from Nagiso Station down to Tsumago (about 10 minutes). Both directions are covered in the transport section below. Because this section is the most popular in the valley, you will rarely have the path to yourself — weekends and late-morning starts are the busiest.
Yabuhara to Narai via Torii Pass — Best for a Quieter, Stronger Hike
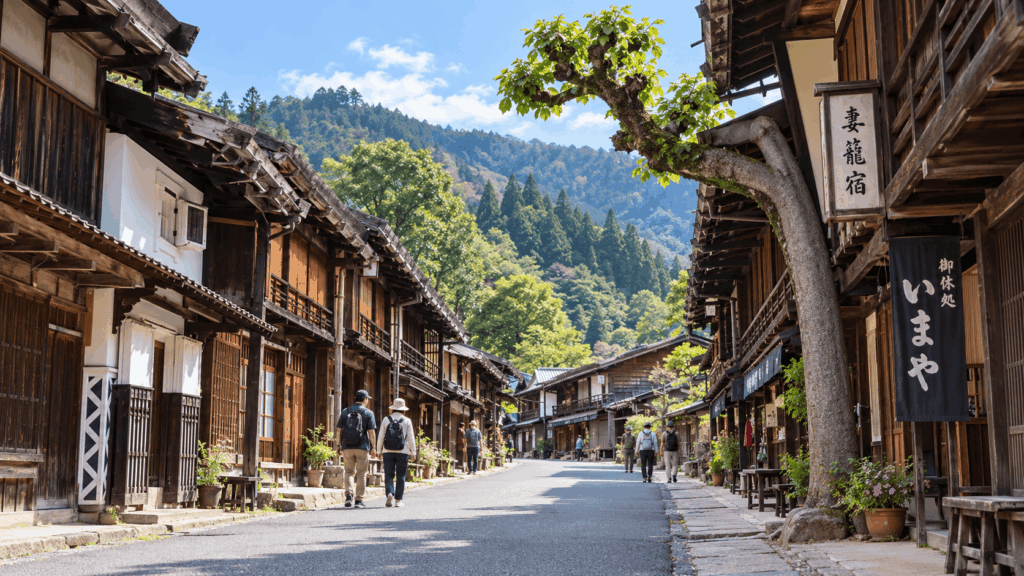
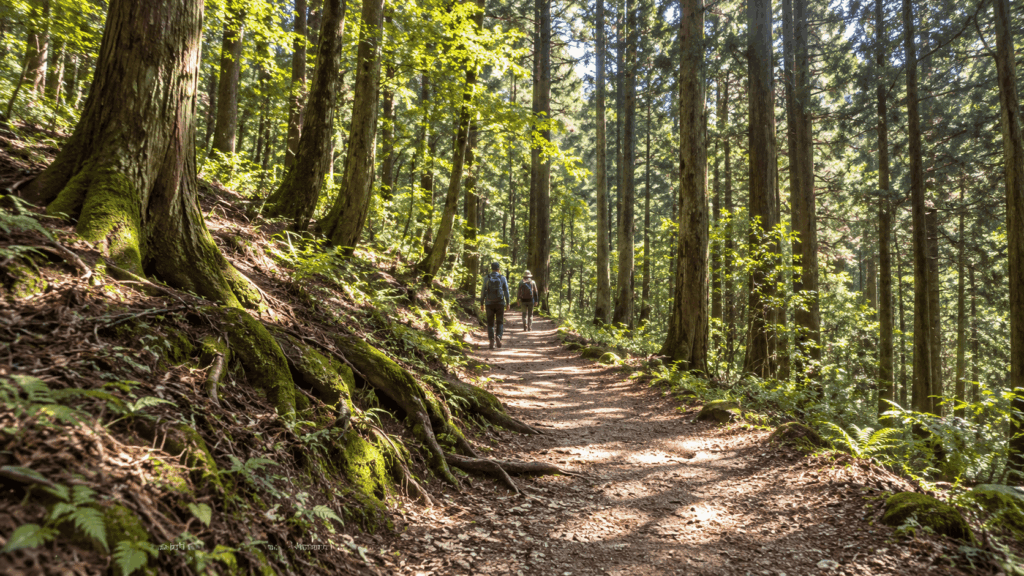
If Magome–Tsumago is the postcard section, the walk from Yabuhara over Torii Pass into Narai is the one that feels like a real mountain crossing. The regional tourism board describes it as quieter than the Magome–Tsumago stretch but beautiful, and the reason is historical: Torii Pass was famously difficult, so travelers who survived it stopped to rest and spend in Narai just beyond — which is how Narai earned its nickname, “Narai of a Thousand Houses.”

You climb steadily from Yabuhara for the first hour or so, past small shrines and viewpoints that open toward Mount Ontake on clear days, then descend through forest into Narai. Sources quote the section at about 8.5 km including the walk through both towns, and around 6 km if you count only the trail between them — both figures are correct, they just measure different end points. Allow roughly 2.5 to 4 hours depending on how many shrine stops and rest breaks you take.

The logistics are what make this section attractive to independent travelers: Yabuhara Station and Narai Station are both on the JR Chuo Line, so you walk from one train station to another with no bus to catch in the middle. The trade-off is that this is a genuine climb — about 400 m of elevation gain to a pass at roughly 1,197 m — with thinner crowds and fewer places to bail out partway. (If you want to know exactly what that climb looks like, see our dedicated guide to the Narai to Yabuhara hike). It suits walkers who want effort and solitude more than families with small children or anyone with knee trouble on long descents.

Narai-juku Only — Best if You Want History Without a Full Hike
Narai-juku is the longest surviving post-town streetscape in the Kiso Valley: a single main street roughly 1 km long, lined with two-story wooden buildings that still operate as shops, restaurants, and family homes. Unlike a museum village, it is a working town — people live above the storefronts, and the street has the slightly worn, lived-in quality that makes it my favorite place in the valley to simply walk slowly.
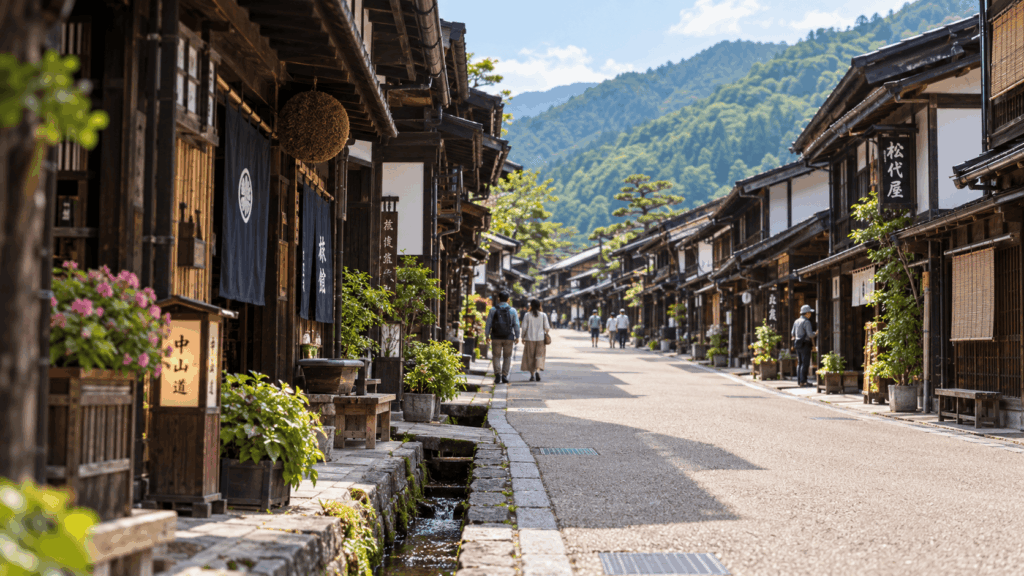
Because JR Narai Station sits right at the edge of town, you can be standing in the Edo-era street about five minutes after getting off the train. This makes Narai the natural choice if you want the historic atmosphere but are short on time, traveling with limited mobility, or facing weather that makes a mountain trail unappealing. It is also the easiest section to add to a larger rail itinerary without reorganizing your whole day.
Look for the kiso lacquerware (Kiso shikki) shops that line the street — lacquer production has been the town’s craft for centuries — and note that many shops and cafés close by late afternoon, so this is a morning-and-early-afternoon town. For a full breakdown of how to spend those hours, see our guide on things to do in Narai-juku.
How Difficult Is the Nakasendo Trail?
For a normal traveler in reasonable shape, the short answer is: none of the three options above is a technical hike, and you do not need climbing gear, ropes, or mountaineering experience. “Easy to moderate” is the official rating for Magome–Tsumago, and it is an accurate one. But difficulty is not a single rating — it comes from five separate factors that each affect different travelers differently:
- Distance: 8 km sounds short until you add a full day of trains, buses, and sightseeing around it. On a one-day trip from Nagoya you are walking 8 km plus standing through several hours of transport, which is a different day than a flat 8 km stroll.
- Elevation: Magome–Tsumago crosses one pass at around 800 m with a gentle gradient. Yabuhara–Narai climbs to Torii Pass at roughly 1,197 m, with a more sustained ascent from the Yabuhara side.
- Surface: The trail is stone paving, packed forest path, and short asphalt stretches. Wet stone is genuinely slippery, and a rainy day turns the descents into a slow, careful shuffle.
- Weather: Summer in the Kiso Valley is hot and humid (35°C and above is possible in July–August), and the forest sections give less shade than photos suggest. Winter brings ice and occasional snow around the passes, and some services thin out.
- Transport deadline pressure: The quietest stress factor is also the most underestimated. Your start time is set by the morning bus or train, and your finish time is set by the last bus or train out of the far town. Missing the final connection in rural Kiso can mean an expensive taxi or an unplanned night, so you walk with a schedule in your head even on an “easy” trail.
The mistake I see most often in trip planning is treating “easy” as “flat and weatherproof.” The rating refers to the gradient and the path, not to the rain, the heat, or the bus timetable. If you plan the transport as carefully as the walking, all three sections are well within reach of an average visitor.

Do You Need Hiking Boots?
No — not for these sections in dry conditions. Sturdy shoes with decent tread (trail runners, grippy sneakers, or light hiking shoes) are fine for Magome–Tsumago and Narai, and most days on Torii Pass as well. What you should avoid is smooth-soled street shoes or sandals, because the stone paving and forest path get slippery when damp.
Bring a layer and a rain shell even on a clear forecast: mountain weather changes quickly, and the forest canopy holds mist. Poles are optional but genuinely useful on the Torii Pass descent for anyone with knee sensitivity. In winter, treat the passes differently — ice can form on shaded stone sections, and you would want proper boots and traction. Check local conditions before attempting any section between roughly December and March.
How Many Days Do You Need for the Nakasendo?
Plan around half a day to three days depending on how much of the valley you want to see. One honest piece of advice: do not try to cram both major sections (Magome–Tsumago and Torii Pass) into a single day. They are a long train ride apart, and the transport math rarely works without turning both walks into a race.
| Time available | A realistic Nakasendo plan | Notes |
|---|---|---|
| Half a day | Narai-juku town walk (1–2 hours) plus lunch; or Tsumago town only | Best if you are already staying in the Kiso Valley or passing through on the Chuo Line between Matsumoto and Nagoya |
| One day | Magome → Tsumago (classic), or Yabuhara → Narai via Torii Pass | Both work as day trips from Nagoya or Matsumoto if you start early; Magome–Tsumago needs bus timing, Yabuhara–Narai does not |
| Two days | Day 1: Magome → Tsumago, overnight in Tsumago (minshuku); Day 2: continue toward Kiso-Fukushima or return | An overnight in a post town is the single best way to feel the Nakasendo’s atmosphere — the streets empty out after day-trippers leave |
| Three days | Add Narai, and optionally the lacquerware village of Kiso-Hirasawa or Kiso-Fukushima | Comfortable pace for seeing the best of the valley without rushing; you can walk Yabuhara → Narai on the final day and leave from Narai Station |
If you are basing yourself outside the valley, the one-day Magome–Tsumago loop from Nagoya is the most popular option and works well with an early start. However, if you have more time to explore, check out our 2- and 3-day Kiso Valley itinerary. That one-day plan is also the one where the guided day-trip option saves the most effort, since it removes the bus-and-train coordination from both ends of the walk — more on the self-guided versus guided comparison below.
Getting to the Nakasendo by Train and Bus
The transport setup is different for each section, and understanding that difference is half the planning. The classic Magome–Tsumago walk is a rail-plus-bus route: you combine JR trains with short local buses at both ends. Yabuhara–Narai via Torii Pass is the opposite — two JR Chuo Line stations and no bus in the middle. Narai on its own is the easiest of all: leave the train and walk into town.

Magome–Tsumago by train and bus. From Nagoya, the usual approach is the JR Chuo Line to Nakatsugawa Station — the Limited Express Shinano takes around 50–60 minutes, local services longer — followed by a local bus up to Magome of about 25–30 minutes. From the Tsumago end, a local bus runs down to Nagiso Station in roughly 10 minutes, where the limited express back to Nagoya takes about an hour. A bus also connects Magome and Tsumago directly in around 30 minutes if you decide to shorten or skip the hike.
Yabuhara–Narai by train only. For the Torii Pass walk, take a Chuo Line train to Yabuhara Station, hike over the pass, and finish at Narai Station. Both stations sit on the same JR line between Nagoya and Matsumoto, which is what makes this section attractive if you are already moving through the region by rail. One practical catch: not every express train stops at these small stations, so check that your specific service actually stops at Yabuhara (or Narai) before you board — or simply take a local train, which serves both.

None of these connections run with city frequency. Services through the Kiso Valley are roughly hourly at best, so the timetable — not the trail distance — tends to set the pace of the day. Check the return times the evening before, because the last bus or train out of the far town decides how much time you actually have on the trail.
Carry cash for the local buses. Some rural services in the area do not accept IC cards or credit cards, so small bills and coins make the day smoother.
Kai’s tip: When I bring guests to Narai, the first thing I point out is that it is the easiest Nakasendo stop to build around a rail itinerary — leave Narai Station and you are minutes from the main street, with no bus coordination to worry about. The flip side is that the trains are rural-frequency, so I always check the timetable the evening before and note the last train out. A missed connection in this valley means a long wait, and taxis are scarce outside the bigger towns.
What Should You Do With Your Luggage?
Do not plan to walk any of these sections with a large suitcase. The trail is stone and forest path, and the towns at either end are not set up for rolling luggage over historic paving. The question is what to do with the bag while you walk, and the answer depends on whether you are doing a day trip or staying overnight.
Same-day forwarding on Magome–Tsumago. During the main season, a luggage forwarding service carries bags between the tourist information centers in Magome and Tsumago while you walk. For the 2026 season, the official notice from the Tsumago tourism association lists the service from March 20 to November 30, with drop-off between 8:30 and 11:30 and pickup from 13:00 to 17:00, at around ¥1,000 per item. A few older tourism pages still show a lower price from previous years, so confirm the current fee and dates before relying on it.
Outside that window, the regular service stops. The same association runs a limited temporary arrangement in the off-season at a considerably higher price, so if you are walking between December and mid-March, check the current terms or plan to leave your bag elsewhere entirely.
If you are staying overnight in a post town (see our guide to the best Nakasendo ryokan to help you choose), your ryokan or minshuku can normally hold your bag before check-in — confirm when you book. If you are based in Nagoya or Matsumoto and doing the walk as a day trip, the simplest solution is to leave the main suitcase at your hotel and travel with a small day bag. For multi-city itineraries, hotel-to-hotel luggage delivery services can send a suitcase ahead so it meets you at your next stop, which removes the luggage problem from the hiking day completely. Narai is the useful exception among the small trail stations: there are coin lockers near Narai Station and the tourist information desk also offers paid luggage storage. Yabuhara has no equivalent luggage-storage facility, so Torii Pass hikers with large bags should store them in Narai first and take the train back to Yabuhara to start.
Do You Need a Nakasendo GPX File?
For Magome–Tsumago, no — not for most walkers. The regional tourism board publishes official walking maps, the trail is well marked, and the main route between the two towns is clearly signed in English. If you download the official walking map before you go and keep an eye on the markers, the classic section is very difficult to lose.
Where a GPX track becomes genuinely useful is on Yabuhara–Narai via Torii Pass, on longer route variations, or in poor visibility and heavy rain, when you want offline navigation as reassurance rather than a plan. As far as I can confirm, the regional tourism board publishes walking maps rather than an official GPX download, so a track file means using a third-party one from an app such as Komoot or AllTrails. Those are fine as a backup, but third-party tracks can reflect older route versions or closed shortcuts, so treat the file as a supplement and follow the current signage and any posted detours on the day.
One warning about Google Maps: it is excellent for stations, bus stops, and the towns, but it does not always distinguish the walking trail from the modern road it crosses. Use it for navigation to the trailheads, not as the authority for the trail itself.
Food, Toilets and Rest Stops: The Details That Can Make or Break the Hike
This is the planning point most guides skip, and it is the one that catches people out. A post town like Narai is a small, working community, not a purpose-built tourist complex. Soba shops, cafés, and snack stands line the main street, and there are genuine highlights among them — the lacquerware shops alone are worth the walk. But the open-every-day assumption you bring from a city does not apply here. Many places close by mid or late afternoon, and an irregular closing day is a realistic possibility, especially on weekdays outside the peak seasons.
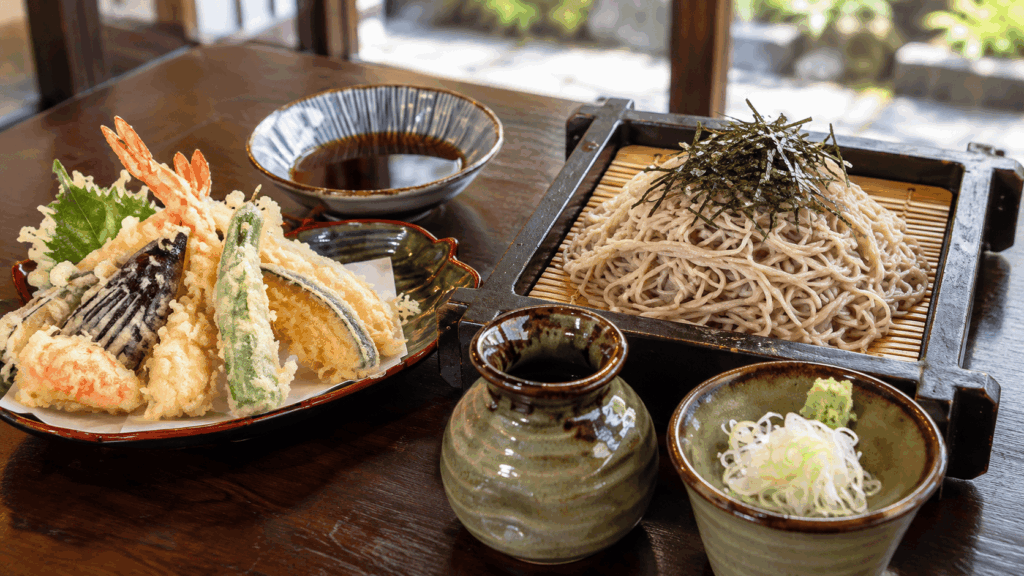
I learned that lesson while guiding a small group through Narai on the Monday after the Obon holidays, when most restaurants in town — including places listed as open online — were shut and finding lunch became unexpectedly difficult. We got through it, but the experience changed how I plan every visit since. Visitor reviews describe the same pattern of occasional closed days in the small post towns, so treat it as a real possibility rather than a one-off. If a particular soba shop is the reason you are stopping, check its opening day in advance, and carry a snack as a backup either way.
For toilets, the practical rule is to use the facilities in the town before you set out. On the trail itself, facilities are limited, so arriving ready — water filled, snack packed, toilet visit done — matters more than on most city walks.
Kai’s tip: I would not rely on the Roadside Station Narai Kiso-no-Ohashi beside Narai Station as a place to stock up on hiking food — it is not that kind of facility, and expecting a market there is a mistake. Where it genuinely helps is before you start walking: the public toilets are right there, so I always send guests there first, then head into the town carrying whatever water and snacks we need for the day.
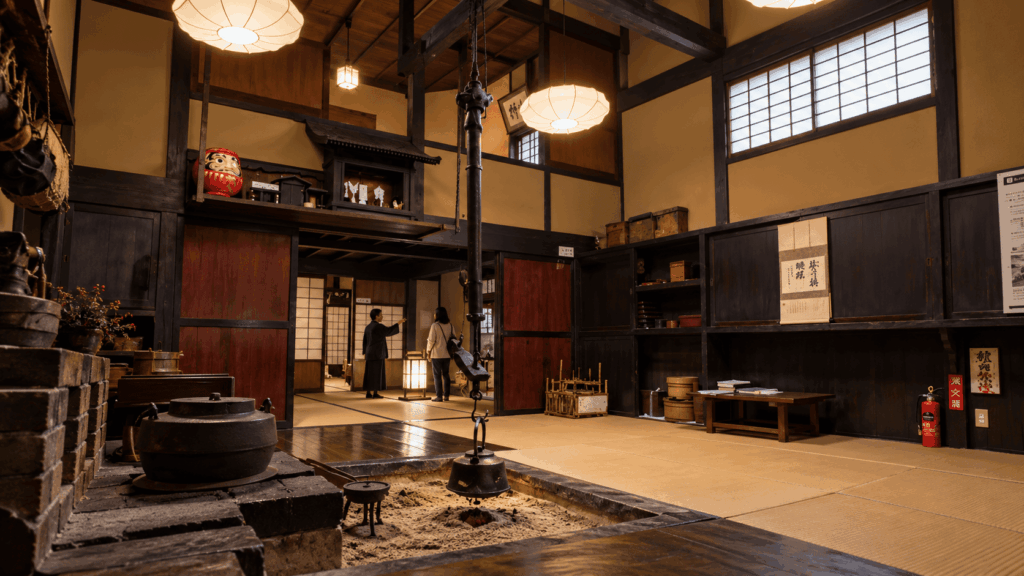
If you are in Narai and need somewhere to sit down properly, my regular stop is Matsuyasabo (松屋茶房), a coffee shop set in a restored Edo-era comb merchant’s house on the main street. It is a classic Japanese kissaten: siphon-brewed coffee, with Toarco Toraja as a house style, served in a quiet, wood-built interior. It opens from around mid-morning to late afternoon and does take occasional irregular days off, so check current hours before planning your break around it — but as a place to rest legs and drink excellent coffee in historic surroundings, it is the option I recommend most often in Narai.
Best Time to Walk the Nakasendo
The best season is not purely a scenery question. The trails are walkable from spring through autumn, but the weather, the daylight, the crowds, and the services all shift the difficulty and the planning in ways that matter more than the color of the leaves.
-
- Spring (April–May): Mild temperatures and fresh greenery make this a comfortable window for all three sections. Early in the season, check for lingering snow or ice at the passes, where shaded stone can stay slippery after cold nights.
- Early summer (June–mid-July): The rainy season brings humidity and frequent showers, which means wet stone underfoot. The trail is still fine, but pace yourself on the descents and carry a rain shell.
- Summer (July–August): Hot and humid, with daytime temperatures that can pass 30°C and occasionally reach the mid-30s. Start early, carry more water than you think you need, and remember that the forest sections offer less shade than the photos suggest. The Obon holidays in mid-August bring the largest Japanese domestic crowds of the year — and, as I found out, a number of shops take the week off.
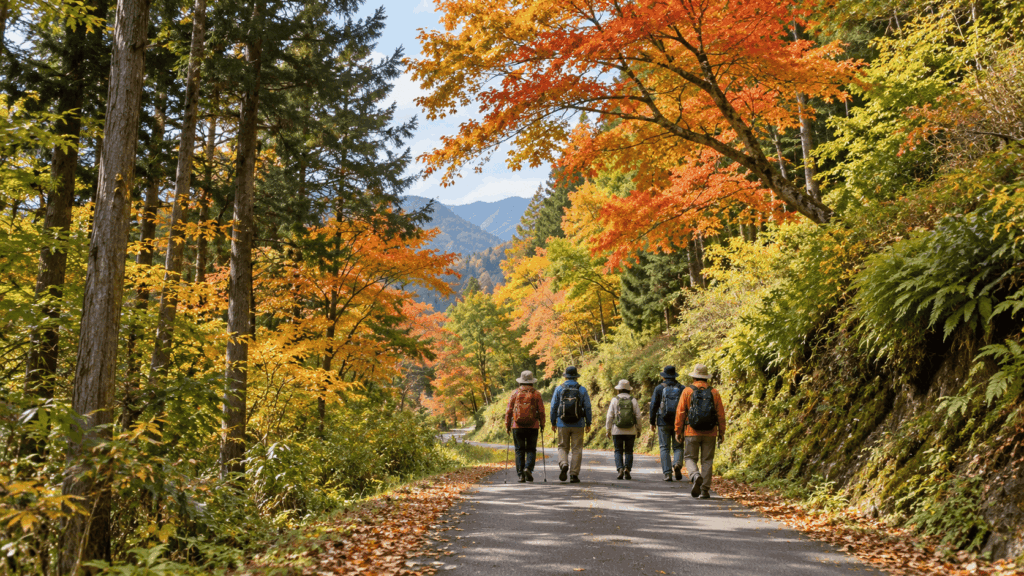
- Autumn (October–early November): The most popular window for the red-and-gold foliage, which also makes it the busiest. Daylight is shorter, so confirm the last bus and train times, and book overnight stays in the post towns well ahead.
-
- Winter (December–March): Snow and ice can form on the passes, and services thin out — the regular Magome–Tsumago luggage forwarding stops at the end of November, and some shops and restaurants close for the season. The towns themselves remain atmospheric, but do not treat Torii Pass as a casual winter walk; it needs proper boots, traction, and current local conditions.

Kai’s tip: The quieter your visit, the more likely you are to find a shop or restaurant taking an irregular day off — the trade-off of traveling outside the crowds. If a specific café or soba shop is part of your plan for Narai, check its opening day in advance and keep a snack in your daypack regardless. It is the one rule I give everyone I take through the valley: never let your lunch depend on a single door being open.
Rain, Slippery Stones and Trail Safety
Rain itself is rarely the problem — the slippery stone paving is. The Kiso trails are surfaced with mossy stone and packed earth, and once wet, the downhill sections become noticeably slick. Travelers consistently report that the descents in rain are the hardest part of an “easy” hike, so slow down, use handrails where they exist, and let faster walkers pass. Check the mountain forecast before setting out, and be willing to switch plans: on a day of heavy rain, Narai’s town walk is a perfectly good Nakasendo experience, and the trail will still be there tomorrow.
What About Bears?
The Kiso Valley is bear country — Asiatic black bears live in these mountains, and local authorities post warnings when there are sightings, which happen in most years. This is worth awareness, not alarm: encounters on the popular sections are rare, and the risk is concentrated on the quieter forest stretches such as Torii Pass, especially in early morning and at dusk. Walk in a group or make some noise, stay on the main trail, and check for current warnings at the regional tourism website before you go. Some local tourist information centers, including Tsumago’s, lend bear bells, which is a simple way to make your presence known on the less-traveled sections.
Self-Guided or Guided Tour — Which Is Better?
To be clear at the start: the Nakasendo does not require a guide. All three sections in this article are walkable independently with the official walking maps, the English signage, and the train-and-bus connections described above, and going self-guided is the more flexible and typically the more budget-friendly option. If you enjoy reading a timetable, setting your own pace, and lingering in the towns, plan it yourself.
A guided day trip earns its place when the logistics — not the walking — are the obstacle. If you are based in Nagoya with a single day, do not want to coordinate the local buses and train connections, and would rather have the historical context explained as you go, one booking that handles all of it is genuinely simpler.

The main option you will see is the “1-Day Tour from Nagoya: Hiking the Historic Nakasendo Trail” listed on GetYourGuide and operated by Machinovate Japan Ltd. As currently scheduled, it runs roughly eight hours with round-trip transport from the Nagoya area, and covers the classic walk of around 8 km through Tsumago and Magome in a small group with an English-speaking guide. Lunch is not included — the operator advises bringing a packed lunch, which connects directly to the food-reliability advice above. The route direction, price, and availability change with the season, so check the listing for the current details.
Roughly speaking:
- Go self-guided if you are comfortable planning a rural timetable, want to set your own pace and start time, are watching your budget, or are combining the walk with an overnight stay in a post town.
- Consider the guided day trip if you have exactly one day from Nagoya, the train-and-bus coordination is the main thing stopping you from going, or you want the history and context explained along the route without carrying a guidebook.
If the trail itself appeals to you but the transport logistics do not, the guided day trip from Nagoya is the simpler option — you can see current availability and details for the Nakasendo hiking tour on GetYourGuide.
Why I’d book this one
- Recent travelers consistently mention knowledgeable, engaging guides who add historical context to the walk rather than simply leading the route.
- The tour combines the roughly 8 km Tsumago–Magome hike with round-trip transport from Nagoya, removing the bus-and-train coordination that makes this day trip feel complicated on your own.
- The listing lets you check the latest cancellation and payment terms before you commit, which is useful when your Japan itinerary is still moving around.
Nakasendo Trail FAQ
How long is the Nakasendo Trail?
The historic Nakasendo was an Edo-period highway of roughly 530 km connecting Tokyo’s Nihonbashi to Kyoto’s Sanjo Ohashi, with 69 post towns along the way. The sections modern travelers actually hike are much shorter: the classic Magome–Tsumago walk is about 8 km, Yabuhara–Narai over Torii Pass is around 8.5 km including both towns (with a forest core of roughly 6 km), and Narai’s preserved main street is about 1 km. “Walking the Nakasendo” almost always means one of these shorter preserved sections in the Kiso Valley, not the full historic route.
How difficult is the Nakasendo Trail?
It depends on the section and the weather, not on a single rating. Magome–Tsumago is officially rated easy to moderate: about 8 km with one gentle pass at around 800 m, well signposted in English, and easiest walked from Magome to Tsumago. Yabuhara–Narai over Torii Pass climbs to about 1,197 m and is officially described as more strenuous, though the distance is similar. In either case, wet stone paving makes the descents noticeably harder, so a rainy day raises the real difficulty regardless of the official rating.
Can you walk the Nakasendo Trail in one day?
The full historic route of about 530 km obviously cannot be done in a day, but every section in this guide can. With an early start from Nagoya or Matsumoto, Magome–Tsumago works comfortably as a day trip if you time the local buses, and Yabuhara–Narai is even simpler because both ends are JR stations with no bus in the middle. If you only have a few hours, Narai-juku alone — straight from Narai Station — is a worthwhile half-day stop. What does not work is cramming both major walking sections into a single day; the transport between them turns the day into a race.
Do you need a GPX file for the Nakasendo?
Not for Magome–Tsumago in most conditions. The trail is well marked and signposted in English, and the regional tourism board publishes official walking maps, so download the map and follow the markers. A GPX track becomes more useful on Yabuhara–Narai via Torii Pass, on longer variations, or in heavy rain and low visibility when offline navigation is reassuring. There is no official GPX download that I can confirm from the regional tourism board, so a track means a third-party file from an app like Komoot or AllTrails — fine as a backup, but treat current signage and posted detours as the authority on the day.
Is Magome to Tsumago or Narai better?
They answer different questions, so the honest answer is “it depends on what you want.” Magome–Tsumago is the better choice for a first Nakasendo hike: it is the iconic route, easy to moderate, well signposted, and combines two preserved post towns with a forest trail in a few hours. Yabuhara–Narai via Torii Pass is the better choice if you want a quieter, more physically substantial walk with rail stations at both ends. And Narai on its own — the longest surviving post-town streetscape in the valley — is the better choice if you have limited time, limited hiking ability, or poor weather. If you have one day and want the classic experience, start with Magome–Tsumago.
My Recommendation: Which Nakasendo Route Is Right for You?
If you have read this far, you now have the honest version of the choice: no single section is the definitive best, because the right answer changes with your time, your legs, your comfort with rural transport, and how much of the day you want to spend in the forest versus in the towns. Here is how I would match the options to travelers.
Choose Magome → Tsumago if this is your first Nakasendo experience, you have roughly a full day, and you want the iconic route with clear English signage, established visitor infrastructure, and the reassurance that comes with the valley’s most popular section. It is the safest introduction for first-time visitors and the standard choice for a one-day trip from Nagoya.
Choose Yabuhara → Narai via Torii Pass if the hiking itself matters more to you than the famous postcard views, you want a quieter trail, you are comfortable with a sustained climb of about 400 m, and Narai fits naturally into a rail itinerary through Matsumoto or the Chuo Line. It suits repeat visitors to the region and experienced casual walkers who found the idea of Magome–Tsumago slightly underwhelming.
Choose Narai-juku only if the weather is poor, your hiking ability or time is limited, or you care more about the streetscape and history than about completing a trail section. It is also the most family-friendly and the easiest to add to a larger rail day without reorganizing your itinerary — and with a lunch backup plan and the coffee shop mentioned above, it easily fills a relaxed half day.
Choose a guided day trip if the transport complexity — not the walking — is the main thing standing between you and the trail. For travelers with one day in Nagoya who would rather not coordinate rural buses and train connections, the classic Tsumago–Magome route with round-trip transport and an English-speaking guide is a legitimate way to remove every logistics risk from the day.
For families, Narai’s flat, compact main street is the least stressful option, followed by Tsumago town itself; save the pass crossings for when the kids are older. For travelers on a tight schedule, Narai from the station gives you the post-town atmosphere in two hours, while Magome–Tsumago needs a disciplined half day with buses timed in advance. For repeat visitors who have already done Magome–Tsumago, the Torii Pass walk into Narai is the natural next step — quieter, harder, and ending in the town I most enjoy guiding rail-based travelers through.
Whichever section you pick, the practical rules are the same: check the return timetable the evening before, carry water and a backup snack, wear shoes with real tread, and treat the day’s difficulty as weather-dependent. Do that, and the Nakasendo — whether you walk 8 km of it or just its longest surviving street — will be one of the most memorable days of your trip.
Want the classic trail without arranging the local transport yourself? See current availability for the guided Nakasendo day trip from Nagoya.

Hi, I’m Kai. I’m a Tokyo-based travel writer, tourism industry insider, and the author of a published guidebook for international visitors to Japan. With over 10 years of professional experience at a leading Japanese tourism company, my mission is to help you skip the tourist traps and navigate Japan’s best destinations like a local. I believe the perfect day trip is like a traditional kaiseki meal: a beautiful balance of precise planning and unforgettable seasonal discovery. When I’m not out conducting field research, you’ll usually find me drafting new itineraries with one of my favorite fountain pens!