
The Narai to Yabuhara hike crosses Torii Pass (鳥居峠, 1,197 m), the high point of the Nakasendo between the post towns of Narai-juku and Yabuhara-juku in Nagano. It is one of the quieter ways to walk a real stretch of the old highway, but it is also the most strenuous Nakasendo section in the Kiso Valley—so the right direction, footwear and start time matter more than on the easier Magome–Tsumago trail. This guide covers how hard the walk really is, which way to go, what the elevation figure actually means, and how to plan the day safely.

If Torii Pass sounds a little more demanding than you want, a more supported alternative is the guided Magome–Tsumago Nakasendo hike from Matsumoto or Nagano. Check current departure options, availability and recent traveler reviews for the guided Nakasendo walking tour.
Quick Answer: Is the Narai to Yabuhara Hike Worth Doing?
Yes—if you are comfortable walking uphill for a couple of hours and want a Nakasendo experience with far fewer people than Magome–Tsumago. Torii Pass is a genuine mountain trail, not a stroll between shops, and it is described by the Nagano tourism board as one of the most difficult sections of the Nakasendo in the Kiso Valley. That difficulty is manageable for a normally active walker, but it should be respected.
- Route: Yabuhara-juku to Narai-juku (or the reverse) over Torii Pass.
- Distance: Official sources publish different figures—roughly 6 km in some route descriptions and 8.5 km in others, depending on how much of the two post towns is included. Plan as if it is the longer figure.
- Walking time: Around 2 to 3.5 hours of actual walking. Plan for 3 to 4 hours total including rests, photos and route checks.
- Elevation: The pass summit is 1,197 m. The elevation gain is what determines the effort, not the summit figure alone.
- Difficulty: Moderate. The Yabuhara side climbs steadily for roughly an hour; the Narai side is a long descent over stone paving.
- Best direction for most first-timers: Yabuhara to Narai, so the main climb comes early and you finish in the larger post town.
- What to wear: Light hiking shoes or trail runners with grip. Sneakers work in dry conditions but are not the shoe I would choose.
- When to start: Morning, so the forested section is finished before the afternoon light fades.
- Bear safety: Bears are present on this trail and the local tourism office issued a warning in July 2026. A bell is recommended, not optional theatre.
If you only take one thing from this article: this is a real mountain walk with a real climb, and the version of it that most first-time visitors enjoy most starts in Yabuhara and ends in Narai.
Narai to Yabuhara or Yabuhara to Narai: Which Direction Is Better?
Most visitors search for the walk as “Narai to Yabuhara” because Narai-juku is the better-known town and the easier one to reach from Matsumoto. But for most people, the more sensible direction on the day is the opposite: start at Yabuhara Station, climb over Torii Pass, and finish in Narai-juku.

| Yabuhara → Narai (recommended for most) | Narai → Yabuhara | |
|---|---|---|
| Main climb | Comes in the first hour, while you are fresh | Starts more gradually from Narai; after the pass, the steeper Yabuhara side becomes the descent |
| Finish point | Narai-juku: longest post town on the Nakasendo, with restaurants, cafes, souvenir shops, toilets and train station | Yabuhara: a quiet village with a small station, very few shops and no luggage storage |
| Luggage | Drop bags in Narai first (coin lockers or the tourist information desk near Narai Station), then take the train to Yabuhara to start | No storage exists on the Yabuhara side, so you would need to walk with your luggage or arrange a different plan |
| Light and timing | Forest sections are mostly done by early afternoon if you start mid-morning | The descent into Yabuhara comes late in the day, when the wooded trail feels darker |
| Who it suits | First-timers, hikers staying in or near Narai, anyone who wants to finish with food and options | Repeat visitors, people staying in Yabuhara, or hikers who strongly prefer to end their day in a quiet village |
Why I Usually Start From Yabuhara
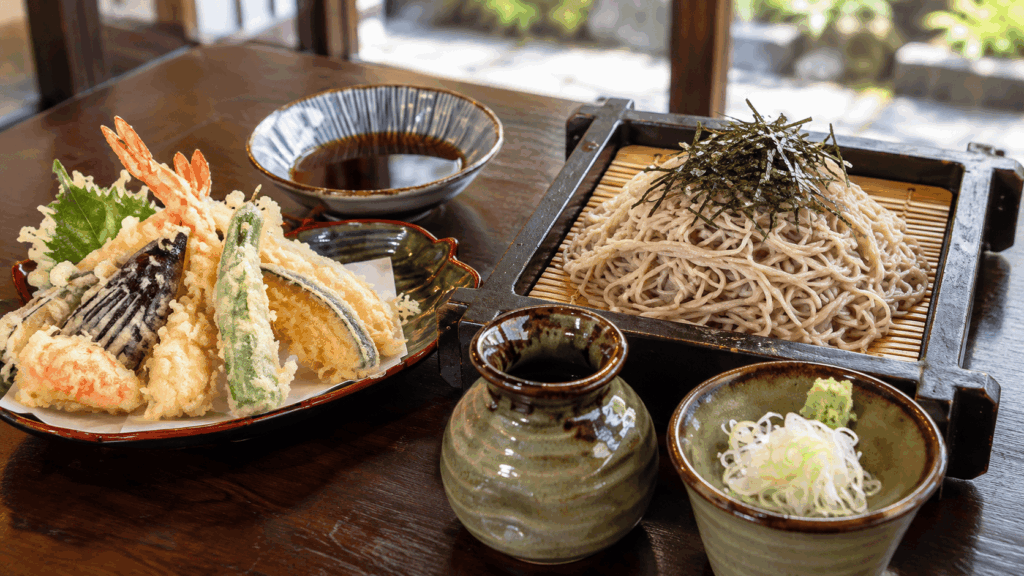
When I take guests on this route, I almost always meet them at Yabuhara Station in the morning. The reason is practical rather than romantic: the Yabuhara side of Torii Pass is where almost all of the climbing sits, and it is genuinely harder than it looks from the map. The trail leaves the village through fields and residential streets, then turns into a steady forested ascent that does make you short of breath—even fit walkers feel it. Starting in Yabuhara means you do that work while you are fresh, then enjoy a mostly downhill finish into Narai-juku, where the day can end with soba, coffee and a train platform rather than an uphill walk into a darkening forest.
Kai’s tip: Starting in Yabuhara front-loads the steeper work, but it does not eliminate the wet-stone issue. The Narai side has long stretches of old stone paving, and in this direction you descend them near the end. After rain, slow down and use footwear with grip. Going Narai → Yabuhara turns much of that stone paving into an ascent, but you then finish by descending the steeper Yabuhara side.
When Narai to Yabuhara Can Still Make Sense
It works well if you are staying overnight in Narai-juku and want to walk out and back, or if you have a reason to end near Yabuhara Station (for example, continuing south toward Kiso-Fukushima by train). The day then starts with a gentle warm-up through Narai’s restored streets, climbs to the pass in the middle, and descends into Yabuhara’s quiet lanes. Just remember three things: there is no luggage storage on the Yabuhara side, no convenience store near Yabuhara Station, and the steeper descent on the Yabuhara side comes after several hours on your feet.

Torii Pass Difficulty: How Hard Is the Hike Really?
“Moderate” tells you little, so here is the difficulty broken into the four things that actually decide how hard the day feels: fitness, climbing, footing and conditions.
Fitness. This is a multi-hour walk over a mountain pass, not a flat town walk. If you can comfortably walk 8 to 10 km over a few hours on undulating ground at home, you have enough base fitness. You do not need to be a trail runner.
Climbing. The sustained climb is on the Yabuhara side and lasts roughly an hour of steady uphill on a mix of trail, old stone paving and some sections beside a forest road. It is not a scramble and there is no exposed drop, but it is continuous enough that most people stop to catch their breath once or twice. The descent into Narai is long and, in places, steep, with stone stairs and sections of worn paving.
Footing. This is the factor first-time visitors underestimate. The Yabuhara approach is largely forest trail and dirt; the Narai side is dominated by old stone paving—the famous ishidatami—that becomes slick when wet and muddy after rain. A handrail-free wooden bridge and a few eroded stone steps add to the list of places where grip matters.
Conditions. The same trail is a completely different proposition in rain, snow or ice. The local tourism association notes that the route is passable in winter but toilets are closed and the trail can be frozen or snow-covered. For a first visit, aim for the drier seasons: roughly April to May and July to November, with June (rainy season) and December to March (cold, slippery) being the less comfortable windows.
Torii Pass Elevation Explained
The 1,197 m figure that appears in listings is the height of the pass itself—the highest point of the walk—not the total amount you climb. Yabuhara sits at roughly 900 m and Narai at roughly 900 m as well, so the pass is only around 300 m above either town. That is an important distinction: you are not climbing 1,197 m from sea level, which is why a fit walker can complete this route in a morning rather than treating it as an alpine day. Do not interpret “1,197 m” as a signal that you need mountaineering gear—interpret it as a signal that you are crossing a forested ridge between two valleys, with roughly an hour of real uphill on one side.
Can You Hike Torii Pass in Sneakers?
In dry conditions, yes—people do it every week, and the trail is nowhere near technical enough to require boots. Many walkers complete the whole route in road running shoes on a fine day. The catch is that the footing is older and rougher than the paved paths of Magome–Tsumago: worn stone steps, bare dirt, wet leaves, mud after rain, and at least one bridge without a handrail. A rolled ankle on a slick stone is the most realistic injury on this trail, not a fall from height.
Kai’s tip: I recommend light hiking shoes or trail runners with decent tread rather than everyday sneakers, and this comes from watching guests negotiate the Narai-side stone paving, not from gear marketing. The stones are uneven and, after rain, some are genuinely slippery—I have seen walkers in flat-soled sneakers slow to a shuffle on the descent. You do not need boots or ankle support for the climb itself, but a shoe with real grip turns the descent from a constant worry into a normal walk. If you only have sneakers, choose a dry day, start early, and take the descent slowly.
For the same reason, trekking poles are a sensible extra for anyone with weak knees: they take real weight off the descent into Narai, where the drop is spread over a long stretch of stairs and paving.
Route Guide: Yabuhara Station to Narai-juku via Torii Pass
This is the route in the direction I recommend for most first-timers. It is a route guide for the key decision points, not a turn-by-turn navigation app—the trail is well signed in Japanese, and the local tourism association maintains maps at the station and the trailhead. The biggest navigational risk is not losing the trail entirely but taking the wrong branch at one specific point described below.
Yabuhara Station to the Trailhead
Yabuhara Station (薮原駅) is a small, unstaffed station on the JR Chuo Line. From the platform, follow the signs through the underpass toward Yabuhara-juku—there is a large map board at the station front and a public flush toilet before you leave the station area. The walk from the station into the old post town takes about 10 minutes along the former highway, passing preserved buildings and the rest house Shokan (笑ん館), which has toilets, sells freshly baked bread, and lends hinoki cypress hats and bear bells on a deposit basis.

Continue through the village in the direction of the pass. Shortly before the trail proper begins, you pass a public toilet near the Kiso fire station’s north substation—this is the last reliable flush toilet before the summit area, and it is worth using it even if you do not feel the need yet. About 300 m beyond it, the trailhead has a large map board marking the start of the real climb. Fill your water here; from this point onward, drinking water is not something you can simply buy.
Kai’s tip: Get your food, water and toilet stop done before the trailhead rather than assuming you will find something mid-climb. What catches people out on this route is not the difficulty of the trail but the absence of options once you leave the village—there is no shop, vending machine or cafe on the pass itself. The rest house in Yabuhara is a good last stop: even if you do not need a hat or bell, it is the natural place to buy a snack and use a proper toilet before the forest begins.
The Climb From Yabuhara
From the trailhead, the path climbs steadily through forest on a mix of dirt trail and old stone paving. This is the section that surprises most hikers: it is more continuous than the map suggests, and the gradient makes itself felt within the first 20 minutes. The route passes the site of the former Yabuhara meteorological observation station, where a management building offers a toilet, and continues to Maruyama Park (丸山公園), marked by a haiku stone of Basho and a small viewpoint where you can look back over Yabuhara and its station far below.
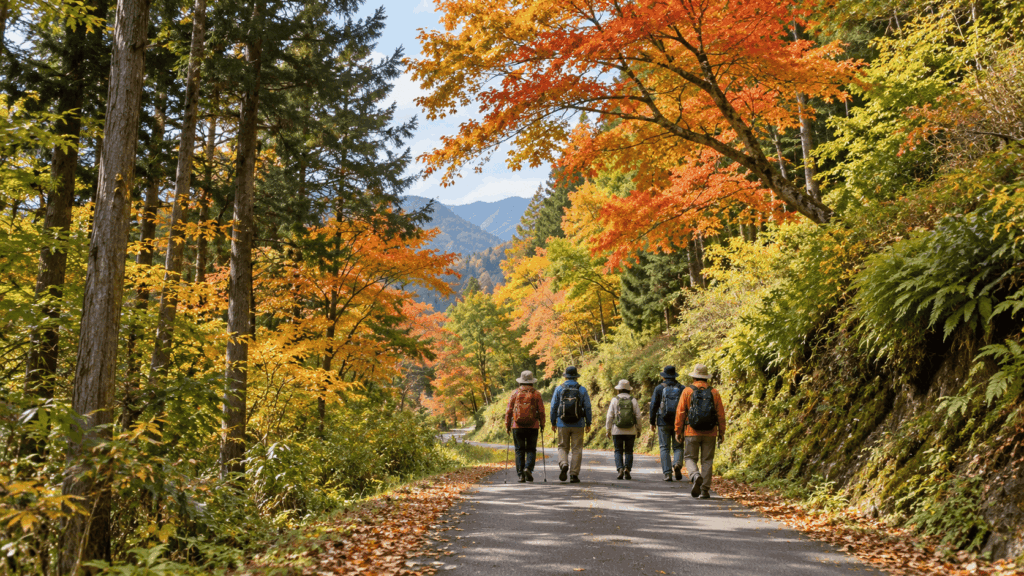
Allow roughly an hour for the climb from the trailhead to the summit, more if you stop at the park or the shrine. The path is never exposed, but the footing is rough in places—roots, loose stones and worn paving—so the same footwear advice from earlier applies here.
Torii Pass Summit and the Watershed
The summit of Torii Pass sits at 1,197 m and is marked by a stone monument to Emperor Meiji’s overnight stop here in 1880, the Ontake shrine (御嶽神社) and a small worship site facing Mount Ontake. This is also the watershed: water on one side of the ridge flows toward the Kiso River, and on the other toward the Narai River. On a clear day there is a view toward Mount Ontake from the shrine area, though trees have grown up over the years and the view is not guaranteed—treat it as a bonus, not a promise.

The summit area has a rest spot and toilet. From here the character of the walk changes completely: you leave the forested climb and begin the long descent into Narai-juku on the old stone paving that this side of the pass is known for.
Important route point: Shortly after the pass, just past the teahouse site Mine-no-Chaya (峰の茶屋), the trail meets a junction with the old national road. Take the branch that descends to the right—the local tourism association flags this as the easiest point on the whole route to misread. The left branch follows the old road and adds roughly three times the distance to your day. If you are unsure, the road you can hear or see below you is the clue: the trail drops toward it, it does not follow it.
Descending Into Narai-juku
Below Mine-no-Chaya, the path continues down past the restored rest shelter Naka-no-Chaya (中の茶屋) and then enters the long stretch of stone paving and stairs that leads to Narai. This descent is the section where pace matters most: the stones are uneven, some are loose, and after rain they become genuinely slippery. You will cross a wooden bridge without a handrail and pass a steep shortcut staircase—the shortcut is significantly steeper than the main path, and anyone with uncertain knees or tired legs should stay on the main route rather than save the five minutes.

Near the bottom, the trail passes Shizume Shrine (鎮神社) before emerging onto the main street of Narai-juku. From the shrine it is a short, flat walk through the preserved town to Narai Station (奈良井駅), where the tourist information desk, coin lockers and train platforms are all within a few minutes’ walk.

Safety: Bears, Weather and When to Start
Two things make this a safer walk than the casual day-hike label suggests: preparation and timing. The route itself is not technically dangerous, but it is a real mountain trail with real wildlife, and the local tourism association’s own communications treat it that way.
Bears. Asiatic black bears are present in this area, and on 9 July 2026 the Kiso tourism association published a warning about a bear sighting on the Narai-juku side of the trail, near a bridge along the stream, in the mid-afternoon. A group of four hikers encountered the bear and it moved away—the association notes that there have been no injuries to hikers on the route in recent years, while still advising standard precautions. This is worth stating plainly: you are walking in bear habitat, sightings do happen, and the routine that locals and guides follow is simple and effective.
Kai’s tip: I start guests on this route in the morning, and the reason is as much about light as about time. The climb from Yabuhara and the summit area sit in fairly open forest, but the descent toward Narai runs through dense tree cover, and in the afternoon that canopy makes the trail noticeably darker and harder to read than the morning light does. As a practical rule when I am guiding, I like to have the mountain section of the day—the climb, the pass and the upper descent—finished by around 3 p.m. That is my own safety margin rather than an official rule, but it has served me well: it leaves a full hour of buffer before the last train connection and keeps the stone-paved descent in daylight, when slips are easier to avoid.
Do You Need a Bear Bell?
Yes—on this route it is the single most useful piece of wildlife kit, and it costs almost nothing to arrange. The point of a bell is to make noise so bears hear you coming and move away before you meet; on a quiet forest trail where you cannot always see far ahead, that matters more than any spray or strategy.
I carry and use a bear bell when guiding this route, and the local rest house and tourism offices expect visitors to do the same. Shokan in Yabuhara lends bear bells and hinoki hats on a deposit basis, and bells can also be borrowed from the tourist information desks at Narai Station and the Kiso Village tourism office in Kiso-Fukushima. If you prefer not to borrow, any outdoor shop in Matsumoto sells a simple bell for a few hundred yen—but the borrow option means you do not need to buy one for a single day’s walk.
Beyond the bell: travel in a group or let someone know your plan if you walk alone, keep an eye out for fresh droppings on the trail, and do not approach or feed the monkeys that occasionally appear in the forest—they are wild animals, and the same calm, non-approaching behavior applies to them as to bears.
Why I Recommend a Morning Start
In practical terms, a morning start from Yabuhara means the whole day fits comfortably into daylight and train schedules. The walk itself takes 3 to 4 hours at a relaxed pace with stops, but the day is longer than the walk: you need time before setting off to sort luggage in Narai, take the train to Yabuhara, and buy food; and after arriving in Narai you will probably want time to walk the town, eat, and catch a train onward. Starting from Narai by train at around 9 a.m.—or from Yabuhara directly if you stayed there—puts you on the trailhead by mid-morning and in Narai-juku by early afternoon, which is the rhythm that makes the day feel easy rather than rushed.
What to Bring for the Torii Pass Hike
This is a day walk on a maintained mountain trail, so the packing list is short—but the items below are the difference between a comfortable day and a memorable one in the wrong way.
- Light hiking shoes or trail runners with real tread — the single most important item. See the footwear section above.
- Water and food — at least 1 litre of water per person and a packed lunch or substantial snacks. There is no reliable purchase point between Yabuhara and Narai.
- Rain layer — mountain weather changes quickly, and the stone paving is the worst place to be caught unprepared in a shower.
- Bear bell — rented at Shokan in Yabuhara or borrowed at the Narai tourist desk.
- Small first-aid basics and a phone power bank — for blisters and for navigation in areas with patchy signal.
- Trekking poles (optional but useful) — they take real load off the knees on the long descent into Narai.
In the colder months (roughly December to March), this list is not sufficient: the route can be snow-covered and frozen, toilets on the pass are closed in winter, and daylight is short. Treat a winter crossing as a different hike requiring proper cold-weather and ice experience, or simply choose the warmer seasons for a first visit.
Toilets, Food, Luggage and Train Planning
The practical questions—where the toilets are, whether you can buy food, what to do with a suitcase—are the ones that decide whether this hike feels easy or stressful. Here is the honest picture, based on what the local tourism association currently publishes.
- Toilets: Public flush toilets at Yabuhara Station, Shokan in Yabuhara, near the fire station substation before the trailhead, at the former observation station site on the climb, and at the summit area. Toilets on the route can be closed seasonally, especially in winter, so treat the pre-trailhead ones as your reliable base.
- Drinking water: A water point exists at Mine-no-Chaya near the pass, but the local association does not guarantee its safety for drinking—carry your own water rather than relying on it.
- Food: No shops on the pass. Yabuhara has Shokan’s bakery and a couple of reservation-based eateries; the nearest convenience-style shopping is a supermarket about a 15-minute walk from Yabuhara Station. The surest plan is to buy food and water before arriving, or at least before leaving the village.
- Luggage: Do not carry a large suitcase over the pass. There is no luggage storage on the Yabuhara side, so the standard trick is to store bags in Narai first and take only a daypack over the mountain.
- Trains: The JR Chuo Line connects Narai and Yabuhara in about 5 minutes, but frequencies are limited—roughly one or two trains per hour in each direction. Check the timetable for the day you travel and build your start time around it, especially if you are connecting from Matsumoto.

Where to Buy Food and Water
There is no convenience store at Yabuhara Station, and visitors who arrive expecting one are regularly caught out. The realistic options are: buy supplies in Matsumoto or Nagiso before you travel; stop at the roadside station Kiso Mura above Yabuhara Station if you are driving; or pick up bread and snacks at Shokan in Yabuhara-juku before you start climbing. Whatever you choose, the principle is the same—arrive at the trailhead already carrying your food and water, because the forest gives you nothing until Narai.
What to Do With Your Luggage
If you are hiking Yabuhara → Narai with a suitcase or large bag, the cleanest sequence is: arrive in Narai first, store the bag, then take the train back to Yabuhara and start walking. On the Narai side, coin lockers near the station’s south side cost around ¥300 for a small locker and ¥500 for a large one, and the tourist information desk at Narai Station accepts bags for a fee of around ¥700 per bag during opening hours (valuables excluded)—confirm current hours and prices before relying on them. From the Yabuhara side, no equivalent service exists, so plan for Narai-side storage or travel light.
Torii Pass vs Magome–Tsumago: Which Nakasendo Hike Should You Choose?
If you have been researching the Nakasendo, you have almost certainly seen the Magome–Tsumago hike—the famous 8 km section between Magome and Tsumago that most visitors walk. It is natural to wonder how Torii Pass compares, because both are advertised as half-day Nakasendo walks. Here is the honest comparison.

| Torii Pass (Narai–Yabuhara) | Magome–Tsumago | |
|---|---|---|
| Atmosphere | Quiet; noticeably fewer walkers | Popular; can be busy from mid-morning |
| Difficulty | More sustained climbing and rougher, older footing | Easier gradients, better-maintained paths |
| Post towns | Narai is the longest preserved town on the Nakasendo; Yabuhara is small and quiet | Magome and Tsumago are both beautifully restored and set up for visitors |
| Access from Matsumoto | Direct JR Chuo Line to Narai or Yabuhara | Train to Nagiso, then bus; or bus via Magome from Nakatsugawa |
| Best for | Experienced walkers, repeat Nakasendo visitors, anyone wanting solitude and a real climb | First-timers, families, anyone wanting the classic experience with more support |
My honest advice: if this is your first Nakasendo walk, Magome–Tsumago is the easier introduction and the one with more support along the way. If you have some walking fitness, want noticeably fewer people, and are drawn to the idea of crossing a real watershed ridge between two preserved towns, Torii Pass is the more memorable day—provided you start early and take the footing seriously. Both are legitimate; they simply reward different travelers.
If Torii Pass is the version you actively want, the quieter route and rougher footing are part of the appeal. If you would rather walk the Nakasendo with transport and route logistics handled for you, the guided Magome–Tsumago option is the more straightforward fit.
Why I’d book this one
- Recent travelers consistently mention knowledgeable, considerate guides who add historical context rather than simply leading the walk.
- Transport from Matsumoto or Nagano is handled as part of the day, removing much of the planning around reaching the southern Kiso Valley independently.
- The booking offers flexible options such as free cancellation within the stated window and reserve-now-pay-later, which can reduce the commitment if your itinerary is still moving.
FAQ
How difficult is the Torii Pass hike?
Moderate—not a technical climb, but a genuine mountain walk. The main effort is roughly an hour of steady uphill from the Yabuhara side, followed by a long descent into Narai over uneven stone paving. Anyone who can comfortably walk 8 to 10 km over a few hours on undulating ground has enough fitness. The factors that decide how hard it feels are the footing (slippery stones after rain) and the conditions (mud, ice or snow change the walk completely), not the 1,197 m summit figure alone.
Should I hike from Narai to Yabuhara or Yabuhara to Narai?
For most first-timers, Yabuhara to Narai is the better direction: you do the main climb in the first hour while you are fresh, the slick stone-paved descent comes at the end in daylight, and you finish in Narai-juku, where restaurants, toilets, luggage storage and the train station are all waiting. Hiking Narai to Yabuhara means a more gradual climb out of Narai followed by a steeper descent on the Yabuhara side, and you finish in a quiet village with no luggage storage. It works well only if you are staying in Yabuhara or have a specific reason to end there.
How long does the Narai–Yabuhara hike take?
Around 2 to 3.5 hours of actual walking, depending on your pace and how much you stop. Official sources publish slightly different distances—roughly 6 km in some descriptions and 8.5 km in others, depending on how much of the two post towns is included—so plan for 3 to 4 hours total including rests, photos and route checks. Add time on either end for luggage, food, exploring the towns and train connections, and the full day runs from roughly mid-morning to early afternoon.
Do I need hiking shoes for Torii Pass?
Light hiking shoes or trail runners with real tread are the honest recommendation. In dry conditions, people do complete the route in everyday sneakers, and no section requires boots or ankle support. The risk is the footing: the Narai-side descent is old, uneven stone paving that becomes slick after rain, and a rolled ankle is the most realistic injury on this trail. If you only have sneakers, choose a dry day, start early and take the descent slowly.
Are bears a concern on the Torii Pass trail?
Yes, in the sense that the trail runs through bear habitat and sightings do happen—the Kiso tourism association published a warning in July 2026 about a bear near a bridge on the Narai side, encountered by a group of hikers. The association also notes there have been no hiker injuries on the route in recent years. The standard routine is simple: carry or rent a bear bell, make noise on quiet forest sections, walk with someone if you can, and let someone know your plan if you go alone.
Final Verdict: Who Should Hike Torii Pass?
Having guided this route and watched different kinds of walkers handle it, here is how I would advise a friend deciding whether Torii Pass belongs in their itinerary.
Choose the Narai–Yabuhara (Torii Pass) hike if you are a reasonably fit walker who wants the quieter, more memorable Nakasendo day—the one where you actually cross a watershed ridge between two preserved post towns, with noticeably fewer people than Magome–Tsumago. Start in Yabuhara, wear shoes with grip, carry water and food, and you will almost certainly finish in Narai-juku feeling that you earned the best walk of your trip.
Choose another option if you are a first-time Nakasendo walker wanting the classic, supported experience; if you are travelling with young children or anyone unsteady on their feet; if you are on a very tight schedule with no buffer for the limited train connections; or if you only have flat-soled sneakers and the forecast is wet. For those cases, Magome–Tsumago is the safer, easier day—and Narai-juku itself is well worth exploring even without crossing the pass.
- For first-time visitors to the Kiso Valley: Walk Magome–Tsumago first, and treat Torii Pass as the sequel. If you have time for only one Nakasendo walk and you are fit, Torii Pass is the better solitude-versus-crowds trade, but Magome–Tsumago remains the gentler introduction.
- For repeat Nakasendo visitors: This is the section to do next. The quiet, the real climb and the long stone-paved descent into Narai offer something the Magome–Tsumago corridor does not.
- For families: Skip the full crossing with young children. Walk the flat main street of Narai-juku instead, or save Torii Pass for when the kids are older—the steep shortcut stairs, slick stones and limited toilets make it more stress than adventure at that stage.
- For travelers on a tight schedule: The hike itself fits a morning, but the logistics around it—storing luggage in Narai, the limited trains, and buying food in advance—need planning. If you have only one day in the area and no margin for a missed connection, the easier Magome–Tsumago loop or a guided Magome–Tsumago walk (where logistics are handled for you) is the more reliable use of the day.
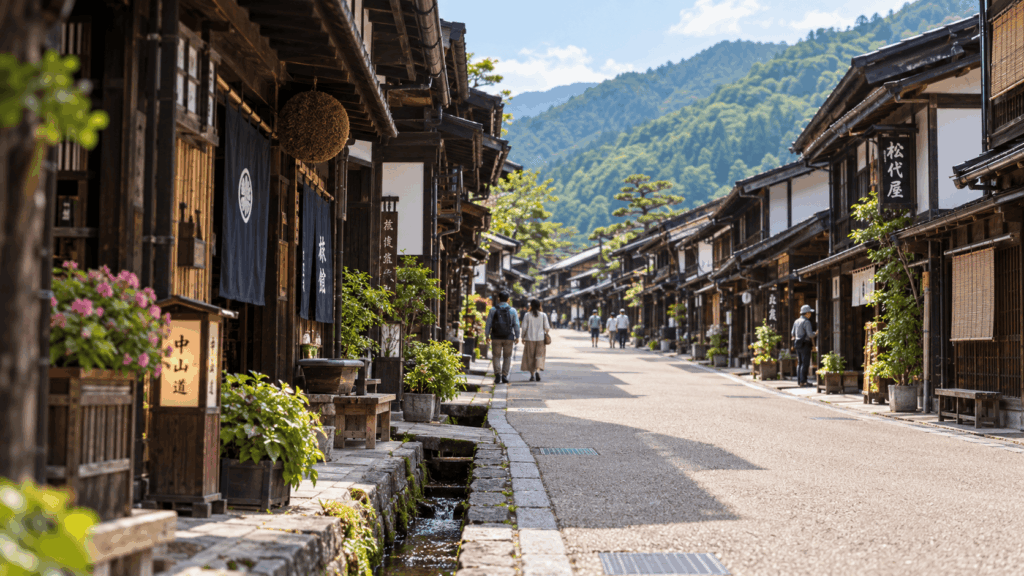
- For anyone who decides the pass is too much: Narai-juku on its own is one of the best-preserved post towns on the entire Nakasendo, with soba shops, cafes and quiet lanes that need no climbing at all. A day spent there—or on the Magome–Tsumago trail—still gives you the Nakasendo experience, just without the summit.

Hi, I’m Kai. I’m a Tokyo-based travel writer, tourism industry insider, and the author of a published guidebook for international visitors to Japan. With over 10 years of professional experience at a leading Japanese tourism company, my mission is to help you skip the tourist traps and navigate Japan’s best destinations like a local. I believe the perfect day trip is like a traditional kaiseki meal: a beautiful balance of precise planning and unforgettable seasonal discovery. When I’m not out conducting field research, you’ll usually find me drafting new itineraries with one of my favorite fountain pens!