If you are searching for the best Osaka photo spots, you probably have two questions: where exactly should I stand, and when should I go to avoid the crowds? This guide answers both. You will find precise locations, recommended shooting times, crowd tips, and practical settings for both smartphones and DSLR or mirrorless cameras — so you can leave Osaka with photos you actually want to post.
Quick verdict: If you only have one day, focus on three high-impact shots: Osaka Castle in the morning, Shinsekai at blue hour, and Dotonbori at night. Add Kuromon Market for food photos and Namba Yasaka Shrine if you want an easy daytime Instagram stop near Namba.
If your travel dates are already fixed and you want to cover Namba, Dotonbori, and Shinsekai without second-guessing the evening route, check the latest availability, reviews, and start times for a private Osaka walking tour before locking in your photography schedule.
At a Glance: Best Osaka Photo Spots & Best Times to Shoot
Use this quick reference table to plan your photography route. Lighting, crowd level, and route order matter more than you think, especially around Osaka Castle, Dotonbori, and Shinsekai.
| Location | Vibe / Theme | Best Time to Shoot | Crowd Level | Best Gear |
|---|---|---|---|---|
| Osaka Castle from Gokurakubashi Bridge | History, reflections | 8:00 AM – 9:00 AM | Low | Any camera or smartphone |
| Nishinomaru Garden | Wide-angle castle views, cherry blossoms | Right after opening | Low–Medium | Wide lens or smartphone ultra-wide |
| Shinsekai / Tsutenkaku | Retro neon, cyberpunk | Blue hour, about 20–30 minutes after sunset | Medium | Fast lens or smartphone Night mode |
| Dotonbori River Walk | Neon cityscape, portraits | 7:00 PM – 10:00 PM | High | Any camera, small grip or mini tripod if allowed |
| Hozenji Yokocho | Lantern-lit traditional alley | After 7:00 PM | Low–Medium | Fast lens or smartphone Night mode |
| Kuromon Market | Street food, market life | 9:00 AM – 12:00 PM | Medium–High | Any camera, portrait mode useful |
| Namba Yasaka Shrine | Giant lion-head shrine | Morning or early afternoon | Low–Medium | Wide lens or smartphone ultra-wide |
| Umeda Sky Building | Skyline, sunset, city lights | Golden hour into blue hour | Medium–High | Wide lens, telephoto, or smartphone Night mode |
| Nakazakicho | Retro streets, cafes, vintage shops | Late afternoon | Low–Medium | 35mm lens or smartphone portrait mode |
| teamLab Botanical Garden Osaka | Immersive night art | After sunset | Medium–High | Smartphone Night mode or fast lens |
| Osaka Mint Bureau Cherry Blossom Viewing | Seasonal sakura tunnel | Morning reservation slot if available | High | Smartphone or standard zoom lens |
| Minoo Park | Autumn leaves, waterfall, nature | Morning to early afternoon | Medium–High in peak autumn | Wide lens, standard zoom, or smartphone |
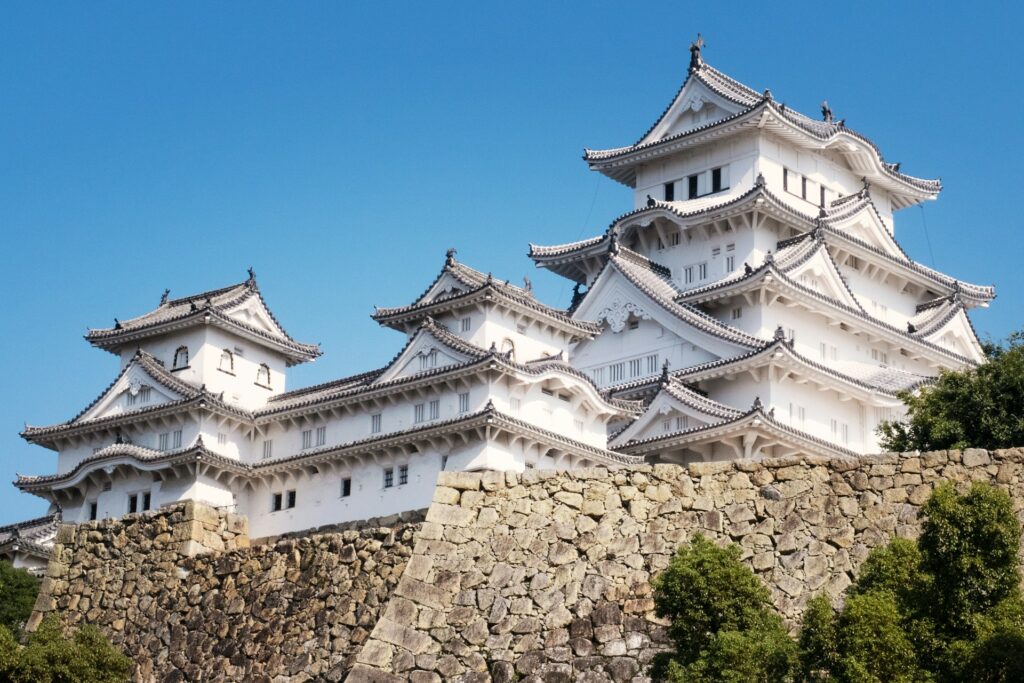
Osaka Castle Photo Spots Without the Crowds
Osaka Castle is the city’s most photographed landmark, but the main plaza in front of the keep is often busy with tour groups by mid-morning. To get cleaner Osaka photo spots around the castle, move away from the centre and use the moat, bridges, and gardens to your advantage. If you are wondering whether going inside the keep is worth your time, read our honest Osaka Castle review first.
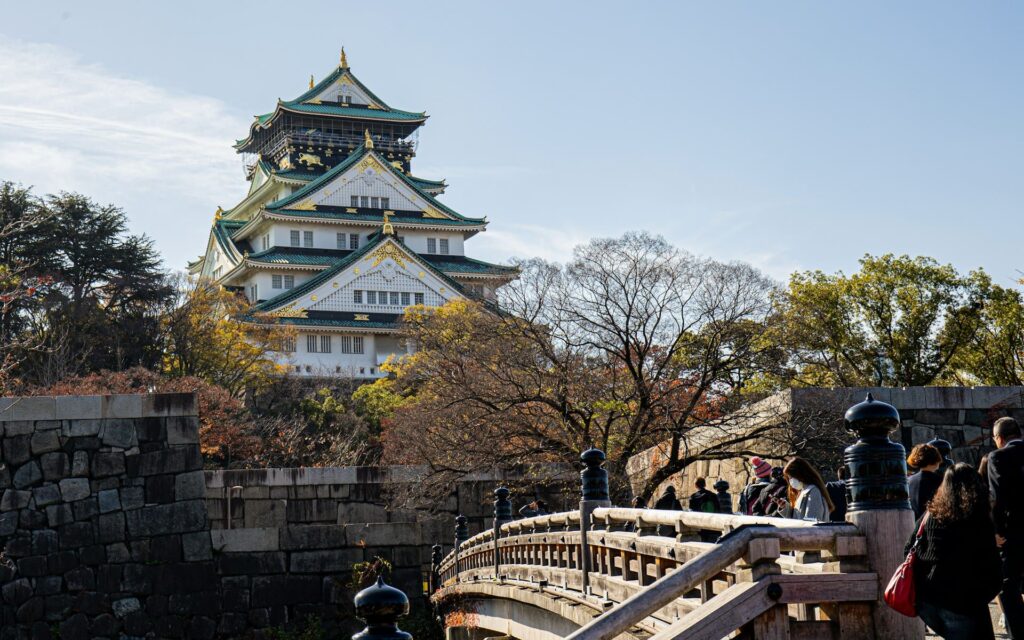
Gokurakubashi Bridge: Reflections & Natural Framing
Walk to the north side of the castle and cross Gokurakubashi Bridge. This is one of the easiest places to get a balanced castle composition without standing in the busiest plaza.
- Water reflections: On a calm morning, you may be able to capture the castle keep reflected in the moat.
- Natural framing: Use the bridge structure and nearby trees to frame the keep.
- Fewer people: Many visitors stay around the main approach, so the north side often feels calmer in the morning.
Nishinomaru Garden: Wide-Angle Castle Views
Located on the western side of the castle grounds, Nishinomaru Garden is one of the best places to photograph the castle with open sky, lawn, and seasonal cherry blossoms. It requires a small admission fee. Official and tourism listings can differ, and special cherry blossom or evening event pricing may apply, so check the latest fee and opening hours before you go.
Timing tip: Aim to enter soon after opening. The garden is usually listed as opening at 9:00 AM, with shorter hours in winter and closures on Mondays or the following day when Monday is a national holiday. During cherry blossom periods or evening events, hours and entry conditions may change.
During cherry blossom season, usually late March to early April, Nishinomaru Garden can become one of the most photogenic Osaka photo spots in the city, with the castle framed by pink blossoms. It also gets much busier, so arrive early and check whether special evening hours or ticket rules apply.
Camera & Smartphone Settings for Osaka Castle
| Equipment | Recommended Settings |
|---|---|
| DSLR / Mirrorless | Use a wide-angle lens, around 16–24mm. Try f/8–f/11 for sharp architecture, ISO 100–200, and shoot in RAW if you plan to edit later. |
| Smartphone | Use the ultra-wide lens if the castle feels too large for the frame. Tap to focus on the castle, then lower the exposure slightly to keep detail in the bright sky. Avoid digital zoom; step closer or change position instead. |
Best Neon & Cyberpunk Photo Spots in Osaka
When travellers search for Osaka Instagram inspiration, they are often looking for the city’s chaotic, glowing night energy. Here is where to stand for strong neon photos — and where not to waste too much time.
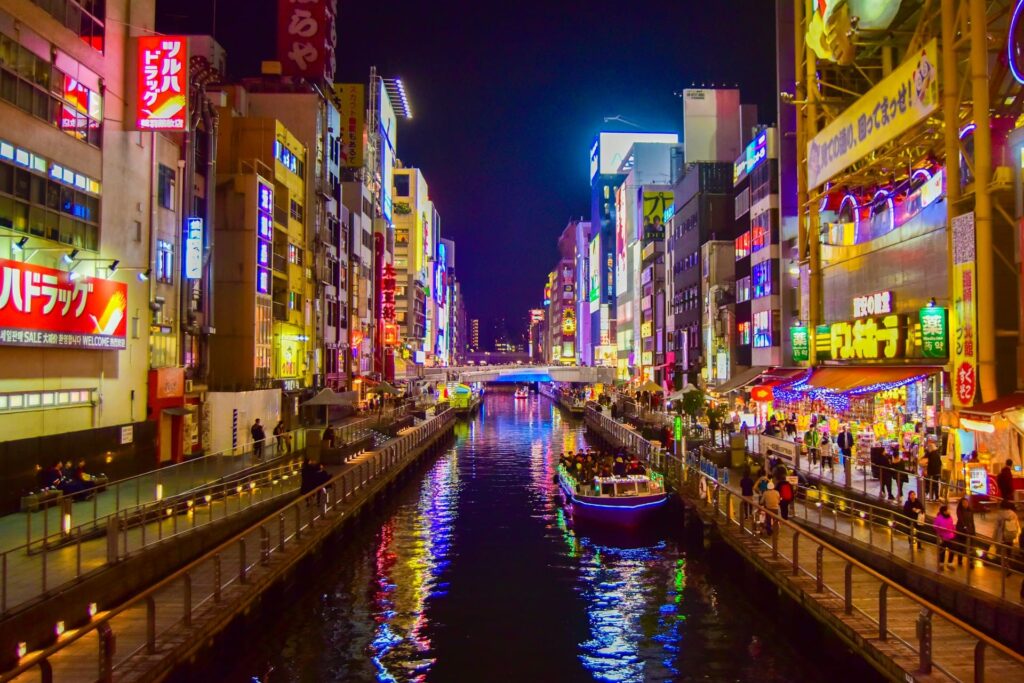
Dotonbori River Walk: Avoid the Ebisubashi Crowds
The Glico Running Man sign is a must-capture, but Ebisubashi Bridge is usually packed. Instead, walk down to the Tombori River Walk, the pedestrian path beside the water. Shooting from this lower angle helps remove crowds from the background and makes the neon signs and LED displays look larger and more cinematic.
Pro tip for portraits: Use a friend’s phone flashlight or a small LED panel to add soft light to your subject’s face. The neon creates dramatic background colour, but your subject may look too dark without a little fill light.
Shinsekai & Tsutenkaku: The Blue Hour Window
Shinsekai is one of the best areas for Osaka photos with a retro-futuristic, cyberpunk feel. Tsutenkaku Tower, giant restaurant signs, lanterns, and colourful shopfronts all sit close together, making it easy to build a strong night-shooting route. For more on food and navigating this area, read our complete Shinsekai guide.
The secret: Do not wait until it is fully dark. The ideal window is blue hour, usually about 20 to 30 minutes after sunset. Check the sunset time on your shooting date. The deep blue twilight sky contrasts beautifully with warm neon and reduces the harsh blown-out look you get when bright signs sit against a pure black sky.
Hozenji Yokocho: Lantern-Lit Traditional Alley
Just a short walk from the neon of Dotonbori, Hozenji Yokocho offers a completely different mood: narrow stone-paved lanes, traditional wooden restaurant fronts, and warm paper lanterns. It is one of the best Osaka photo spots for quieter, cinematic evening images.
Gear note: The alley is narrow and can be busy. Full-size tripods are not recommended because they block foot traffic and may disturb restaurants or other visitors. Bring a fast lens, such as f/1.4 or f/1.8, or use your smartphone’s Night mode and shoot handheld.
Camera & Smartphone Settings for Neon & Night Shots
| Equipment | Recommended Settings |
|---|---|
| DSLR / Mirrorless | Use a fast prime lens such as 24mm or 35mm at f/1.4–f/1.8. Try ISO 800–3200 depending on light. Keep shutter speed around 1/60s or faster for handheld street scenes. With a tripod, use a lower ISO and a longer exposure only where tripods are allowed and not blocking foot traffic. |
| Smartphone | Use Night mode, brace your phone against a railing or wall, and tap to focus on the neon signs. Lower exposure slightly to protect highlights. Avoid digital zoom at night because it increases noise. |
For night photographers, the hardest part is often route order and timing rather than camera settings. If your evening is limited, compare the guided Namba–Dotonbori–Shinsekai option on GetYourGuide before deciding whether to go fully DIY — especially if you want to catch blue hour in Shinsekai and neon in Dotonbori on the same evening.
Osaka Street Food Photography: Best Locations & Etiquette
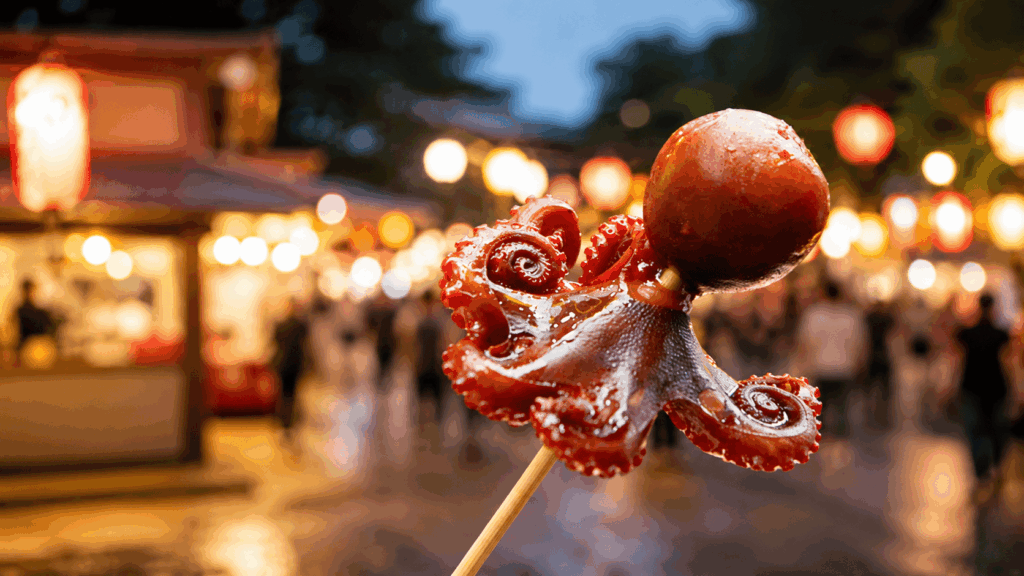
Osaka is known as the “Kitchen of Japan,” so photographing its food is part of the experience. But getting great Osaka street food photos means knowing both the best locations and the local etiquette. For detailed food recommendations, read our Osaka street food guide.
Kuromon Market: Morning Light & Fresh Food Close-Ups
Kuromon Market is best visited between about 9:00 AM and noon, when many shops are active and the daylight filtering through the arcade gives soft, even light for food close-ups. It gets busier toward lunchtime, so arriving earlier helps with both photos and movement through the market.
- What to shoot: Fresh seafood, grilled scallops, wagyu skewers, takoyaki, and food being prepared at the counter.
- Smartphone tip: Use portrait mode for food close-ups. Tap the food to focus and lower exposure slightly if bright sauces or seafood are washing out.
- Camera tip: A 35mm or 50mm prime lens works well for isolating a dish. A macro lens is useful for seafood details and grill marks.
Dotonbori: Neon + Street Food Combo Shots
If you want food photos with Osaka’s iconic neon chaos in the background, shoot in Dotonbori after sunset. Giant crab, octopus, gyoza, and takoyaki signs make even a simple food photo instantly recognisable as Osaka.
Composition idea: Hold your food toward the neon signs and shoot from a slightly low angle. This captures both the dish and the glowing backdrop in one frame. Keep moving if the area is crowded, and do not block shop entrances or pedestrian flow.
The Street Food Etiquette You Must Know
Kuromon Market and Dotonbori have many foods designed for casual tasting, but crowded lanes are not the place to block traffic for a long photo session. Avoid eating while walking through dense crowds, stopping suddenly in the middle of the walkway, or carrying food waste far away from the shop where you bought it.
When possible, eat near the stall where you purchased the food or use designated eat-in spaces. Return trays, skewers, and food waste to the shop of purchase when requested. Also ask before taking close-up photos of vendors’ faces, hands, or private work areas. Food close-ups are usually easier and more respectful than pointing a camera directly at staff.
More Osaka Photo Spots Worth Your Time
Beyond the classic castle, market, and neon areas, these additional Osaka photo spots give you more variety if you have extra time or want a less obvious Instagram route.
Namba Yasaka Shrine: Massive Lion Head
Namba Yasaka Shrine is famous for its giant lion-head stage, about 12 metres tall. It is dramatic, unusual, and close enough to Namba to fit into a half-day photo route.
Best time to shoot: Morning or early afternoon is best for clear light on the lion head. Official tourism listings usually show the gates opening from early morning to late afternoon, with shrine office hours around the daytime period. Do not assume it is a 24-hour photo spot; check the latest opening information before planning an early or late visit.
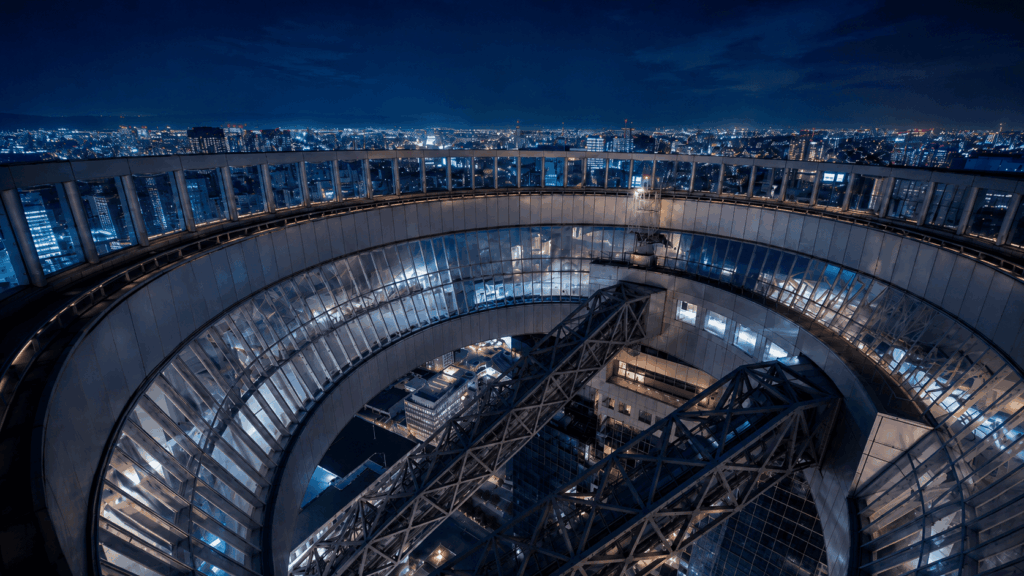
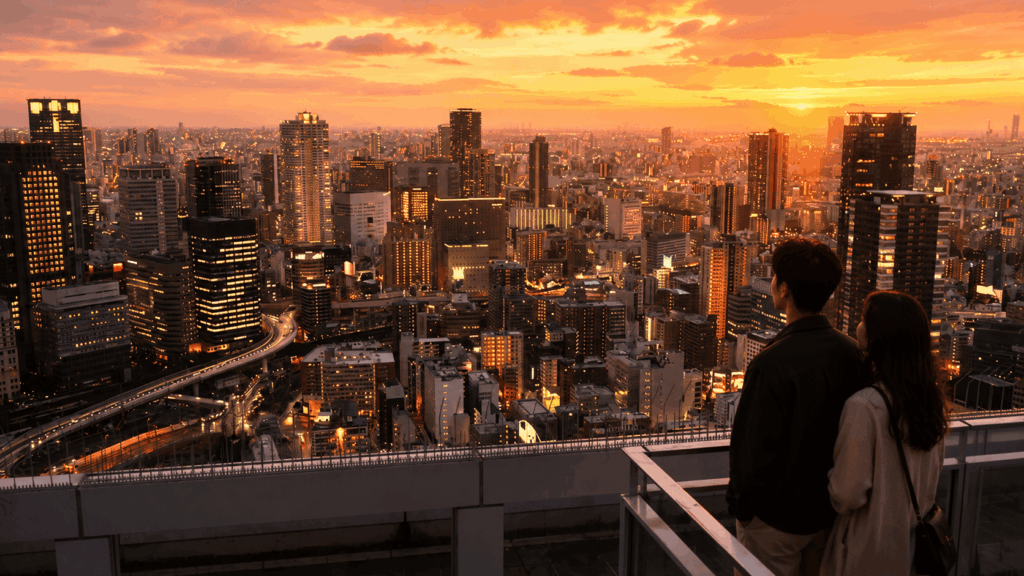
Umeda Sky Building: Panoramic City Views
The Kuchu Teien Observatory at Umeda Sky Building gives you one of Osaka’s best skyline views. It is especially useful if you want a high-angle city photo rather than another street-level neon shot.
Best time to shoot: Arrive before sunset and stay through blue hour. The warm light before sunset gives shape to the buildings, then the city lights start to appear after dark. As of the latest official listing checked in June 2026, regular hours are generally 9:30 AM to 10:30 PM with last admission at 10:00 PM, and adult admission is listed at ¥2,000. Check the official website before visiting because hours, prices, and entry conditions can change.
Nakazakicho: Retro Vintage Streets
Nakazakicho, near Umeda, has narrow alleys, retro storefronts, small cafes, and vintage shops. It feels very different from Dotonbori: quieter, softer, and more local.
Best time to shoot: Late afternoon, around 2:00 PM – 4:00 PM, often works well for warm side light. Be respectful around small shops and private homes, and avoid photographing cafe interiors without permission.
teamLab Botanical Garden Osaka: Immersive Night Art
Located in Nagai Park, teamLab Botanical Garden Osaka turns the botanical garden into an outdoor night art experience. It is a good option when you want something different from city neon, especially for colourful long-exposure-style smartphone shots.
Best time to shoot: After sunset. The artworks are light-based, so they become stronger as the sky darkens. Operating hours vary by season, and closures can change. Advance booking is strongly recommended, especially on weekends or holidays, because same-day tickets may sell out or be priced differently.
Photography note: Tripods, monopods, selfie sticks, flash photography, and drones may be restricted or prohibited at immersive art venues, including teamLab events. Plan to shoot handheld with Night mode or a fast lens, and always follow the current venue rules and staff instructions.
Seasonal Osaka Photo Opportunities
Osaka changes dramatically by season. These seasonal additions can make your photos more distinctive, but they also require the most up-to-date checks before you go.
Cherry Blossom Season: Late March to Mid-April
Osaka Castle Park and Nishinomaru Garden are classic cherry blossom photo locations, especially when you can frame the castle with blossoms. Go early in the morning for fewer people, and check whether special opening hours or tickets apply.
The Osaka Mint Bureau cherry blossom viewing is another famous spring event. It usually opens for about one week in April, but dates and reservation rules change each year. In recent years, advance reservation has been required, and entry conditions can change by year, so check the official Japan Mint information before adding it to your plan.
Autumn Leaves: November
Minoo Park, north of central Osaka, is one of the most popular autumn-leaf options in the area. The waterfall and maple-lined walking path make it a strong nature alternative to Osaka’s city scenes. The walk is easier than many mountain trails, but allow enough time and wear comfortable shoes.
Winter Illuminations: November to February
Osaka’s winter illuminations add seasonal sparkle to places such as Midosuji Boulevard, Umeda, and Osaka Castle Park. Osaka Castle Illuminage is a seasonal ticketed event held in Nishinomaru Garden in some winter seasons. Dates, ticket prices, and lighting times change by year, so check the current season’s official event information before planning a night shoot around it.
One-Day Osaka Photography Itinerary
If you only have one day dedicated to shooting Osaka photos, this route gives you strong variety: castle, market food, retro streets, neon, and lanterns. For a broader plan including meals and transport, see our full 1-day Osaka itinerary.
- 8:00 AM – Osaka Castle: Start at Gokurakubashi Bridge for reflection shots, then move toward Nishinomaru Garden if it is open. Leave before the main mid-morning crowds build up.
- 11:00 AM – Kuromon Market: Head south for street food and market photography. Natural light is usually better before noon.
- 2:00 PM – Nakazakicho or Namba Yasaka Shrine: Choose Nakazakicho for retro streets and cafes, or Namba Yasaka Shrine for the giant lion-head stage.
- 4:30 PM – Shinsekai: Arrive before sunset. Scout angles around Tsutenkaku, then wait for the blue hour window.
- 7:00 PM – Dotonbori & Hozenji Yokocho: Shoot neon from the Tombori River Walk, then slip into Hozenji Yokocho for a warmer, traditional night mood.
Rainy day alternative: Prioritise covered or easier-to-manage spots such as Kuromon Market, Umeda Sky Building, indoor cafe scenes, and covered shopping arcades. teamLab Botanical Garden may still operate in some weather conditions, but outdoor exhibitions can be affected by heavy rain, wind, or maintenance closures, so check before going.
If combining Osaka Castle, Kuromon Market, Shinsekai, and Dotonbori in one day sounds logistically tricky, check the half-day Osaka Castle and Shinsekai tour details on Klook before finalising your route. It may help you cover several photo-heavy highlights with a guide, but always confirm the current route, transport method, inclusions, meeting point, and what is or is not included before booking.
FAQ About Osaka Photography
What is the best time to photograph Osaka Castle?
Early morning is best, especially around 8:00 AM to 9:00 AM for the surrounding park and moat areas. The light is softer, and the main tourist flow is usually lighter than late morning. Nishinomaru Garden usually opens later than the park itself, so check its latest opening hours if that is your main target.
Where can I take cyberpunk neon photos in Osaka?
Shinsekai and Dotonbori are the top two areas. Shoot Shinsekai during blue hour, about 20–30 minutes after sunset, for warm neon against a deep blue sky. For Dotonbori, use the Tombori River Walk beside the water rather than staying only on Ebisubashi Bridge.
Are there rules for taking street food photos in Osaka?
Yes. Avoid blocking crowded lanes while eating or taking photos. Eat near the stall where you bought the food or in designated spaces when available, dispose of trash properly, and return trays or food waste to the shop of purchase when requested. Always ask before taking close-up photos of vendors.
Is it safe to carry expensive camera gear at night in Osaka?
Osaka is generally a safe city for travellers, and many people carry cameras around Dotonbori, Hozenji Yokocho, and Shinsekai at night. Still, use common sense: keep your bag zipped, avoid leaving gear unattended, watch for accidental bumps in crowds, and be more cautious on quiet side streets late at night.
Can I use a tripod at Osaka photo spots?
It depends on the location. A tripod may be practical in open areas when crowds are light, but it is not a good idea in narrow places like Hozenji Yokocho or on busy walkways. Some areas, facilities, and events restrict tripods, monopods, or selfie sticks, so check signs and follow staff instructions. For most travellers, a small phone grip or handheld Night mode is more practical than a full-size tripod.
Can I take good Osaka photos with only a smartphone?
Yes. Every location in this guide can be photographed well with a recent smartphone. Use ultra-wide mode for architecture, portrait mode for food, Night mode for neon, and a railing or wall to stabilise your phone in low light. Good timing and composition matter more than expensive gear alone.
Final Verdict: Which Osaka Photo Plan Is Right for You?
Choose the DIY route if:
You are comfortable researching your own route, you have a full day to devote to photography, and you want the freedom to linger at each spot. The one-day itinerary above works well if you start early and move efficiently.
Choose a guided tour if:
You are short on time, you prefer having someone else handle navigation, or you are visiting during a peak period such as cherry blossom season, Golden Week, or autumn leaves. A guided option will not guarantee perfect weather, empty streets, or specific views, but it can reduce route-planning stress and help you use limited time more efficiently.
For smartphone photographers:
You do not need a DSLR to get strong Osaka photo spots. Focus on using Night mode, ultra-wide mode, portrait mode, and stable handholding. Clean composition, good light, and patience will improve your results more than gear alone.
For family travellers with kids:
Osaka Castle Park, Nishinomaru Garden, Kuromon Market, and the Tombori River Walk are easier than narrow alleys or late-night routes. Skip Hozenji Yokocho if you have a large stroller because the lane is narrow. Kids often enjoy the giant lion head at Namba Yasaka Shrine and the lights at teamLab Botanical Garden Osaka.
For photographers on a tight schedule:
Focus on three high-impact areas: Osaka Castle in the morning, Shinsekai during blue hour, and Dotonbori at night. These three give you the most visual variety per hour.
Prices, opening hours, transport schedules, event dates, ticket rules, tripod policies, tour inclusions, payment methods, and seasonal operations can change. Always check official sources and your selected booking page before finalising your Osaka photography plan.
Hi, I’m Kai. I’m a Tokyo-based travel writer, tourism industry insider, and the author of a published guidebook for international visitors to Japan. With over 10 years of professional experience at a leading Japanese tourism company, my mission is to help you skip the tourist traps and navigate Japan’s best destinations like a local. I believe the perfect day trip is like a traditional kaiseki meal: a beautiful balance of precise planning and unforgettable seasonal discovery. When I’m not out conducting field research, you’ll usually find me drafting new itineraries with one of my favorite fountain pens!