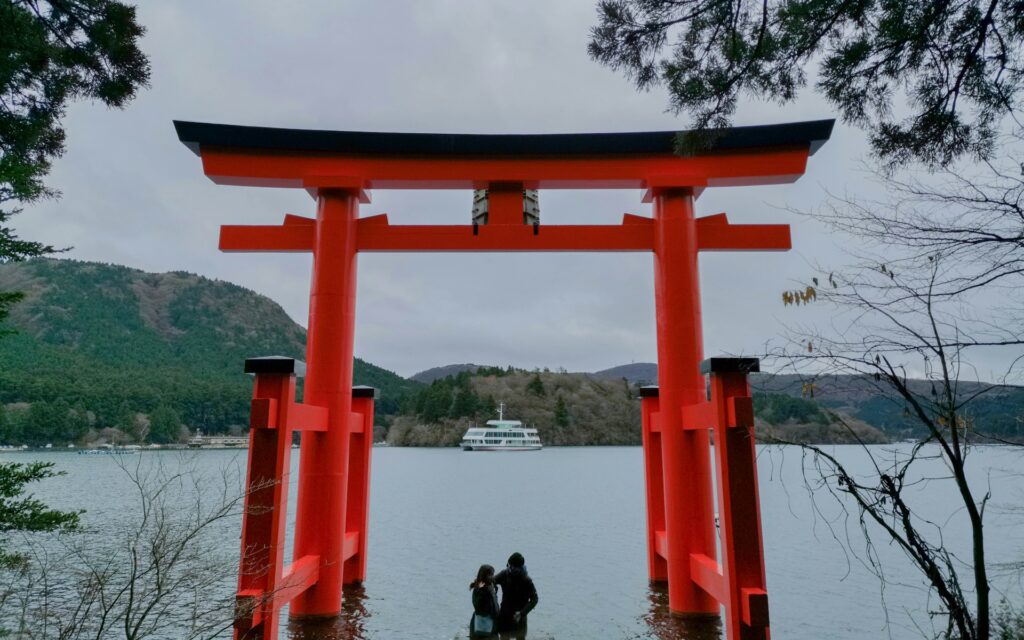
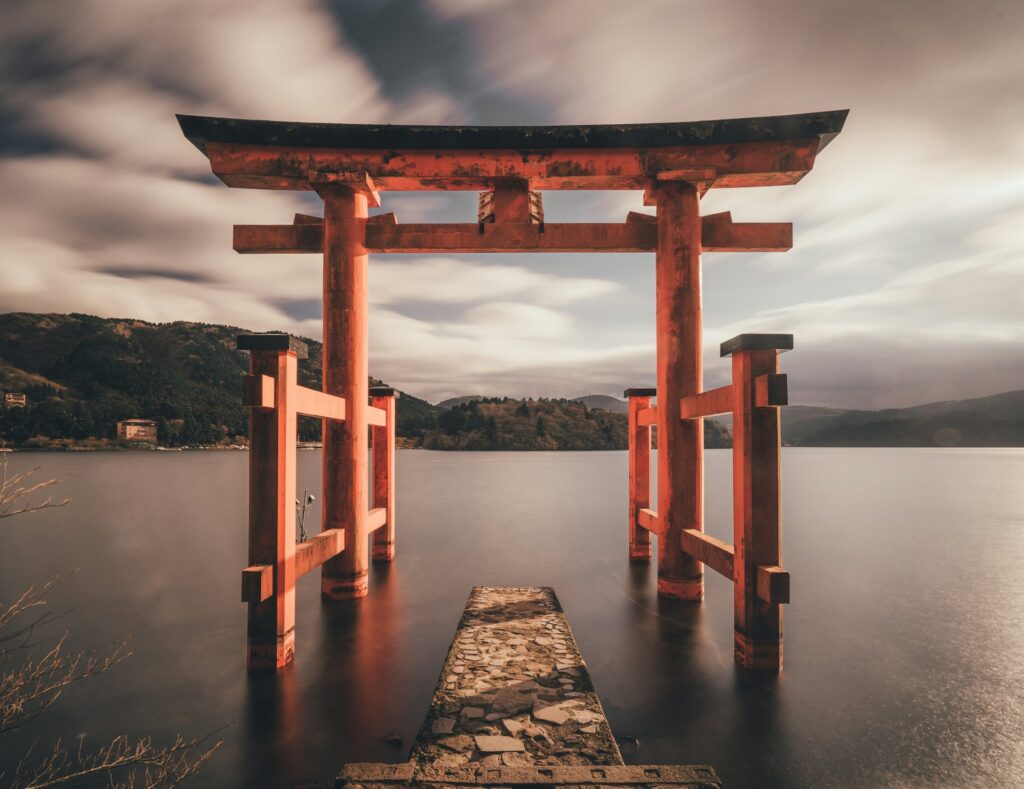
If your goal is to take the best possible Hakone Shrine photos, the most important thing to know is this: timing matters more than gear. The famous floating torii at Lake Ashi is one of the most photographed spots in Japan, but by midday, the queue for the classic shot can stretch to 45 minutes or longer.
For most travelers, the best strategy is simple. Arrive early, take the iconic lakeshore shot first, then explore the shrine grounds afterward. If you show up late, you may still get beautiful photos—but you will likely need to rely on side angles, stair views, or boat shots instead of the clean front-facing composition.
Quick Answer: Best Time for Hakone Shrine Photos
The best time to photograph the Hakone Shrine floating torii is early morning, ideally between 7:00 AM and 8:00 AM. That is when the light is softer, the lake is calmer, and the photo line is usually much shorter. If you arrive around midday or early afternoon, expect harsher light, more people, and a much longer wait for the classic front shot.
| At a Glance for Photographers | What to Expect |
|---|---|
| Best time to shoot | 7:00 AM to 8:00 AM |
| Worst time to shoot | Midday to early afternoon |
| Typical peak wait | 45 minutes to over 1 hour for the classic torii photo |
| Best classic angle | From the stone path directly facing the floating torii |
| Best no-queue alternatives | Stairs angle, side shoreline angle, or Lake Ashi boat view |
| Best for full photo control | DIY travel with an early arrival |
| Mt. Fuji visibility | Never guaranteed, even on clear-looking days |
| Entrance fee | Free for the torii area and main shrine grounds |
If You Only Want the Iconic Floating Torii Shot
If you care mainly about getting that one clean photo of the red torii standing over Lake Ashi, do not overcomplicate the plan. This is the simplest approach:
- Get there before 8:00 AM if possible.
- Go straight to the lakeshore first before exploring the main shrine grounds.
- Take your photos quickly once it is your turn.
- Use alternative angles if the line is too long.
- Save the forest shrine buildings for afterward, when the pressure is off.
This order matters because the floating torii queue gets much worse later in the day. If you visit the main shrine first and leave the lakeshore photo for later, you may end up wasting a large part of your visit standing in line.
Best Times for Hakone Shrine Photos
Early Morning: The Best Choice
Early morning is the best time for almost every type of Hakone Shrine photo. The light is softer, reflections on the lake are often cleaner, and the queue for the floating torii is much shorter than later in the day.
- Best window: 7:00 AM to 8:00 AM
- Why it works: Fewer people, softer light, calmer water, and faster access to the classic composition
- Best for: Clean torii shots, portraits, and photographers who want the most control
Midday to Afternoon: The Most Difficult Time
This is the hardest time to get the perfect photo. The line at the water can become extremely long, and the brighter overhead light is usually less flattering for both scenery and portraits.
- Typical problem: 45-minute to 1-hour waits for the main front-facing shot
- Main downside: Harsh light, more crowd pressure, and less time to experiment
- Best strategy: Skip the main queue and focus on side angles or elevated views
Late Afternoon: Better Light, But Less Flexibility
Late afternoon can offer more attractive light than midday, and crowds may thin slightly. However, this is less forgiving if you are moving around Hakone by bus or boat, since transport timing becomes more important later in the day.
- Best for: Travelers already staying in Hakone
- Main risk: Less margin for missed buses, boats, or connections
- Good option if: You cannot make an early start but still want softer light
Best Season and Weather Expectations
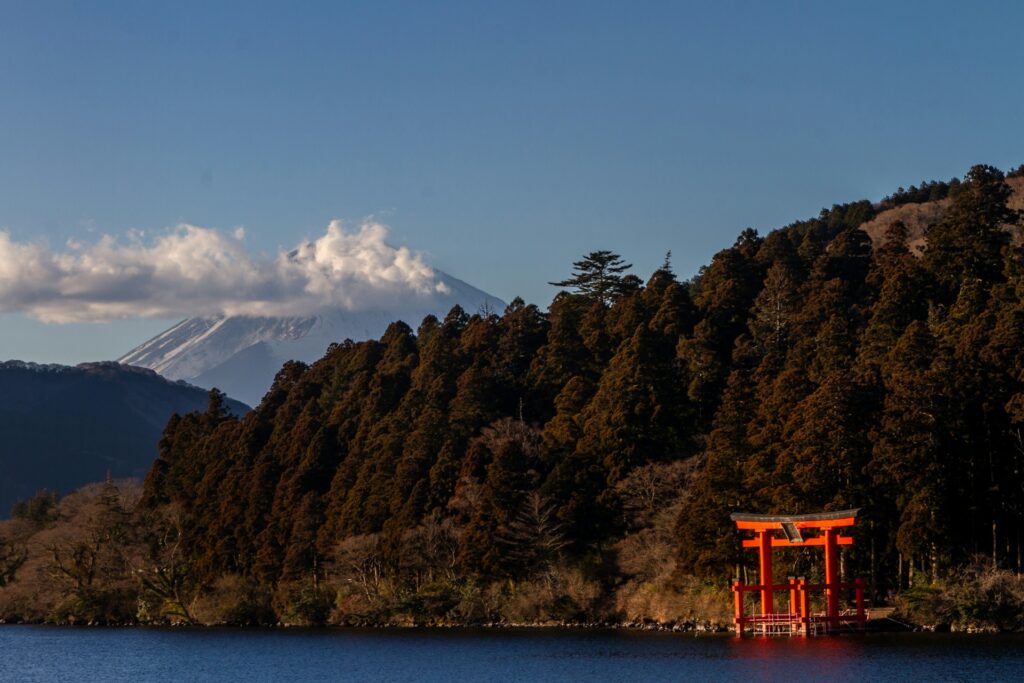
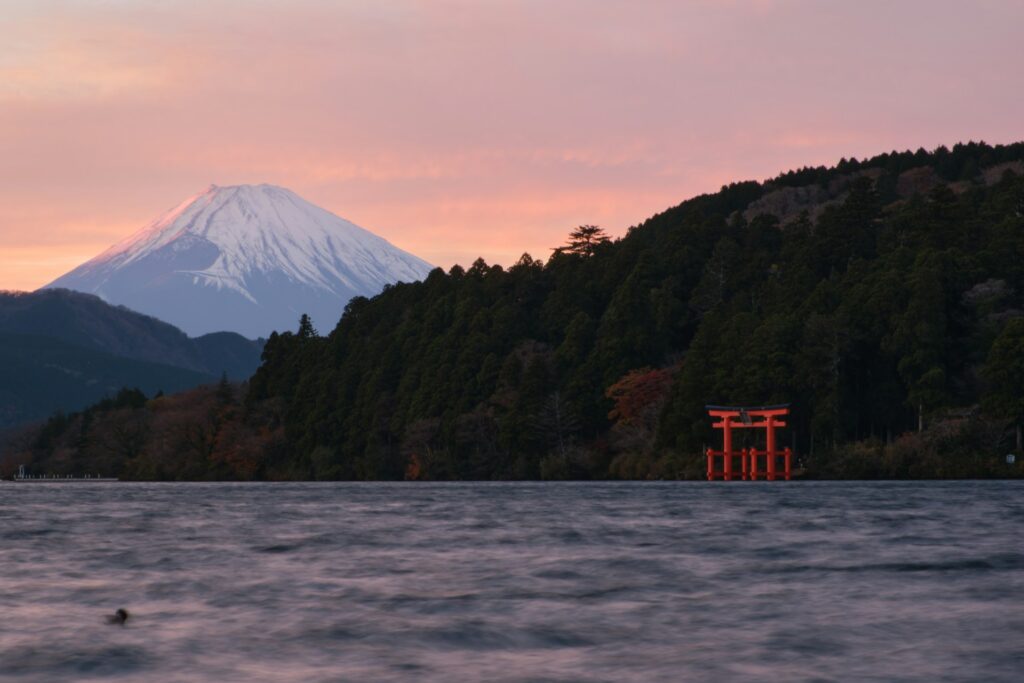
Hakone Shrine is photogenic year-round, but the atmosphere changes with the season. Autumn foliage and spring holidays bring heavier crowds, while colder months often offer clearer air and a better chance of seeing Mt. Fuji from the lake area.
If Mt. Fuji matters to your photos, the colder and drier months are generally more favorable. Still, even on cloudy or misty days, the shrine can look dramatic and atmospheric, especially with the red torii against the dark forest and grey water.
Top Angles for Hakone Shrine Photos
1. The Classic Front Shot
This is the iconic image most people come for: the floating torii framed from the stone path directly in front of the gate, with Lake Ashi stretching behind it. It is the most recognizable angle, but also the most competitive.
Because the line can be long, it helps to decide your pose and camera setup before it is your turn. If someone is taking your photo, have them ready on the steps above so you do not waste time when the space opens up.
2. The Stairs Angle
Shooting downward from the stone steps can give you one of the most useful backup compositions. You still capture the torii and lake, but you avoid the pressure of needing the exact front position at the water’s edge.
This is also one of the best options when the queue is long but you still want a recognizable Hakone Shrine photo without waiting too long.
3. The Side Shoreline Angle
If you want a less crowded and slightly more creative composition, move away from the direct front angle and shoot from the side. This can frame the torii with branches, shoreline texture, and water while avoiding the most congested shooting spot.
It is a smart choice if your priority is a beautiful photo rather than the exact postcard composition.
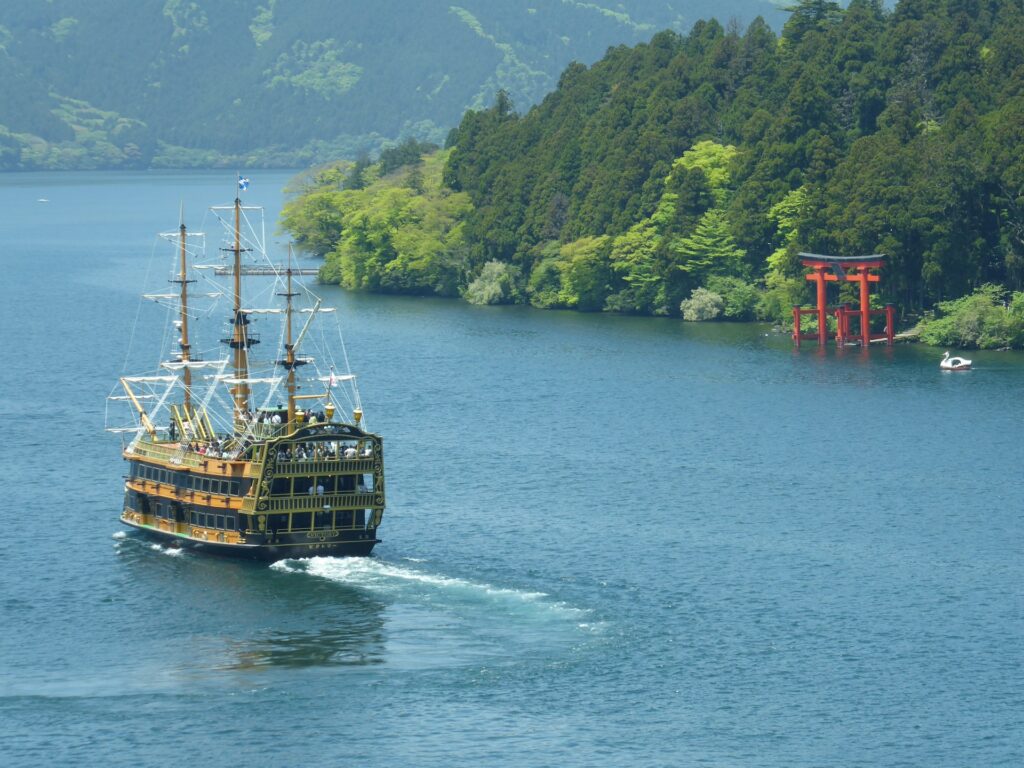
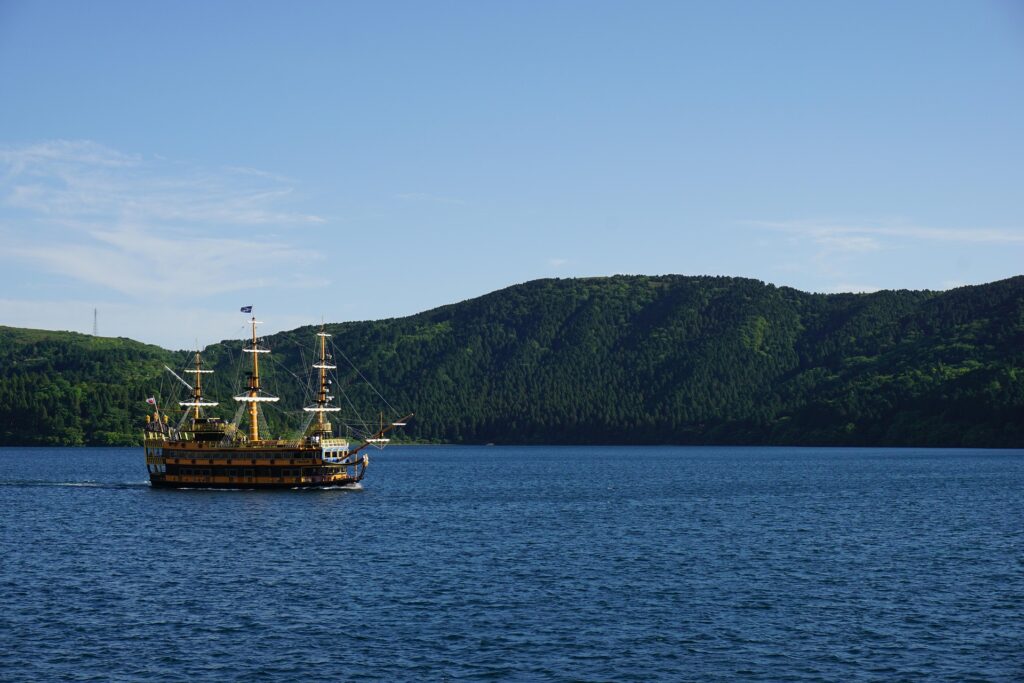
4. The Lake Ashi Boat View
The sightseeing boats on Lake Ashi can give you a wider view of the torii and forest from the water. This works especially well if you want a broader landscape image rather than a portrait-style torii shot.
The main downside is timing. You do not control the boat speed or stopping point, so this angle works best as a bonus shot rather than your only plan.
The “3-Minute Rule” Mindset
Whether or not it is formally posted on the day, the atmosphere around the floating torii is usually fast-moving. The best approach is to act as if you only have a few minutes.
- Know your pose before reaching the front
- Set your camera or phone in advance
- Take the must-have shot first
- Move aside quickly once you have it
This keeps the line moving, reduces stress, and gives you a better chance of leaving with a usable photo instead of fumbling under pressure.
Where Hakone Shrine Is & How to Get There
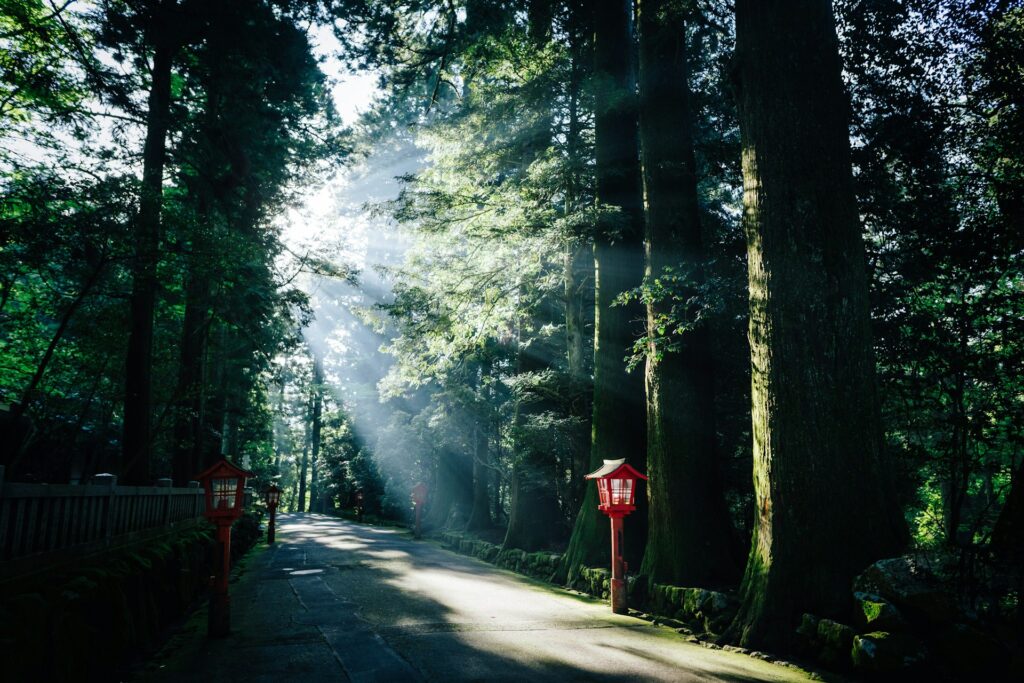
Hakone Shrine is in Moto-Hakone, Kanagawa Prefecture, on the southern shore of Lake Ashi. The main shrine sits back in a cedar forest, while the famous floating Heiwa no Torii stands at the water’s edge a short walk away.
Once you arrive, the layout is simple:
- The main shrine buildings are up the stone steps in the forest.
- The floating torii photo area is down by the lake.
- If your main goal is photography, go to the water first and explore the shrine grounds after.
DIY Access from Tokyo
If you want the best chance of getting clean Hakone Shrine photos without crowds, DIY travel is usually the better choice because it gives you full control over your arrival time.
- Shinjuku to Hakone-Yumoto: Take the Odakyu Line. The limited-express Romancecar is the fastest and most comfortable option.
- Hakone-Yumoto to Moto-Hakone: Transfer to a Hakone Tozan Bus bound for Moto-Hakone or Hakonemachi.
- Walk to the shrine: From the bus stop, it is a short walk to the shrine entrance and lakefront torii area.
If you plan to explore more of Hakone on the same day, the Hakone Freepass is usually the most practical option because it simplifies buses and other local transport around the area.
Joining a Guided Day Tour
A guided tour makes sense if you want to combine Hakone Shrine with other major sights such as Lake Ashi, the Hakone Ropeway, and Mt. Fuji viewpoints in one easy day from Tokyo.
However, for photography specifically, guided tours come with a clear drawback: you usually do not control the timing. That means you may arrive during the busiest part of the day, when the floating torii queue is longest and the light is least flattering.
If your top priority is the perfect shrine photo, DIY is the stronger option. If your priority is a simple, stress-free day that includes several highlights, a tour is more convenient.
Hakone Shrine Photos: DIY vs. Guided Tour
The best choice depends on whether you care more about photo control or overall convenience.
| Feature | DIY Travel | Guided Day Tour |
|---|---|---|
| Best for photos | Excellent if you want an early arrival and full timing control | Limited because the schedule is fixed |
| Chance to beat the queue | High if you arrive before 8:00 AM | Usually lower because many tours arrive later |
| Flexibility | High | Low |
| Stress level | Moderate because of transport planning | Low because the operator handles logistics |
| Good for wider sightseeing | Good if you plan carefully | Very good for combining multiple stops in one day |
| Best choice if you only want the iconic torii shot | Yes | No |
Choose DIY if: you care most about the classic floating torii photo, want to arrive early, and do not mind handling trains and buses yourself.
Choose a guided tour if: your goal is broader sightseeing and you want Hakone Shrine to be one stop among several major highlights.
Related reading: If you are considering combining Hakone with Mt. Fuji in one day, read our full review here: Is This Mt. Fuji & Hakone Day Tour from Tokyo Really Worth It?
Want the easiest all-in-one option from Tokyo?
➡️ Check availability & prices for the Tokyo: Mt. Fuji, Hakone Ropeway & Lake Ashi Day Tour
Practical Tips, Gear Rules & Shrine Etiquette
Hakone Shrine is both a major photo spot and an active Shinto shrine. A little preparation and basic courtesy will make your visit smoother for everyone.
- Travel light if possible: The floating torii area is narrow, and large camera bags can become awkward when the queue is busy.
- Avoid large tripods near the lakefront: They slow the line and make the shooting area harder to use for everyone else.
- Drones are not appropriate here: Treat this as a quiet cultural site, not an open filming zone.
- Set up before your turn: If you are using a phone, wipe the lens and choose your mode in advance. If you are using a camera, decide your framing before stepping forward.
- Take the must-have shot first: Do not spend your first few seconds experimenting. Get the safe shot, then try one variation if time allows.
- Respect worshippers: Keep your voice low near the main shrine buildings, and avoid pointing your camera close to people who are praying.
- Wear practical shoes: You will likely be using stone steps, forest paths, and lakeside walking areas that can be wet or slippery.
- Check weather and transport before you go: Rain, fog, and wind can change both the atmosphere and your timing.
If you are visiting mainly for photography, the most important practical tip is still the simplest one: arrive early and shoot the torii first.
Frequently Asked Questions
Is Hakone Shrine free to enter?
Yes. The shrine grounds and the floating torii area are free to visit.
What time should I arrive for the best Hakone Shrine photos?
The best time is usually 7:00 AM to 8:00 AM. That is your best chance for softer light and a much shorter line.
How long is the wait for the floating torii photo?
Early in the morning, the wait may be minimal. By midday or early afternoon, it can stretch to 45 minutes or more, especially on weekends and holidays.
Can I take photos at Hakone Shrine in bad weather?
Yes. Mist, light rain, and overcast skies can still produce beautiful photos. You may not get a bright postcard-style image, but the shrine often looks especially atmospheric in moody conditions.
Can I use a tripod or drone?
Keep your setup small and unobtrusive. Large tripods are not a good fit for the narrow lakeside queue area, and drones should not be used around the shrine.
Do guided tours help me avoid the photo line?
Usually not. Guided tours are helpful for convenience, but they often arrive later in the day, when the floating torii area is already crowded.
Is Hakone Shrine worth visiting even if I do not get the perfect front-facing shot?
Yes. The forest shrine buildings, stone steps, side angles, and lake views still make this one of the most photogenic spots in Hakone.
Summary: How to Get the Best Hakone Shrine Photos
If you want the best possible Hakone Shrine photos, the winning strategy is clear: arrive early, head to the floating torii first, and keep your photo plan simple. That gives you the best chance of soft light, a shorter queue, and a cleaner shot at the lake.
If you are a dedicated photographer or you care mainly about the iconic image, DIY travel is the better choice because it gives you full control over timing. If you are happy to treat Hakone Shrine as one stop on a bigger sightseeing day, a guided tour is the easier option.
Final decision checklist:
- Want the best chance at a clean torii photo? Go early and travel DIY.
- Want a wider day trip with less planning? Join a guided tour and accept that the shrine may be busy.
- Want both photo tips and broader Hakone planning? Use this shrine stop as part of a larger Hakone itinerary.
For full tour details and a realistic review:
➡️ Read: Is This Mt. Fuji & Hakone Day Tour from Tokyo Really Worth It?
For a seamless, all-in-one day trip from Tokyo:
➡️ Book your Mt. Fuji & Hakone Day Tour here
“`

Hi, I’m Kai. I’m a Tokyo-based travel writer, tourism industry insider, and the author of a published guidebook for international visitors to Japan. With over 10 years of professional experience at a leading Japanese tourism company, my mission is to help you skip the tourist traps and navigate Japan’s best destinations like a local. I believe the perfect day trip is like a traditional kaiseki meal: a beautiful balance of precise planning and unforgettable seasonal discovery. When I’m not out conducting field research, you’ll usually find me drafting new itineraries with one of my favorite fountain pens!