If your goal is to take the best possible photos of the Hakone Shrine floating torii gate (Heiwa no Torii), the most important thing to know is this: timing matters more than gear. The iconic red gate standing over Lake Ashi is one of the most photographed spots in Japan, and by mid-morning, the queue for the classic front-facing shot can stretch to 45 minutes or longer.
Arrive early, go straight to the lakeshore, and take the iconic shot first. That is the single best strategy. If you arrive late, you can still get beautiful photos—but you will likely need to rely on side angles, stair views, or boat perspectives instead of the classic front composition.
Note: As of early 2026, the torii gate area underwent temporary repair work but has since reopened. If you are visiting soon, check the official Hakone tourism site for the latest access status.
Quick Answer: Best Time for Hakone Shrine Photos
The best time to photograph the floating torii is early morning, ideally between 5:30 AM and 8:00 AM. The light is softer, the lake is calmer, and the queue is dramatically shorter—sometimes just a few minutes. If you arrive between late morning and early afternoon, expect harsh overhead light, heavy crowds, and waits of 45 minutes or more for the classic front shot.
| At a Glance for Photographers | What to Expect |
|---|---|
| Best time to shoot | 5:30 AM to 8:00 AM |
| Worst time to shoot | 10:00 AM to 2:00 PM |
| Typical peak wait | 45 minutes to over 1 hour for the classic front-facing photo |
| Best classic angle | From the stone path directly facing the floating torii |
| Best no-queue alternatives | Stairs angle, side shoreline angle, or Lake Ashi boat view |
| Best for full photo control | DIY travel (stay overnight in Hakone or take the first train) |
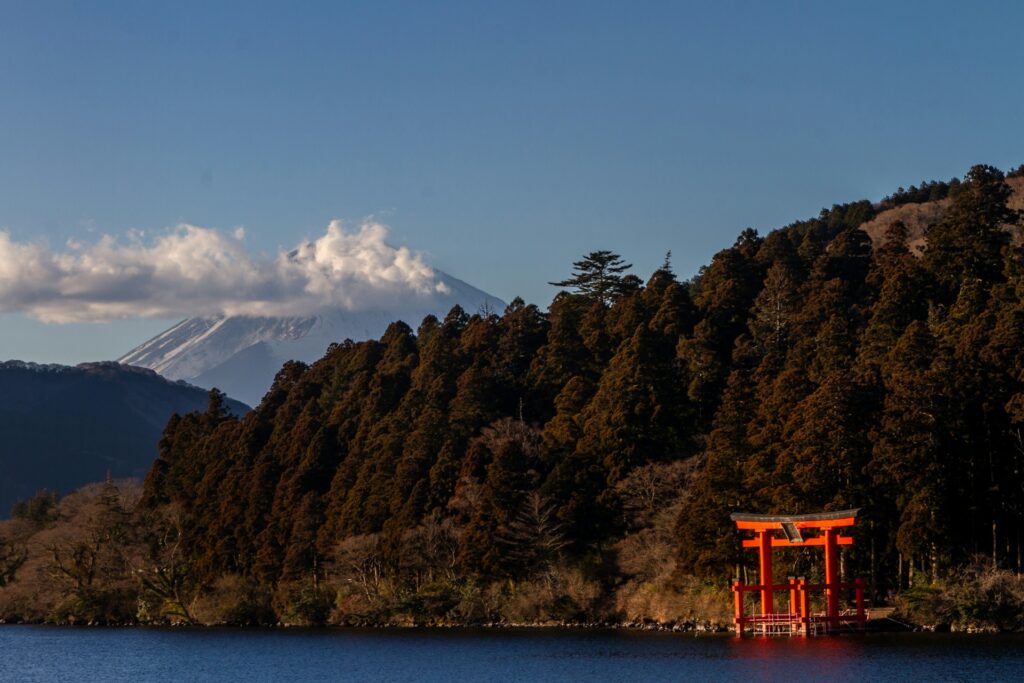
| Mt. Fuji visibility | Highest in winter and early spring; never guaranteed even on clear days |
| Shrine & torii area | Open 24 hours • Free entry • No admission fee |
| First train from Tokyo | Shinjuku 6:40 AM (Odakyu Romancecar) → Hakone-Yumoto ~7:55 AM |
Step-by-Step: How to Get the Iconic Floating Torii Shot
If your main goal is that one clean photo of the red torii standing over Lake Ashi, here is the simplest approach:
- Arrive before 8:00 AM – or even earlier (5:30–6:30 AM) if you are staying overnight in Hakone.
- Head straight to the lakeshore first, not the main shrine buildings. The torii is a short walk from the shrine entrance.
- Take your photo quickly once it is your turn. Decide your pose and camera settings in advance.
- Switch to an alternative angle if the line is too long. The stairs angle and side shoreline both work well.
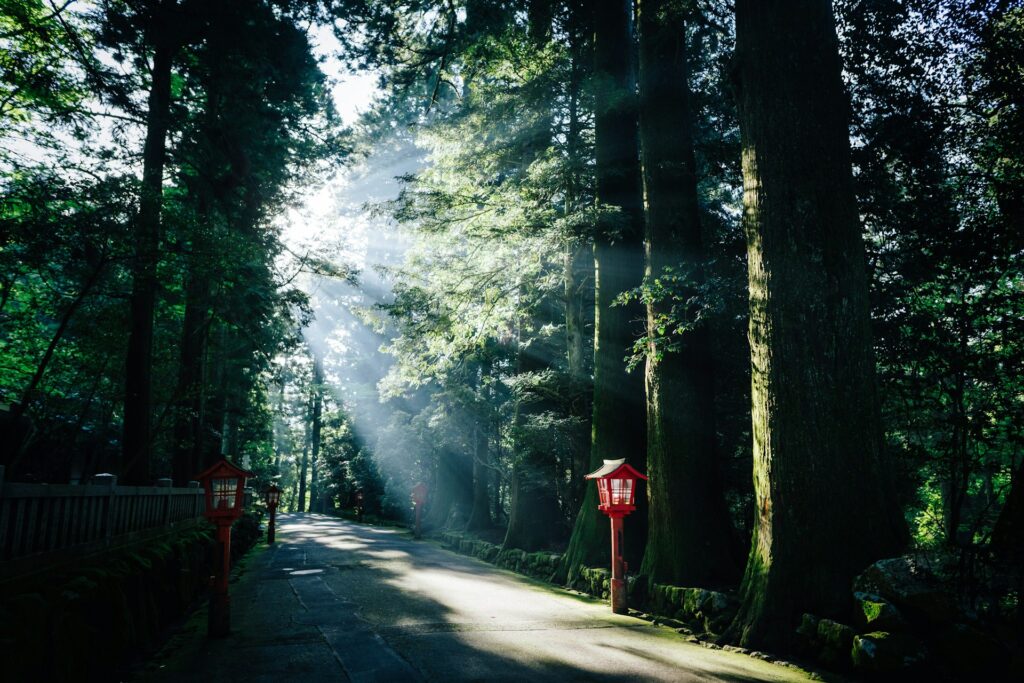
- Explore the forest shrine grounds afterward, when the pressure is off.
This order matters. If you visit the main shrine first and leave the lakeshore photo for later, you risk spending a large part of your morning standing in line.
Sample Early Morning Timeline (from Tokyo)
| Time | Action |
|---|---|
| 6:40 AM | Depart Shinjuku on the Odakyu Romancecar (first train) |
| 7:55 AM | Arrive at Hakone-Yumoto Station |
| 8:00–8:10 AM | Board Hakone Tozan Bus (Line H) toward Moto-Hakone |
| 8:35–8:45 AM | Arrive at Moto-Hakone bus stop; walk to the torii (5–10 min) |
| 8:45–9:00 AM | Shoot the floating torii with a short queue |
| 9:00–9:30 AM | Explore the main shrine grounds and forest path |
Best Times for Hakone Shrine Photos
Early Morning (5:30 AM – 8:00 AM): The Best Choice
Early morning is the best time for almost every type of Hakone Shrine photo. The light is soft and directional, reflections on the lake are often cleaner, and the queue for the floating torii is short or nonexistent.
- Best window: 5:30 AM to 8:00 AM
- Why it works: Fewer people, softer light, calmer water, and faster access to the classic composition
- Best for: Clean torii shots, portraits, and photographers who want full control
- Tip for sunrise (5:30–6:30 AM): You will need to stay in Hakone the night before, as the first train from Tokyo arrives around 8:00 AM. Hotels in Moto-Hakone (such as Hotel de Yama) are a short walk from the shrine.
Midday to Afternoon (10:00 AM – 3:00 PM): The Most Difficult Time
This is the hardest window to get a clean photo. The line at the lake can become extremely long, and the brighter overhead light is usually less flattering for both scenery and portraits.
- Typical problem: 45-minute to 1-hour waits for the main front-facing shot
- Main downside: Harsh light, crowd pressure, and less time to experiment
- Best strategy: Skip the main queue and focus on the stairs angle, side shoreline angle, or boat view
Late Afternoon (3:00 PM – Sunset): Better Light, Less Flexibility
Late afternoon offers warmer, more attractive light than midday, and crowds may thin slightly. However, this window is less forgiving if you are traveling around Hakone by bus or boat, since transport schedules tighten later in the day.
- Window: Approximately 3:00 PM until sunset (varies by season)
- Best for: Travelers already staying in Hakone or those with flexible transport
- Main risk: Less margin for missed buses, boats, or connections
- Good option if: You cannot make an early start but still want softer light
Best Season & Weather Expectations
Hakone Shrine is photogenic year-round, but the atmosphere shifts with the season.
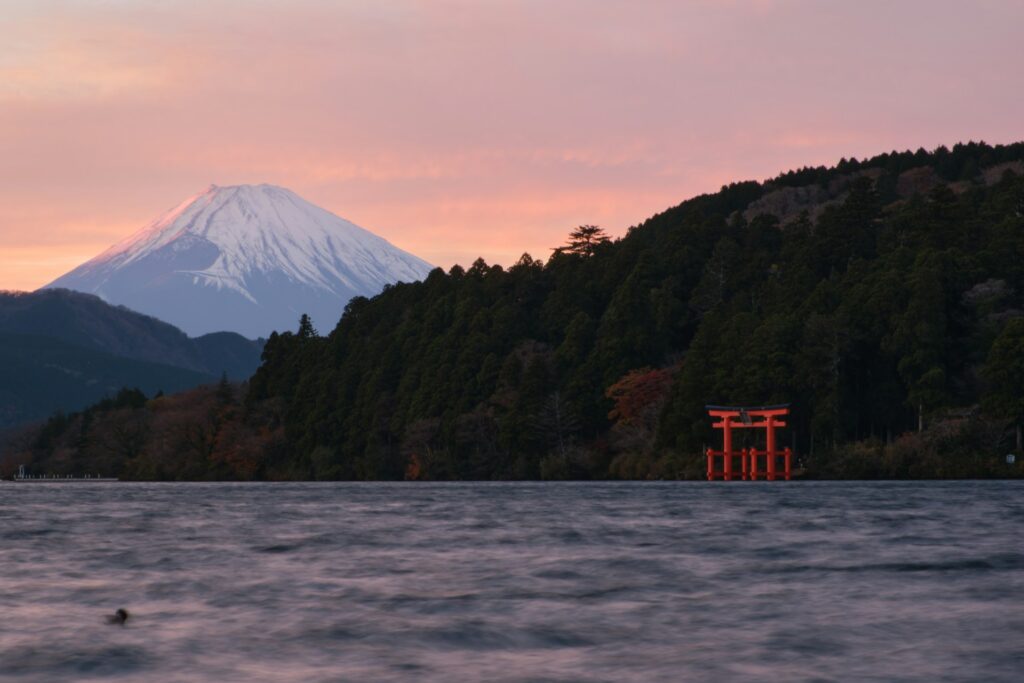
- Winter (Dec–Feb): Coldest but clearest air. Best chance of seeing Mt. Fuji from the torii area. Fewer crowds on weekdays.
- Spring (Mar–May): Cherry blossoms around Lake Ashi. Heavy crowds, especially during late March to early April.
- Summer (Jun–Aug): Lush green forest, but often humid and hazy. Mt. Fuji is rarely visible.
- Autumn (Oct–Nov): Stunning fall foliage. The busiest season after spring. Expect long lines even on weekdays.
What if the weather is bad? Mist, light rain, and overcast skies can produce atmospheric, moody photos—sometimes more striking than a bright blue-sky shot. The red torii against grey water and dark forest is a look that many photographers actively seek. You may not get a postcard-perfect image, but you might get something more memorable.
Planning an early start? If your travel dates are already fixed, compare the latest train schedules, bus times, and current access conditions before finalizing your morning plan. For a stress-free option that combines Hakone Shrine with other highlights, check the details of the Mt. Fuji & Hakone Day Tour from Tokyo—including start times, inclusions, and cancellation policy.
Top 4 Angles for Hakone Shrine Photos
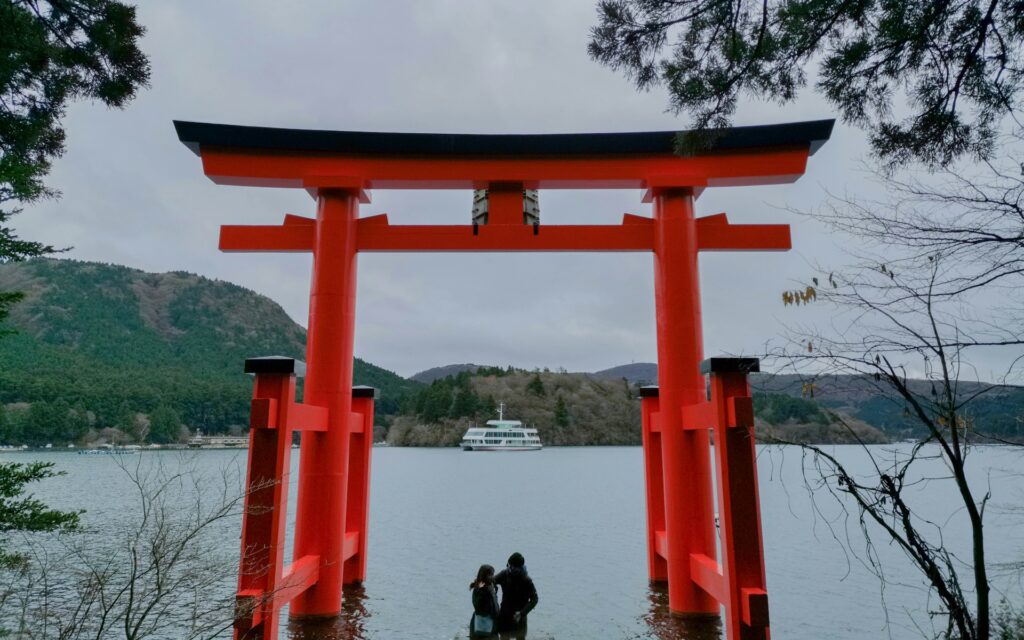
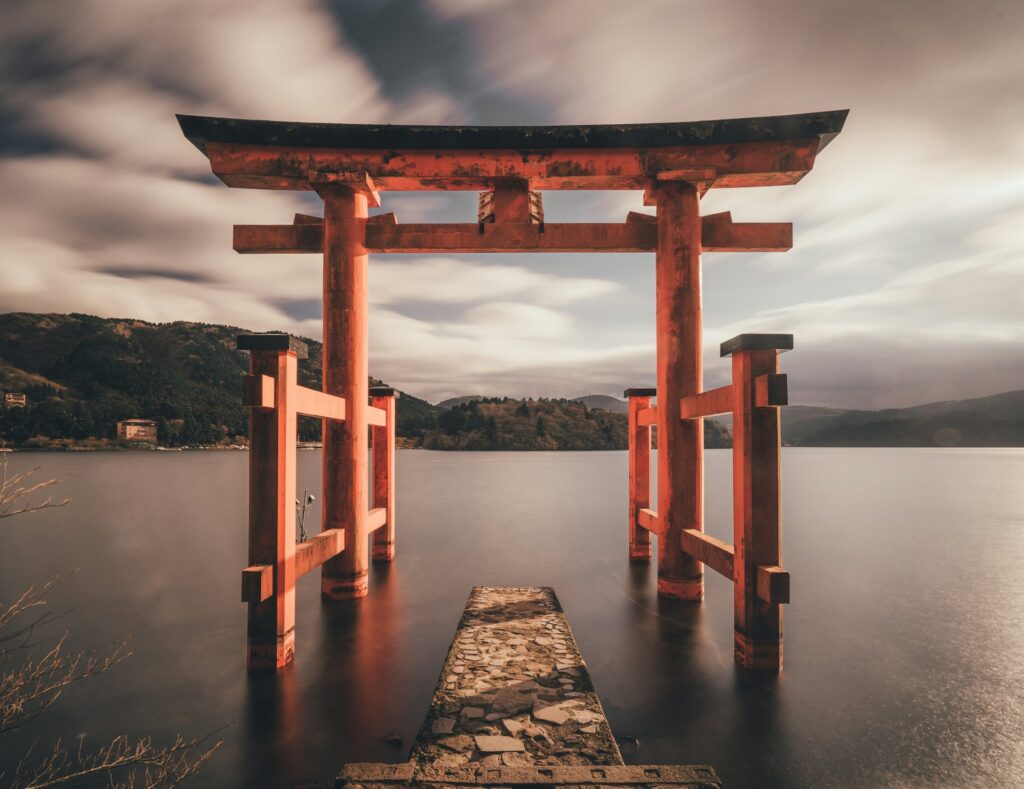
1. The Classic Front Shot
This is the iconic image most people come for: the floating torii framed from the stone path directly in front of the gate, with Lake Ashi stretching behind it. It is the most recognizable angle, but also the most competitive.
Because the line can be long, decide your pose and camera setup before it is your turn. If someone is taking your photo, have them stand on the steps above so you can step into position and shoot quickly when the space opens up.
2. The Stairs Angle
Shooting downward from the stone steps gives you one of the most useful backup compositions. You still capture the torii and lake, but you avoid the pressure of needing the exact front position at the water’s edge.
This is the best option when the queue is long but you still want a recognizable photo without waiting 45 minutes.
3. The Side Shoreline Angle
Move away from the direct front angle and shoot from the side. This frames the torii with branches, shoreline texture, and water while avoiding the most congested spot. It is a smart choice if your priority is a beautiful photo rather than the exact postcard composition.
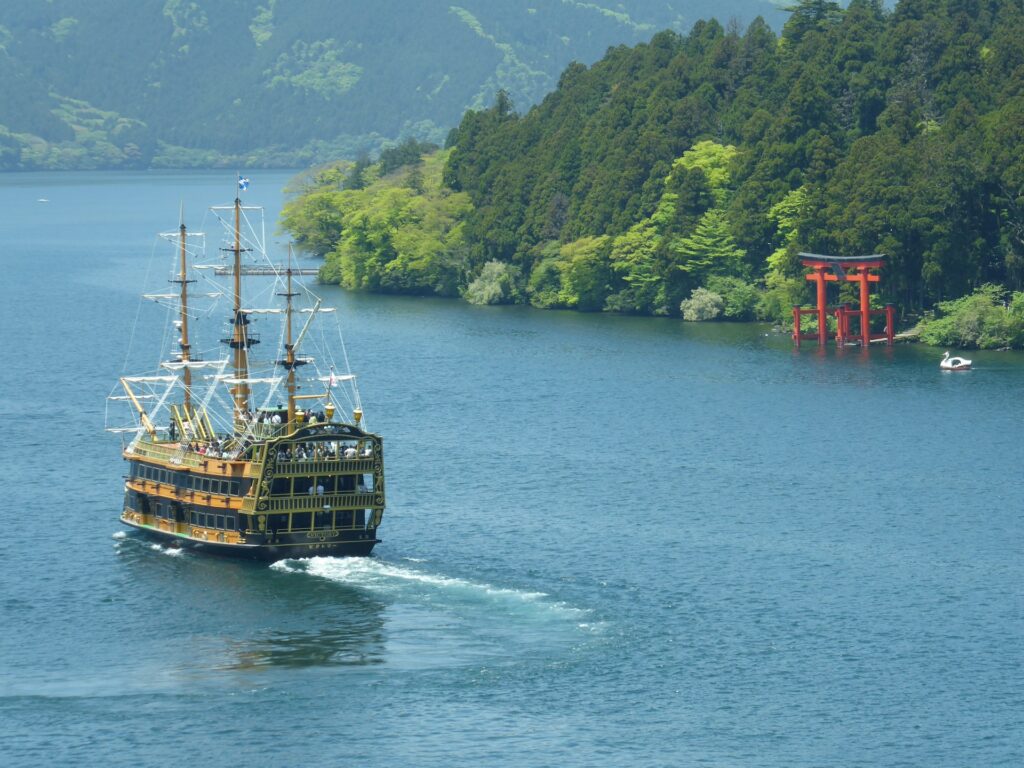
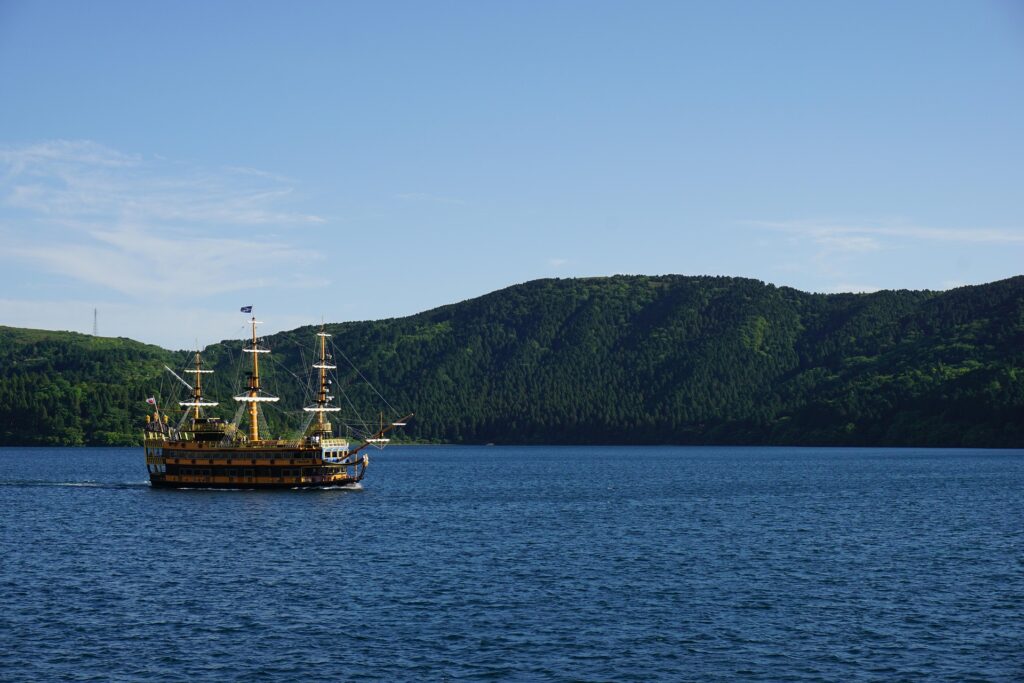
4. The Lake Ashi Boat View
The sightseeing boats on Lake Ashi give you a wider view of the torii and forest from the water. This works especially well for a broader landscape image rather than a portrait-style torii shot. You do not control the boat speed or stopping point, so treat this as a bonus shot rather than your primary plan.
The “3-Minute Rule” Mindset
Whether or not a time limit is posted on the day, the atmosphere around the floating torii is fast-moving. Act as if you only have a few minutes:
- Know your pose before reaching the front
- Set your camera or phone in advance
- Take the must-have shot first
- Move aside quickly once you have it
Pro Photo Tips: Smartphone & Solo Traveler Edition
For Smartphone Photographers
- Wipe your lens before shooting. Fingerprints are the most common reason for blurry phone photos at busy spots.
- Use portrait mode for the stairs and side angles. It separates the torii from the background and adds depth.
- Tap to focus and drag exposure down slightly to avoid blowing out the sky or water reflections.
- Shoot in HDR or HEIF if your phone supports it, especially for high-contrast scenes like the torii against bright water.
For Solo Travelers
- Arrive early and ask someone in line. Most visitors are happy to take a quick photo for you if you return the favor.
- Use a mini tripod or gorillapod on the stone steps or shoreline rocks — but keep it small. Large tripods are not practical in the narrow queue area.
- Prop your phone on a bag or jacket on the steps for a steady shot of yourself with the torii in the background.
- Take a video clip and extract a still frame. This works surprisingly well if you are struggling to get the timing right with a self-timer.
Where Hakone Shrine Is & How to Get There
Hakone Shrine is located in Moto-Hakone, Kanagawa Prefecture, on the southern shore of Lake Ashi. The main shrine sits back in a cedar forest, while the famous floating Heiwa no Torii stands at the water’s edge a short walk away.
Once you arrive, the layout is simple:
- The main shrine buildings are up the stone steps in the forest.
- The floating torii photo area is down by the lake, a 5–10 minute walk from the shrine entrance.
- If your main goal is photography, go to the water first and explore the shrine grounds after.
DIY Access from Tokyo (For Early Birds)
If you want the best chance of getting clean Hakone Shrine photos, DIY travel gives you full control over your arrival time. Here is the earliest route from Tokyo:
- Shinjuku to Hakone-Yumoto: Take the Odakyu Line. The limited-express Romancecar departs as early as 6:40 AM and is the fastest option (~75 minutes). Reserve your seat online in advance via the Odakyu website or at a ticket counter.
- Hakone-Yumoto to Moto-Hakone: Transfer to a Hakone Tozan Bus (Line H or Line K) bound for Moto-Hakone or Hakonemachi (~35 minutes, ¥1,210 one way).
- Walk to the shrine: From the bus stop, it is a short walk to the shrine entrance and lakefront torii area.
If you plan to explore more of Hakone on the same day, the Hakone Freepass (¥7,100 for 2 days from Shinjuku as of 2026) simplifies buses, trains, and other local transport around the area.
DIY Access from a Hakone Stay (For the Earliest Light)
If you want to shoot the torii at sunrise (5:30–6:30 AM depending on the season), you need to stay overnight in Hakone. The first train from Tokyo arrives around 8:00 AM, which is too late for sunrise light.
- Recommended area: Stay in Moto-Hakone itself, so the shrine is within walking distance. Hotels like Hotel de Yama and Hakone Lake Hotel are convenient options.
- Alternative: Stay near Hakone-Yumoto Station and take the first local bus to Moto-Hakone (~5:30–6:00 AM start depending on the season).
Tip: If you are staying overnight, check with your hotel about luggage storage. This lets you visit the shrine in the early morning before checking out.
Joining a Guided Day Tour
A guided tour makes sense if you want to combine Hakone Shrine with other major sights such as Lake Ashi, the Hakone Ropeway, and Mt. Fuji viewpoints in one easy day from Tokyo.
However, for photography specifically, guided tours come with a clear drawback: you usually do not control the timing. Most tours from Tokyo arrive between 10:00 AM and 1:00 PM, when the floating torii queue is longest and the light is least flattering.
If your top priority is the perfect shrine photo, DIY is the stronger option. If your priority is a simple, stress-free day that includes several highlights, a tour is more convenient.
Hakone Shrine Photos: DIY vs. Guided Tour
The best choice depends on whether you care more about photo control or overall convenience.
| Feature | DIY Travel | Guided Day Tour |
|---|---|---|
| Best for photos | Excellent if you arrive early or stay overnight | Limited because the schedule is fixed |
| Chance to beat the queue | High if you arrive before 8:00 AM | Low – most tours arrive during peak hours |
| Flexibility | High – stay as long or as short as you like | Low – fixed schedule at each stop |
| Stress level | Moderate because of transport planning | Low because the operator handles logistics |
| Best for wider sightseeing | Good if you plan carefully | Very good for combining multiple stops |
| Best for the iconic torii shot | Yes | No |
Choose DIY if: you care most about the classic floating torii photo, want to arrive early or stay overnight, and do not mind handling trains and buses yourself.
Choose a guided tour if: your goal is broader sightseeing and you want Hakone Shrine to be one stop among several major highlights.
Related reading: If you are considering combining Hakone with Mt. Fuji in one day, read our honest review here: Is This Mt. Fuji & Hakone Day Tour from Tokyo Really Worth It?
Practical Tips, Gear Rules & Shrine Etiquette
Hakone Shrine is both a major photo spot and an active Shinto shrine. A little preparation and basic courtesy will make your visit smoother for everyone.
- Travel light if possible. The floating torii area is narrow, and large camera bags become awkward when the queue is busy.
- Avoid large tripods near the lakefront. They slow the line and make the shooting area harder to use for everyone else. A small gorillapod or tabletop tripod is fine on the stone steps.
- Drones are not permitted. The shrine is a quiet cultural site and an active place of worship.
- Clean your lens before queuing. Whether you use a phone or a camera, a quick wipe saves you from realizing your photos are blurry later.
- Set your camera or phone mode in advance. Do not spend your first few seconds at the front adjusting settings.
- Take the must-have shot first. Get the safe shot, then try one variation if time allows.
- Respect worshippers. Keep your voice low near the main shrine buildings, and avoid pointing your camera close to people who are praying.
- Wear practical shoes. You will be using stone steps, forest paths, and lakeside walking areas that can be wet or slippery.
- Check weather and transport before you go. Rain, fog, and wind can change both the atmosphere and your timing.
Frequently Asked Questions
Is Hakone Shrine free to enter?
Yes. The shrine grounds and the floating torii area are free to visit. There is no admission fee.
What time should I arrive for the best Hakone Shrine photos?
The best time is 5:30 AM to 8:00 AM. If you are staying overnight in Hakone, aim for sunrise. If you are coming from Tokyo for the day, take the first Romancecar (6:40 AM from Shinjuku) to arrive around 8:45 AM.
Can I take photos before sunrise?
Yes. The shrine grounds and torii area are open 24 hours, so sunrise photography is possible. You will need to stay overnight in Hakone (Moto-Hakone area) as the first train from Tokyo arrives too late for sunrise light.
How long is the wait for the floating torii photo?
Early in the morning, the wait may be just a few minutes. By late morning or early afternoon, it can stretch to 45 minutes or more, especially on weekends and holidays.
What time does the first bus from Hakone-Yumoto to Moto-Hakone run?
The first Hakone Tozan Bus from Hakone-Yumoto to Moto-Hakone typically departs around 5:30–6:00 AM, depending on the season and day of the week. Check the local bus timetable before your visit, as schedules change seasonally.
Can I take photos at Hakone Shrine in bad weather?
Yes. Mist, light rain, and overcast skies can produce beautiful and atmospheric photos. The red torii against grey water and dark forest is a striking combination that many photographers prefer over a bright blue sky.
Can I use a tripod or drone?
Keep your setup small and unobtrusive. Large tripods are not practical in the narrow lakeside queue area. A small gorillapod or tabletop tripod is fine on the stone steps. Drones are not permitted at the shrine.
Do guided tours help me avoid the photo line?
Usually not. Guided tours are helpful for convenience, but they often arrive between 10:00 AM and 1:00 PM, when the floating torii area is already crowded.
Is Hakone Shrine worth visiting even without the perfect front-facing shot?
Absolutely. The forest shrine buildings, stone steps, side angles, and lake views make this one of the most photogenic spots in Hakone. Even if you skip the queue entirely, you can still take stunning photos from alternative angles.
Final Verdict: How to Get the Best Hakone Shrine Photos
The winning strategy is simple: arrive early, head to the floating torii first, and keep your photo plan simple. That gives you the best chance of soft light, a short queue, and a clean shot at the lake.
Choose this plan if…
- You want the cleanest possible torii photo: Stay overnight in Hakone and shoot at sunrise (5:30–6:30 AM). DIY travel with an early start gives you full control.
- You are coming from Tokyo for a day trip: Take the 6:40 AM Romancecar. You will arrive around 8:45 AM with still manageable crowds and good light.
- You prioritize convenience over the perfect shot: Join a guided tour and use the stairs or side angles if the main queue is too long. The shrine is still beautiful even without the front-facing composition.
- You are visiting in bad weather: Embrace the moody atmosphere. Mist and rain can produce more dramatic photos than a clear day.
Final decision checklist:
- Want the best chance at a clean torii photo? Go early and travel DIY.
- Want a wider day trip with less planning? Join a guided tour and accept that the shrine may be busy.
- Want both photo tips and broader Hakone planning? Use this shrine stop as part of a larger Hakone itinerary.
For a detailed honest review of the Mt. Fuji & Hakone Day Tour:
➡️ Read: Is This Mt. Fuji & Hakone Day Tour from Tokyo Really Worth It?
For a seamless all-in-one day trip from Tokyo:
➡️ Check availability & prices for the Mt. Fuji, Hakone Ropeway & Lake Ashi Day Tour — includes start times, inclusions, reviews, and cancellation policy so you can decide if it fits your plan.

Hi, I’m Kai. I’m a Tokyo-based travel writer, tourism industry insider, and the author of a published guidebook for international visitors to Japan. With over 10 years of professional experience at a leading Japanese tourism company, my mission is to help you skip the tourist traps and navigate Japan’s best destinations like a local. I believe the perfect day trip is like a traditional kaiseki meal: a beautiful balance of precise planning and unforgettable seasonal discovery. When I’m not out conducting field research, you’ll usually find me drafting new itineraries with one of my favorite fountain pens!