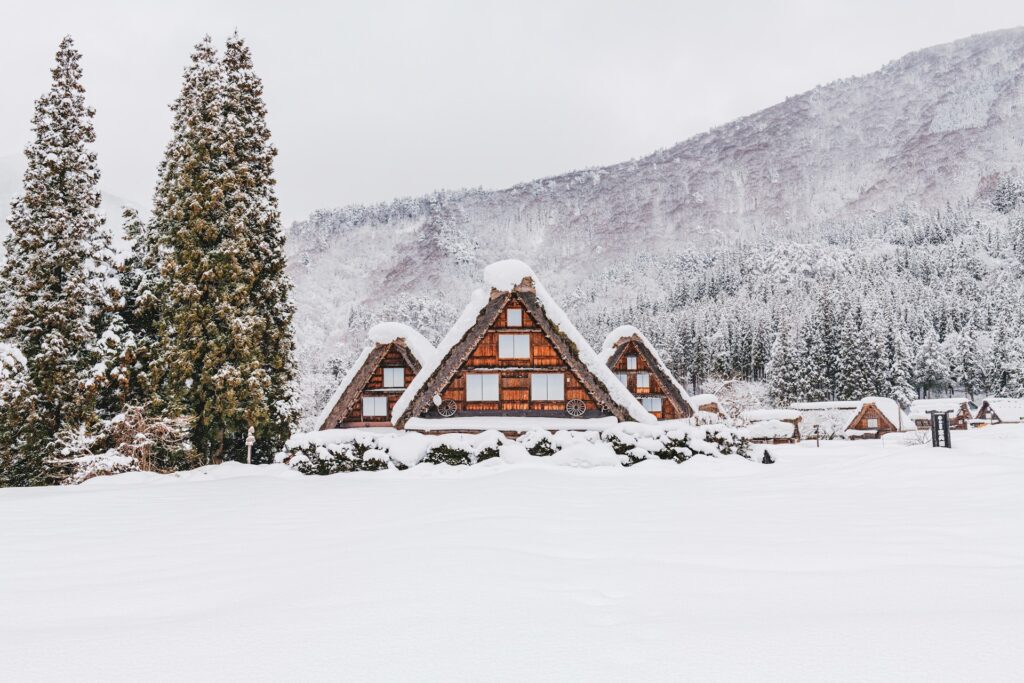
If you searched for a Shirakawago itinerary, you are probably not looking for a long list of attractions. You are trying to figure out whether a day trip will actually work, how much time you need, and how to avoid wasting that time in bus queues, lunch lines, or viewpoint bottlenecks.
The key to a good visit is simple: transport timing shapes the whole day. In Shirakawa-go, arrival time matters more than how many spots you try to check off. A shorter visit with the right timing feels better than a longer visit dropped into the busiest part of the day.
Quick Answer
A Shirakawago itinerary works best when you can give the village 3 to 4 hours. That is usually enough time for the viewpoint, a walk through the village, one traditional house interior, and a meal or snack without turning the day into a rush.
- Choose a 3- to 4-hour visit if Shirakawa-go is a highlight of your trip and you want a relaxed pace.
- Choose a 2-hour visit only if you accept that you are doing a highlights-only version.
- Choose Kanazawa as your base if it fits your wider trip better, but book transport early because many services require reservations.
- Choose Takayama as your base if you want the shortest transfer and the easiest early start.
For most travelers, the real decision is not whether Shirakawa-go is worth the trip. It is whether you want to manage the transport details yourself or pay to remove that friction.
Shirakawago Itinerary Options at a Glance
| Option | Best for | Time needed | Main priority | Main risk | Best base |
|---|---|---|---|---|---|
| 3- to 4-hour DIY visit | Travelers who want the classic experience without rushing | 3 to 4 hours in the village | Viewpoint, village walk, one house, food break | Late arrival creates crowd and lunch bottlenecks | Kanazawa or Takayama |
| 2-hour DIY visit | Travelers fitting Shirakawa-go into a tighter transfer day | About 2 hours | Highlights only | Trying to do too much and missing your return bus | Takayama or a stopover route |
| Group day tour | Travelers who want transport handled but prefer a shared-price option | Full-day, depending on departure point | Easy routing with a set schedule | Less flexibility once the tour starts | Kanazawa or Takayama |
| Private day tour | Families, travelers with luggage, or travelers who want less planning stress | More flexible | Smooth routing and less transport friction | Higher cost | Kanazawa or Takayama |
| Overnight stay | Travelers who want quieter evening and morning atmosphere | One night | Experience beyond peak day-trip hours | Less practical if your trip is tightly scheduled | Shirakawa-go |
Transport Planning: The First Step
Build your Shirakawago itinerary around confirmed transport first. Once you know your arrival and departure windows, the sightseeing part becomes easy. If you plan the village first and the buses second, the day is much more likely to fall apart.
Kanazawa to Shirakawa-go
Kanazawa is a very common base, but it is the option that demands more planning discipline. The bus ride is typically around 75 to 90 minutes, depending on the service, and this route should be treated as a reservation-first plan rather than a casual show-up-and-go day.
If you are traveling during foliage season, winter, a weekend, or a holiday period, do not assume the next convenient bus will still be available. For a Kanazawa-based day trip, lock in your transport first and then build the village timing around that confirmed slot.
Planning note: If the Kanazawa bus timing feels like the hardest part of the day, compare a guided morning option before committing to the DIY route. You can check the Kanazawa to Shirakawa-go morning guided tour details here to compare the schedule, meeting point, current price, and recent reviews.
Takayama to Shirakawa-go
Takayama is the easier base for a shorter and simpler day trip. The bus ride is roughly 50 minutes, which makes it easier to arrive early and easier to recover if one part of the day runs long. Takayama also tends to work better for travelers who want a compact outing rather than a full-day logistics exercise.
Some Takayama services may be reservation-required while others may operate differently, so check the exact bus conditions for your date. During weekends, holidays, winter, and foliage season, booking ahead is the safer approach.
Planning note: If you are using Takayama as your base but still want the transport and explanations handled, compare a guided day trip before finalising the DIY plan. You can see the Takayama to Shirakawa-go guided day trip details here.
How to Book Your Highway Bus
Many highway buses to Shirakawa-go require seat reservations, especially on popular routes and during busy seasons. The exact rules depend on the route and departure time, so check the current timetable before building the rest of your day.
- Reservation window: Reservations usually open about one month before the travel date, but the exact sales window can vary by route and booking platform.
- Where to book: Check Japan Bus Online and the official Nohi Bus website for current timetables, fares, and reservation rules.
- Typical one-way fares: As of recent official route information, Takayama to Shirakawa-go and Kanazawa to Shirakawa-go are both around 2,800 yen one way, while Toyama to Shirakawa-go is around 2,400 yen one way. Always confirm the latest fare before booking.
- What you need: Keep your reservation number and confirmation email ready. A screenshot can be useful in case mobile signal is weak.
- Cancellation: Cancellation rules vary by ticket and platform, so check the terms before paying.
Buses depart from Takayama Nohi Bus Center near JR Takayama Station and from Kanazawa Station. Check the current boarding point on your ticket, because platforms and bus stop names can change.
The 3- to 4-Hour Route: Best for First-Time Visitors
This is the most balanced Shirakawago itinerary for first-time visitors. It gives you enough time to see the village properly without drifting into the busiest part of the day for too long.
1. Start with the Viewpoint Decision
The Shiroyama Viewpoint, also known as the Ogimachi Castle Observation Deck, is the most famous photo spot. It is also where timing matters most. If you arrive early and conditions are clear, it can make sense to go up first. If you arrive around the middle of the day and the queue looks long, it is often smarter to explore the village first and leave the viewpoint until later.
- Shuttle bus: The paid shuttle usually runs during the daytime from near Wada House, with a midday break. Recent official FAQ information lists a cash fare of 200 yen one way, but shuttle details can change, so check the latest information at the bus terminal before heading up.
- Walking route: The walk takes around 15 to 20 minutes uphill in good conditions. It is not the best choice for every traveler, and snow, ice, rain, or poor visibility can make it much less comfortable.
The best rule is simple: do not build your whole day around the viewpoint queue. If the line is long and your time is limited, protect the rest of your itinerary first.
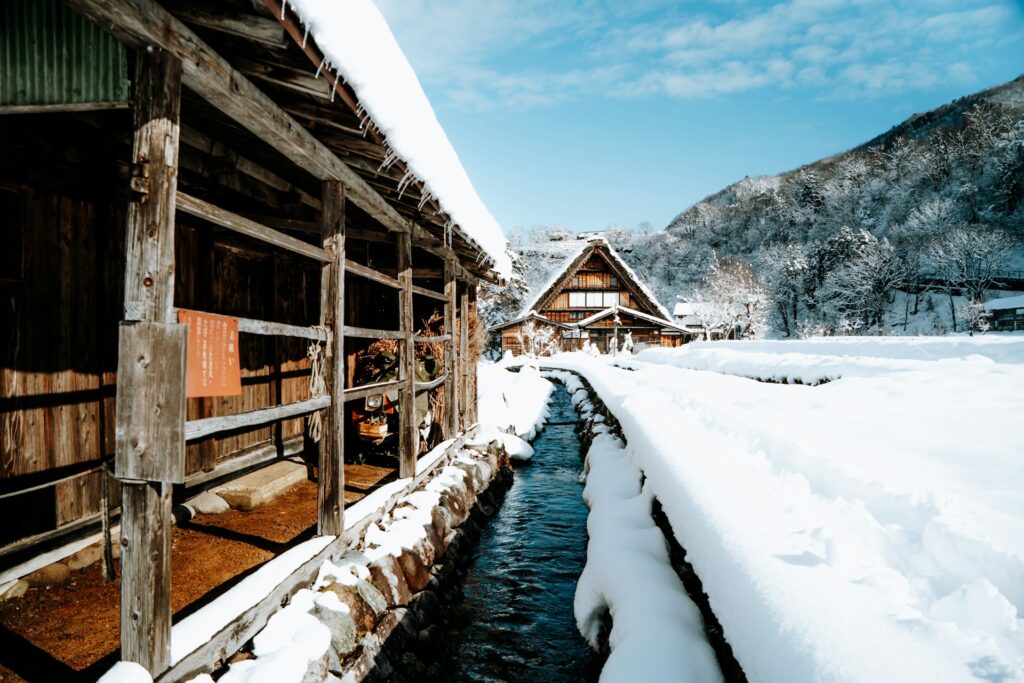
2. Cross Deai Bridge and Slow Down Inside the Village
Once you enter the main village area, do not just follow the busiest central stretch and leave. Cross Deai Bridge, enjoy the river view, and then give yourself time to drift into the side lanes. That is where the visit starts to feel less like a queue and more like a place.
The quieter edges of the village are often better for photos than the busiest souvenir-shop corridor. A good itinerary protects this wandering time instead of treating it as optional.
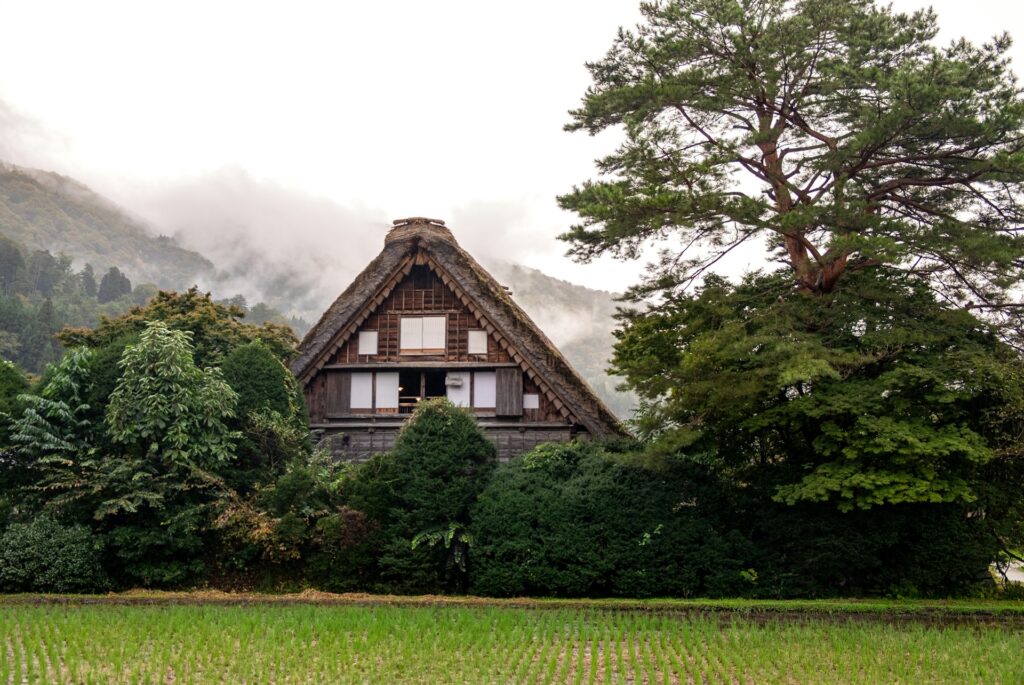
3. Enter One Gassho-style House
You do not need to visit every open house. For most travelers, one house interior is enough to understand the architecture, scale, and atmosphere.
- Wada House: The classic first choice and the easiest pick if you want one well-known option.
- Kanda House: A strong choice if you are especially interested in roof construction and interior atmosphere.
- Nagase House: A good fit if you want a larger structure with a slightly different historical feel.
Admission is usually around 300 to 400 yen for many individual house interiors, depending on the facility. This stop adds very little cost but a lot of context. Check the latest opening hours when you arrive, especially in winter or during event periods.
4. Eat Outside the Peak Lunch Window
One of the easiest ways to lose time in Shirakawa-go is to hit lunch exactly when everyone else does. If possible, eat early or wait until after the main lunch rush. That small timing change can protect a surprising amount of your day.
If you only want a quick local taste, planning a shorter food stop around local snacks often works better than committing to a full sit-down meal during peak hours.
Sample Timetable: Kanazawa Departure
The sample schedule below is only a planning model. Use it to understand the rhythm of the day, then check the latest bus timetable and reservation conditions before booking.
| Time | Activity |
|---|---|
| Early morning | Arrive at Kanazawa Station, pick up drinks or snacks, and board your reserved bus. |
| Morning | Travel to Shirakawa-go. The ride is typically around 75 to 90 minutes. |
| After arrival | Use the restroom, check the viewpoint shuttle queue, and decide whether to start with the viewpoint or the village. |
| First hour | Visit the viewpoint if the queue and weather are reasonable, or start with Deai Bridge and the village lanes. |
| Middle of visit | Walk through the village, explore side lanes, and enter one gassho-style house. |
| Lunch timing | Eat before or after the main lunch rush, or keep the stop short with snacks. |
| Final stretch | Leave buffer time for photos, souvenirs, restrooms, and the walk back to the bus terminal. |
Alternatively, if you prefer a guided option that handles the Kanazawa transport timing, compare the morning guided tour from Kanazawa before locking in your DIY schedule.
Sample Timetable: Takayama Departure
This Takayama version is also a sample, not a fixed timetable. It works best if you can secure an early bus and give yourself at least 3 hours in the village.
| Time | Activity |
|---|---|
| Early morning | Board from Takayama Nohi Bus Center after confirming whether your chosen service requires a reservation. |
| Morning | Travel to Shirakawa-go. The ride is typically about 50 minutes. |
| After arrival | Use facilities, check the viewpoint conditions, and decide whether to go up first. |
| First hour | Visit the viewpoint if weather and queues look favorable, or begin with the village walk. |
| Middle of visit | Cross Deai Bridge, explore the side lanes, visit one house interior, and take your time with photos. |
| Late morning or early afternoon | Eat before the busiest lunch window if possible. |
| Before departure | Return to the bus terminal with extra time. Do not cut it close, especially if your onward transport is fixed. |
If you want a guided day trip from Takayama with transport included, check the Takayama departure tour details here before deciding.
The 2-Hour Minimum Route: Highlights Only
A 2-hour visit can still work, but only if you accept that this is a highlights-first itinerary. The mistake is trying to squeeze the full 3- to 4-hour experience into half the time.
With only 2 hours, choose one of these two approaches:
- Viewpoint-first version: If the shuttle line is short and the weather is clear, go up early, take your photos, come back down, and do a fast loop through the village center. Skip house interiors unless you have more time than expected.
- Village-first version: If the viewpoint looks crowded, foggy, or stressful, skip it and spend your time on Deai Bridge, the quieter backstreets, and one house interior.
The goal of a short visit is not to do everything. It is to leave feeling that you saw the village properly without spending the whole stop watching the clock.
Seasonal Guide to Shirakawa-go
Shirakawa-go looks and feels different depending on when you visit. The village is photogenic year-round, but the practical experience changes with snow, daylight, crowds, and bus demand.
| Season | Atmosphere | Crowds | What to bring | Best for |
|---|---|---|---|---|
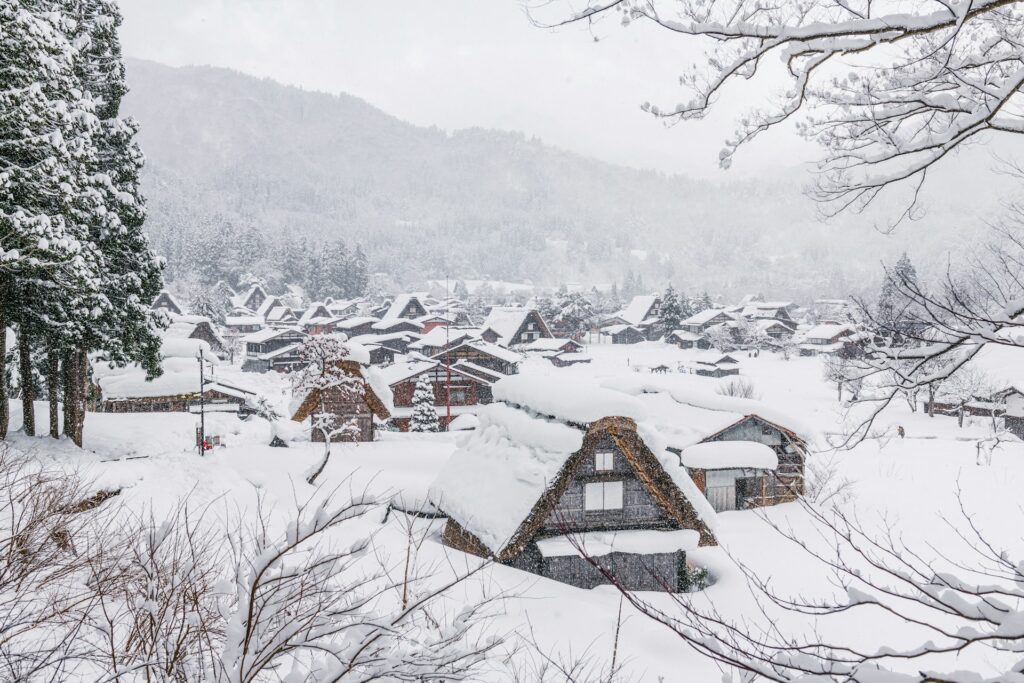
| Winter Dec to Feb |
Snow-covered roofs, short daylight hours, beautiful but cold conditions. | High on weekends and light-up dates; quieter on some weekdays. | Waterproof shoes with grip, thermal layers, gloves, hat, and cash. | Snow scenery and winter photography. |
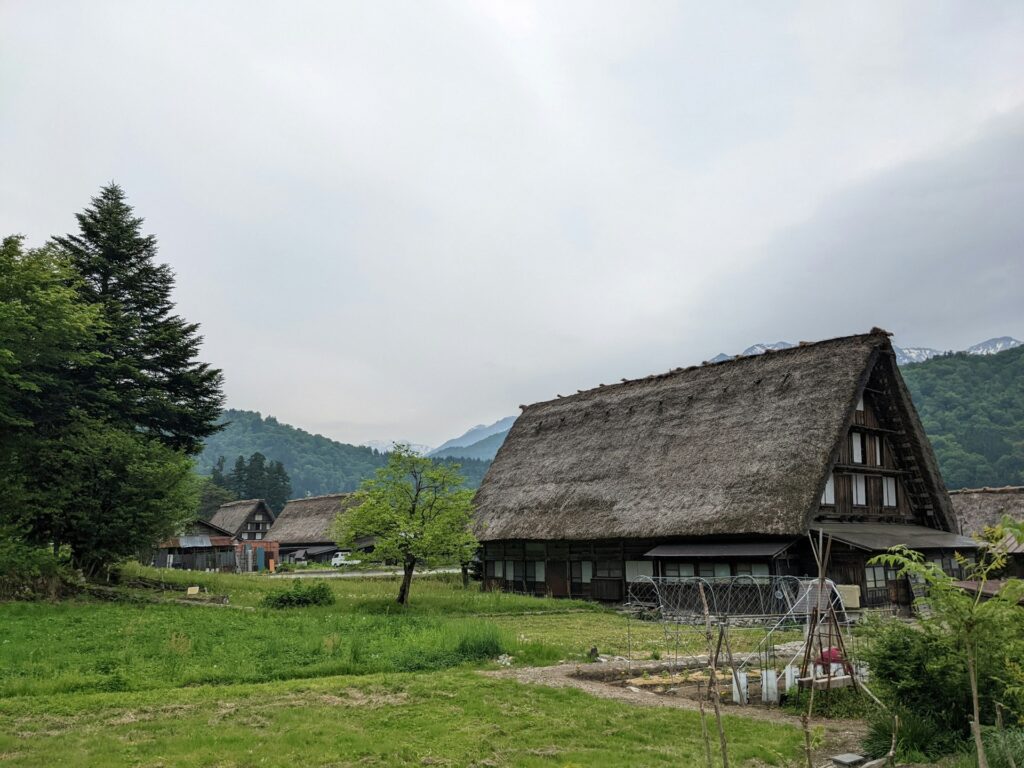
| Spring Mar to May |
Melting snow, fresh greenery, and possible muddy paths in early spring. | Moderate, but Golden Week can be very busy. | Waterproof shoes, light layers, and rain protection. | Milder weather and softer scenery. |
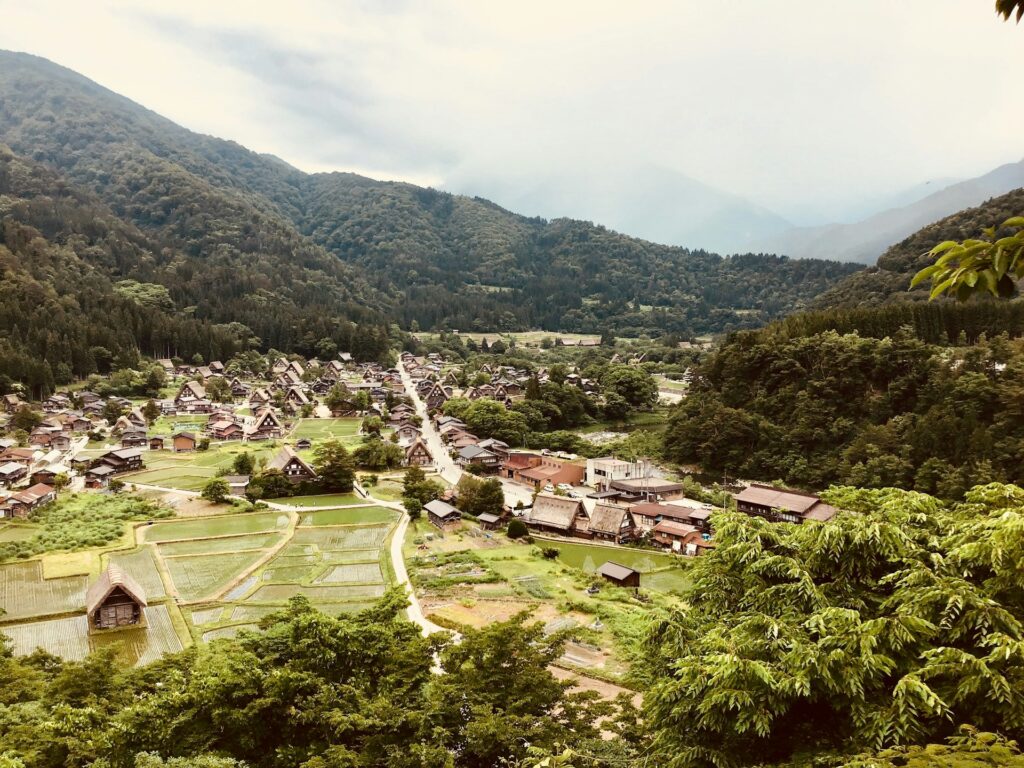
| Summer Jun to Aug |
Green rice fields, warm weather, humidity, and occasional rain. | Moderate to high, especially during holiday periods. | Sun protection, water, light clothing, and rain gear. | Longer daylight and lush views. |
| Autumn Sep to Nov |
Clearer air and fall colors, especially from late October into early November in many years. | Very high on peak foliage weekends. | Comfortable walking shoes, light jacket, and camera. | Photography and classic scenery. |
Shirakawa-go Winter Light-Up 2026
If you are visiting in winter, the Shirakawa-go Winter Light-Up can be a special reason to plan around the village. It is also one of the easiest parts of the trip to misunderstand.
- 2026 scheduled dates: January 12, January 18, January 25, and February 1.
- Scheduled hours: 17:30 to 19:30.
- Reservation rule: The event is reservation-only. Same-day entry without a reservation is not allowed.
- Observation deck access: Viewpoint access depends on the ticket, accommodation, or tour conditions for that year. Check the official event rules before booking.
- Weather and traffic: Heavy snow, road conditions, or operational issues can affect access or lead to changes.
If the light-up is your main reason for visiting, do not treat it like a normal day trip. Plan around confirmed accommodation, a confirmed light-up tour, or the latest official reservation conditions.
Logistics That Change the Day
The biggest mistakes in a Shirakawago itinerary usually come from practical details, not from sightseeing choices. These are the small things that can quietly eat your time if you do not plan for them.
Luggage and Storage
Shirakawa-go is much easier to enjoy with a daypack than with a full suitcase. Rolling luggage through a crowded village, across bridges, or in wet and snowy conditions adds friction fast.
The bus terminal area has coin lockers and a nearby baggage storage service, but availability and hours are limited. Recent official FAQ information lists lockers from around 8:00 AM to 5:00 PM, with smaller lockers around 500 yen and larger lockers around 1,000 yen. Treat this as a planning reference, not a guarantee.
If you are traveling between cities, the smoother move is often to leave larger bags at your departure station or use a luggage forwarding service rather than bringing everything into the village. If you do bring bags, arrive with enough buffer to deal with locker availability.
Winter Conditions
Winter is one of the most beautiful times to visit Shirakawa-go, but it is also less forgiving. Snow, wet ground, and shorter daylight hours make the day feel tighter, especially if you are relying on fixed transport times.
- Footwear: Waterproof shoes with good grip are strongly recommended. Ice grippers can help on icy paths.
- Daylight: Winter daylight is limited, so a late arrival leaves much less time than it might look on paper.
- Transport buffer: Heavy snow can affect road travel. Avoid planning a tight onward connection after your return bus.
- Walking routes: Uphill paths can feel very different under snow or ice. Use the shuttle if walking conditions look unsafe.
Rainy Day Plan
Shirakawa-go is still worth visiting on a rainy day if your schedule is fixed, but you should adjust expectations.
- What changes: The viewpoint may be fogged in, outdoor paths can get slippery, and photos may be less clear.
- What still works: Selected house interiors, shops, and restaurants may still make the visit worthwhile, though opening conditions can vary.
- Best strategy: Prioritize Deai Bridge, one house interior, and a relaxed village walk instead of chasing a perfect viewpoint shot.
If you have flexibility and the weather forecast is much better the next day, postponing can be smart. If your schedule is fixed, go anyway and treat it as a quieter, moodier version of the village.
Visiting with Children or Mobility Needs
Shirakawa-go can work for families and travelers with mobility needs, but it is not a fully barrier-free sightseeing area. Conditions vary by route, season, snow, and individual facility.
- Strollers and pushchairs: Main village paths are generally easier than the viewpoint walking route, but snow, crowds, and narrow areas can make strollers difficult.
- Toilets: Public restrooms are available in key visitor areas, including around the bus terminal, but facilities vary.
- Wheelchair access: Some central village paths are relatively manageable, but gassho-style house interiors often have raised thresholds, narrow entrances, and steep stairs.
- Viewpoint access: Conditions for the shuttle and viewpoint route can vary. Ask at the tourist information desk before committing to the viewpoint.
- Family food: Simple meals such as soba, udon, curry, and snacks are often easier than planning a long sit-down lunch during peak hours.
DIY vs Group Tour vs Private Tour
The right transport style depends less on whether Shirakawa-go is possible by bus and more on how much planning stress you want to carry yourself.
| Feature | DIY Bus Trip | Group Day Tour | Private Tour |
|---|---|---|---|
| Reservation risk | You manage departure times, ticket conditions, and return timing yourself. | The operator handles the main transport plan, but you still follow a fixed schedule. | Most of the route planning is arranged for you. |
| Luggage fit | You need to work around lockers, baggage storage, or station luggage plans. | Usually limited to what the tour operator allows. | Often better for travelers moving between bases, but confirm luggage rules before booking. |
| Same-day flexibility | Limited by fixed departures and return times. | Limited because the whole group follows the same itinerary. | Usually more flexible, depending on the provider and road conditions. |
| Guide or language support | No guide. | Depends on the selected tour. Check guide language and inclusions. | Depends on the selected tour. Check whether it includes a guide, driver-guide, or transport only. |
| Best for | Budget-conscious travelers, solo travelers, and careful planners. | Solo travelers or couples who want a simpler day at a shared price. | Families, couples prioritizing comfort, and travelers short on time. |
| Main trade-off | Lower cost, but more logistics to manage. | Mid-range convenience, but less freedom. | Higher cost, but a smoother day with less friction. |
DIY makes sense if you like managing your own timing and want the lowest-cost way to visit. Group tours are a good middle ground if you want transport handled at a shared price. A private tour makes more sense if you are traveling with family, moving between cities with bags, or trying to combine Shirakawa-go with other stops without turning the day into a transport puzzle.
Compare your options: If a private tour feels more than you need but DIY bus planning still feels stressful, a guided group day tour is worth considering. You can check the Shirakawago and Takayama 1-day group tour from Kanazawa here for current pricing, pickup points, inclusions, and cancellation terms.
For travelers who want more flexibility and a lower-stress day, compare the private tour details here, including pickup conditions, itinerary options, current prices, and recent traveler reviews.
Frequently Asked Questions
How much time is enough for Shirakawa-go?
For most travelers, 3 to 4 hours is the sweet spot. That gives you enough time for the viewpoint, a walk through the village, one traditional house interior, and a food stop without making the visit feel rushed. A 2-hour visit can still work, but it should be treated as a highlights-only stop.
Do I need to book the bus in advance?
You should check and book your transport before building the rest of your itinerary. Many services to Shirakawa-go are reservation-required or become difficult to secure during busy periods. Kanazawa-based trips especially should be planned early, while Takayama still deserves advance checking during holidays, weekends, winter, and foliage season.
Can I visit Shirakawa-go with a suitcase?
Yes, but it is usually not the most comfortable way to do it. The bus terminal area has lockers and luggage storage options, but space and hours are limited. The easier plan is to visit with a daypack and use station storage or luggage forwarding for larger bags.
Which gassho-style house is best if I only visit one?
Wada House is the easiest classic choice for most first-time visitors. Kanda House is a strong option if you care more about interior atmosphere and architectural detail. Nagase House works well if you want a larger structure with a slightly different historical feel.
Is Shirakawa-go still worth it on a rainy day?
Yes, if your schedule is fixed. The viewpoint may be fogged in, but the village can feel quieter and more atmospheric. Focus on Deai Bridge, the village lanes, and one house interior rather than chasing perfect panoramic photos.
Is Shirakawa-go accessible for wheelchair users?
Some central village paths are easier than others, but Shirakawa-go is not fully barrier-free. House interiors often have raised thresholds, narrow entrances, and steep stairs. If accessibility is a major concern, check with the tourist information desk before planning the viewpoint or house interior visits.
Can I see the winter light-up without staying overnight?
The winter light-up is reservation-only, and conditions vary by year. Ground-level viewing, viewpoint access, accommodation access, and tour access can all have different rules. If the light-up is your main reason for visiting, check the latest official event rules and secure the correct reservation well in advance.
Is Shirakawa-go still worth it on a short visit?
Yes, as long as you adjust your expectations. A 2-hour stop can still be worthwhile if you focus on either the viewpoint or the village core instead of trying to do everything at once.
If you are still unsure whether DIY transport is worth the effort, compare the private day trip option in our full guide: Private Shirakawa-go & Takayama day tour guide.
Final Verdict
The best Shirakawago itinerary is the one that matches your transport reality, not the one that tries to pack in the most stops.
- Choose the 3- to 4-hour DIY route if: You can book suitable buses, arrive at a smart time, and want the classic village experience without feeling rushed.
- Choose a 2-hour visit if: You are passing through on a transfer day and can accept a highlights-only version. Pick either the viewpoint or the village core as your priority.
- Choose a group tour if: You want transport handled at a shared price and do not mind following a fixed schedule.
- Choose a private tour if: You are traveling with family, carrying luggage, combining stops, or simply want to reduce schedule stress.
- Choose an overnight stay if: You want quieter morning and evening atmosphere, or if a reservation-only winter light-up experience is central to your trip.
If you already know you want the lower-stress option, check the route details, pickup conditions, current prices, and recent reviews before you commit. You can view the private tour details here.
Prices, opening hours, bus schedules, reservation rules, shuttle operations, luggage storage, event conditions, accessibility details, payment methods, and tour inclusions can change. Always check official transport information and your selected booking page before finalizing your Shirakawa-go itinerary.
Hi, I’m Kai. I’m a Tokyo-based travel writer, tourism industry insider, and the author of a published guidebook for international visitors to Japan. With over 10 years of professional experience at a leading Japanese tourism company, my mission is to help you skip the tourist traps and navigate Japan’s best destinations like a local. I believe the perfect day trip is like a traditional kaiseki meal: a beautiful balance of precise planning and unforgettable seasonal discovery. When I’m not out conducting field research, you’ll usually find me drafting new itineraries with one of my favorite fountain pens!