
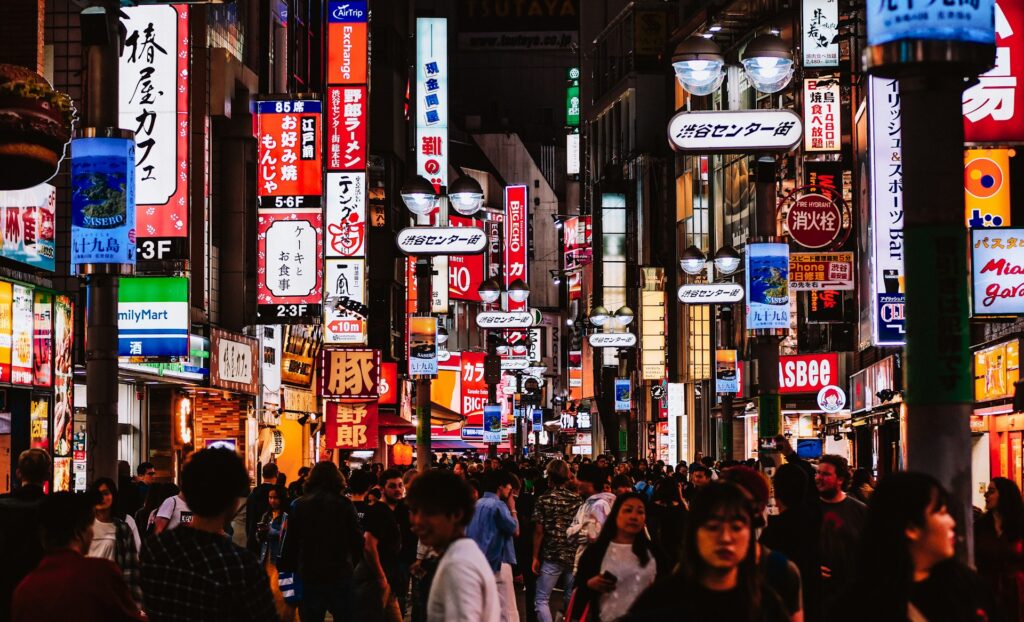
Tokyo is one of the most photographed cities in the world, but the same location can look completely different depending on when you arrive. Sunrise gives you empty temple grounds and soft light. Sunset turns the skyline gold. Night brings neon, crowds, reflections, and cinematic street energy.
This guide is organized by time of day so you can plan a realistic Tokyo photography route by light, budget, crowd level, and gear restrictions. It also includes practical notes on tripods, glass reflections, weather risks, and when a private photo tour may be worth considering.
- Best sunrise spot: Senso-ji Temple in Asakusa for empty temple grounds, red architecture, lanterns, and quiet early-morning streets.
- Best Tokyo Tower view: Shiba Park and Zojoji Temple in the early morning for free ground-level compositions with greenery or temple roofs.
- Best paid sunset view: Shibuya Sky for an open-air skyline view, especially on clear days when the rooftop is open.
- Best free skyline view: Tokyo Metropolitan Government Building in Shinjuku for free observation deck views and a useful backup if paid decks are sold out.
- Best neon areas: Shinjuku for narrow alleys and nightlife atmosphere; Shibuya for crowds, digital billboards, and Scramble Crossing energy.
- Biggest photography risk: Tripod restrictions, crowded streets, glass reflections, and rooftop closures during bad weather or strong winds.
Tokyo Photography Rules to Know Before You Go
Before packing your gear, it is important to understand how photography works in busy Tokyo locations. Many of the best viewpoints and streets are easy to enjoy, but they are not always easy places to set up a tripod, gimbal, selfie stick, or large camera bag.
- Tripod rules vary by location: Many major observation decks, indoor viewpoints, crowded streets, and narrow alleys restrict tripods, monopods, gimbals, or selfie sticks. Do not assume you can use a tripod just because a location is outdoors.
- Shibuya Sky has strict rooftop rules: As of 2026, loose items such as bags, hats, tripods, and selfie sticks are not allowed on the rooftop. Cameras generally need a strap or must fit in your pocket. Store other belongings before entering the open-air area.
- Weather can change rooftop plans: Shibuya Sky’s rooftop may close during bad weather, strong winds, or other safety-related conditions. If you book a sunset slot, have a backup plan such as the Tokyo Metropolitan Government Building or a ground-level neon shoot in Shibuya or Shinjuku.
- Glass reflections are a real problem: Indoor observation decks can create strong reflections at night. A rubber lens hood, dark jacket, or careful shooting angle can help reduce glare.
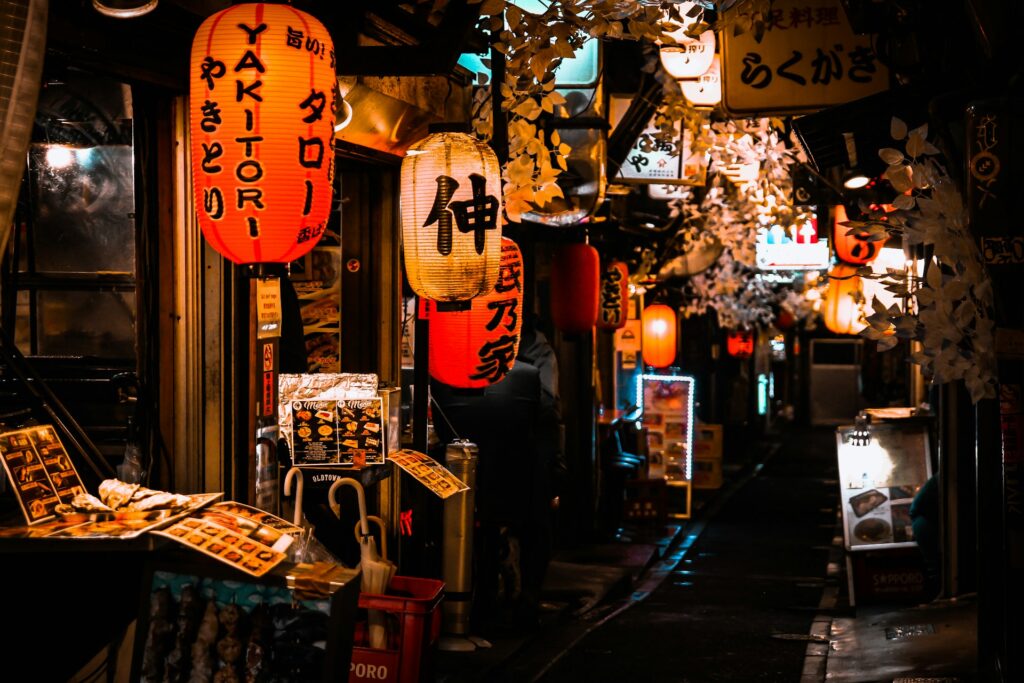
- Respect people and businesses: In restaurant alleys such as Omoide Yokocho, avoid blocking narrow walkways, setting up large gear, or pointing your camera directly at people eating and drinking.
- Carry light gear: A small camera body, fast lens, phone, and compact bag are usually more practical than a full tripod-based setup in Tokyo’s busiest districts.
Best Tokyo Photo Spots by Time of Day
| Spot | Best Time | Best For | Access | Tripod Risk | Crowd Risk | Cost |
|---|---|---|---|---|---|---|
| Senso-ji Temple | Sunrise | Temple gates, lanterns, empty streets | Asakusa Station area | Low if respectful | Low early, high later | Free |
| Shiba Park & Zojoji Temple | Sunrise | Tokyo Tower with greenery or temple roofs | Daimon, Onarimon, or Shibakoen area | Low in open areas | Low early | Free |
| Asakusa Culture Tourist Information Center | Morning / opening time | Senso-ji approach from above, Nakamise Street view | Near Kaminarimon Gate | Moderate to high indoors | Low early | Free |
| Shibuya Sky | Sunset | Open-air skyline, Shibuya Crossing from above | Shibuya Station area | High / not allowed on rooftop | High | Paid |
| Tokyo Metropolitan Government Building | Sunset or night | Free skyline views, Shinjuku cityscapes | Tochomae or Shinjuku Station area | High indoors | Medium | Free |
| Shinjuku | Night | Neon alleys, nightlife, rainy reflections | Shinjuku Station area | Very high | High | Free |
| Shibuya Crossing | Night | Billboards, crowds, motion blur, urban energy | Shibuya Station area | Very high | Very high | Free |
Best Tokyo Sunrise Photo Spots
Tokyo is famously crowded, but the city feels completely different before 7:00 AM. Sunrise is the best time to photograph traditional Tokyo locations without hundreds of people in your frame. Most early shoots are free, and the soft morning light makes temple architecture, gates, and pagodas look especially vivid.
Senso-ji Temple, Asakusa
During the day, Kaminarimon Gate, Nakamise Street, and the main hall of Senso-ji are packed with visitors. At sunrise, the same area becomes one of the most reliable Tokyo photo spots for clean architectural shots.
- Why it works: You can photograph the red lanterns, five-story pagoda, temple buildings, and shopping street shutters before the crowds arrive. The temple grounds are usually accessible even before the main hall opens.
- Best time: From about 30 minutes before sunrise until around 6:30 AM. The exact crowd pattern depends on the season. Summer sunrise is very early, while winter sunrise is much later.
- Best for: First-time visitors, temple photography, empty street shots, wide-angle compositions, and quiet morning walks.
- Also worth knowing: Senso-ji is also beautiful at night, when the main buildings and pagoda are typically lit up until around 11:00 PM. This makes it a strong backup if you miss sunrise.
- Access: Use Asakusa Station on the Ginza Line, Asakusa Line, Tobu Skytree Line, or Tsukuba Express, then walk toward Kaminarimon Gate.
- Avoid if: You only have late morning available. By then, the area usually becomes too busy for clean photos.
- Tripod note: Use caution and stay out of main walking routes, especially because locals may visit early for prayer.
- Cost: Free.
Asakusa Culture Tourist Information Center
The Asakusa Culture Tourist Information Center sits across from Kaminarimon Gate and offers a free elevated view toward Nakamise Street and Senso-ji. It is not a true sunrise spot because the building opens in the morning, but it is a useful post-sunrise stop if you want a higher viewpoint in Asakusa without paying for a tower.
- Why it works: The observation terrace gives you a straight view down Nakamise Street toward the temple, with Tokyo Skytree visible in the background from some angles.
- Best time: Visit close to opening time for a calmer experience. It is better treated as a morning viewpoint than a dawn location.
- Best for: Elevated temple approach shots, Asakusa context photos, and a free warm-up spot before exploring the area further.
- Access: Near Kaminarimon Gate and Asakusa Station.
- Tripod note: Do not rely on using a tripod on the indoor or terrace areas. Shoot handheld and keep your setup compact.
- Cost: Free.
Shiba Park and Zojoji Temple
Tokyo Skytree is taller, but Tokyo Tower’s red and white design remains one of the most recognizable subjects in the city. Shiba Park and nearby Zojoji Temple give you several ways to frame it without paying for an observation deck.
- Why it works: Shiba Park gives you greenery in the foreground, while Zojoji Temple lets you contrast traditional temple roofs with Tokyo Tower rising behind them. Both are within easy walking distance of each other.
- Best time: Early morning for softer light, fewer people, and cleaner skies.
- Best for: Tokyo Tower photos, classic Tokyo compositions, and free outdoor shooting with flexible framing options.
- Access: Daimon, Onarimon, Shibakoen, or Hamamatsucho can all work depending on your route.
- Avoid if: You want a high-angle skyline view. This is a ground-level photo spot, not an observation deck.
- Tripod note: Usually more practical in open park areas than in crowded streets, but avoid blocking paths and check local signs.
- Cost: Free for the park and general temple grounds.
Best Tokyo Sunset and Golden Hour Spots
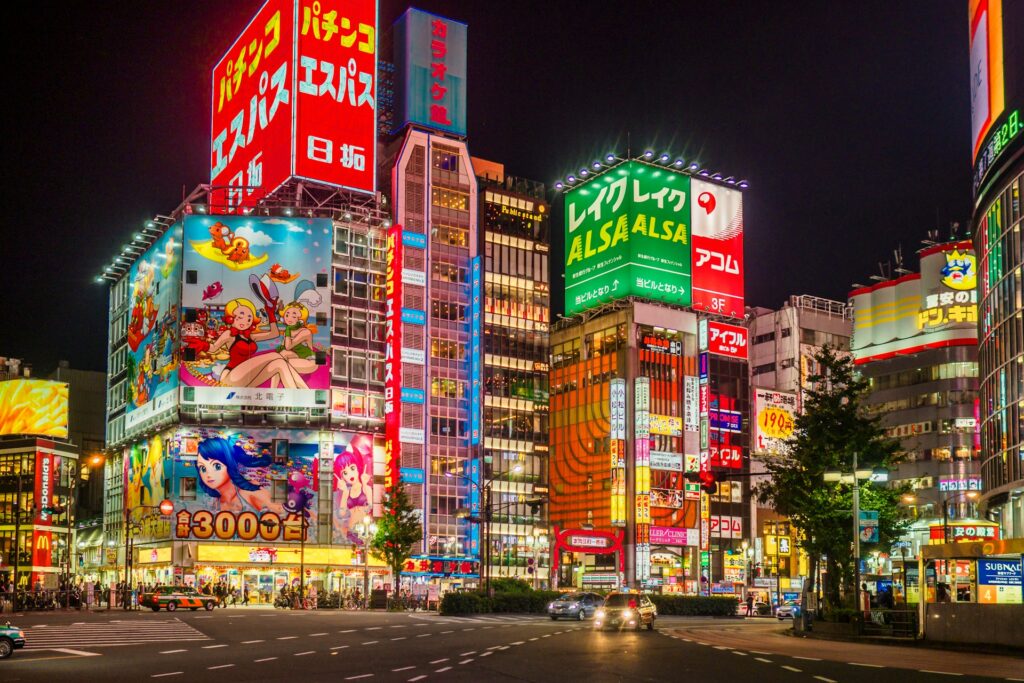
Sunset is when Tokyo’s skyline is at its most dramatic. On clear days, you may see Mount Fuji in the distance, while the city gradually shifts from golden light to glowing office towers and street-level neon. This is the one time of day when paying for a viewpoint can be worth it, but you need to plan ahead and accept some weather risk.
Shibuya Sky
Shibuya Sky is one of the most popular observation decks in Tokyo because it combines an open-air rooftop with direct views over Shibuya, Tokyo Tower, Tokyo Skytree, and the wider city skyline.
- Why it works: The open-air rooftop avoids the glass-reflection problem that affects many indoor observation decks, and the view over Shibuya Crossing gives photographers a strong sense of place.
- Best time: Sunset is the most photogenic time. Choose an entry slot that gives you enough time to enter, store restricted belongings, and reach the rooftop before golden hour.
- Booking note: Sunset slots are popular, and the official site generally sells tickets only within a limited advance window. Book as early as your chosen ticket platform allows, and always check the current release schedule before planning around one specific time.
- Weather risk: The rooftop may close during bad weather, strong winds, or other safety conditions. This is the main downside for photographers planning a once-only sunset shoot.
- Gear rules: Tripods, selfie sticks, loose hats, and large bags are not allowed on the rooftop. Bring a camera strap and avoid carrying more gear than you need.
- Access: Shibuya Station area. Follow signs for Shibuya Scramble Square and SHIBUYA SKY.
- Cost: As of 2026, adult online tickets are typically ¥2,700 before 15:00 and ¥3,400 from 15:00 onward. Counter tickets, when available, usually cost more. Prices and ticket rules can change, so confirm on the official or selected booking page before buying.
If your travel dates are confirmed, it is worth checking availability early. Shibuya Sky is not the cheapest Tokyo viewpoint, but the open-air rooftop makes it more useful for photographers than many glass-only decks.
👉 Compare ticket options and availability for Shibuya Sky
Tokyo Metropolitan Government Building, Shinjuku
If Shibuya Sky is sold out, too expensive, or risky because of weather, the Tokyo Metropolitan Government Building is one of the best free observation decks in Tokyo.
- Why it works: The observatories sit high above Shinjuku and give you free panoramic views over the city. On very clear days, Mount Fuji may be visible to the west, but it is never guaranteed.
- Best time: Late afternoon into early evening is ideal if you want both daylight and night views.
- Best for: Budget travelers, free skyline photography, and a backup plan when paid observation decks are sold out or rooftop areas are closed due to weather.
- Access: Tochomae Station is the closest option. JR Shinjuku Station also works if you do not mind a longer walk through the west side of Shinjuku.
- Avoid if: You strongly dislike shooting through glass. Reflections can be difficult at night, especially when the room is bright.
- Closure note: Closure days vary by deck, and schedules can change for maintenance or events. Check the official observatory information before visiting.
- Tripod note: Do not plan on using a tripod. Shoot handheld and use a rubber lens hood, dark jacket, or careful angle to reduce reflections.
- Cost and hours: Free. As of the latest official Tokyo tourism listing checked in 2026, the observatories are generally open from 9:30 AM to 10:00 PM, with last entry 30 minutes before closing.
Best Tokyo Neon Photo Spots
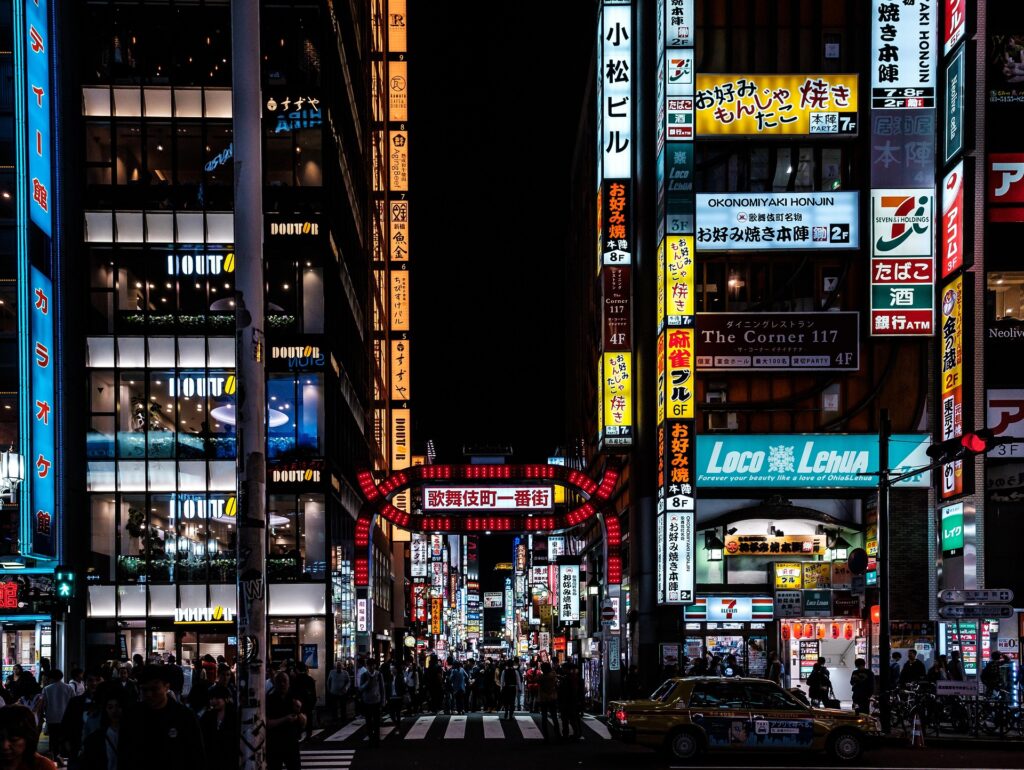
After dark, Tokyo becomes a very different city for photographers. Shibuya and Shinjuku are the easiest areas for neon, crowds, and cinematic street scenes, but they are also some of the hardest places to shoot carefully because space is limited and people move quickly.
A fast lens, good phone night mode, or camera with strong high-ISO performance helps much more than a tripod in these areas. In most neon districts, handheld shooting is the realistic choice.
Shinjuku — Omoide Yokocho and Kabukicho
Shinjuku is the strongest area in Tokyo for neon photography because it gives you several different moods within a short walk: narrow food alleys, bright nightlife streets, giant signs, and cinematic reflections after rain.
- Why it works: Omoide Yokocho has lanterns, steam, tiny restaurants, and narrow lanes. Kabukicho gives you a brighter, more futuristic neon look with larger signs and wider streets. The contrast between the two makes Shinjuku especially versatile.
- Best time: After dark, once the signs are fully lit and the area has more atmosphere. Blue hour can work well for shots that mix deep sky color with warm neon.
- Best for: Neon streets, cinematic city shots, street portraits, rainy-night reflections, and moody Tokyo travel photos.
- Access: Shinjuku Station area. Omoide Yokocho is near the west side of the station, while Kabukicho is northeast of the station.
- Avoid if: You need space for a tripod, a long portrait setup, or repeated takes in the same spot. This is a fast-moving environment.
- Tripod note: Do not plan to use a tripod in Omoide Yokocho. The alleys are too narrow, and blocking walkways is not respectful to businesses or customers. Use a high ISO, a fast lens, or image stabilization instead.
- Recommended settings: For handheld neon shots, start around ISO 1600–3200, aperture f/1.8–f/2.8 if your lens allows, and shutter speed around 1/60–1/125 depending on how much motion blur you want.
- Photo etiquette: Avoid pointing your camera directly into restaurants or at people eating. In Kabukicho, avoid photographing touts or intoxicated people clearly. If you are unsure about the area, read this guide to navigating Kabukicho safely.
Shibuya Scramble Crossing and Center Gai
Shibuya is best for scale and movement. The crossing, digital billboards, and crowds create one of the most recognizable Tokyo street photography scenes, especially at night.
- Why it works: You can shoot from ground level for an immersive crowd scene, or walk into Center Gai for layers of signs, shops, and pedestrian movement. Overhead views are possible from some nearby buildings, but access, crowding, and shooting conditions can change.
- Best time: Early evening to night, when the screens are bright but the trains are still running and the area feels active. Blue hour gives you a good balance between ambient sky color and artificial light.
- Best for: Crowds, billboards, motion blur, wide-angle street scenes, and urban energy.
- Access: Shibuya Station area. The crossing is beside the Hachiko-side exits.
- Avoid if: You want a calm self-portrait. The moving crowds and mixed lighting make this one of the hardest places to photograph yourself.
- Tripod note: A tripod is not practical at the crossing or in Center Gai. Use handheld settings, a fast lens, or a phone night mode instead.
- Recommended settings: For motion blur on the crossing, try around 1/4–1/15 second with a stabilized lens or by bracing the camera against a solid surface. For crisp handheld shots, keep your shutter speed faster and raise ISO as needed.
Other Tokyo Photo Spots to Consider
If you have extra time, these alternatives are worth adding to your Tokyo photography route. They are especially useful if the weather changes, Shibuya Sky sells out, or you want more variety beyond the classic sunrise, sunset, and neon locations.
- Tokyo Station and Marunouchi: Best for architecture, evening lights, and rainy reflections around the station area. The brick facade of Tokyo Station is especially photogenic at golden hour and after dark.
- Ginza and Yurakucho: Good for cleaner city scenes, luxury storefronts, under-track restaurants, and a more polished night photography look with fewer chaotic crowds than Shibuya or Shinjuku.
- Akihabara: A strong option for electric signs, anime billboards, game-center lights, and a different kind of cyberpunk-style street photography. Best shot at night when the electronics stores are lit up.
- Hijiri Bridge, Ochanomizu: Good for urban train views, bridge architecture, and layered city compositions around the Kanda River. Use Ochanomizu or Shin-Ochanomizu as your access point rather than Kudanshita.
- Meiji Jingu and Harajuku: The massive torii gate and forested approach are good for moody daytime photos, while nearby Harajuku offers colorful street scenes. Respect shrine etiquette and avoid treating worship areas like a fashion shoot backdrop.
- Bunkyo Civic Center: In normal years, this is a useful free skyline viewpoint. However, its 25th-floor observation lounge is closed for renovation as of 2026 and is scheduled to reopen in early December 2026. Do not plan around it unless the official page confirms it has reopened.
Tokyo Photography Gear & Settings Guide
You do not need expensive gear to shoot great photos in Tokyo, but knowing what works for each time of day helps you avoid missed shots and frustrating setups.
| Time of Day | Recommended Lens | Tripod | Key Challenge | Tip |
|---|---|---|---|---|
| Sunrise | 16–35mm or 24–70mm | Sometimes possible outdoors | Low light, quiet spaces | Use a wide aperture or raise ISO instead of slowing the shutter too much around moving people |
| Sunset | 24–70mm or 70–200mm | Rarely allowed at decks | Glass reflections, crowded viewpoints, changing light | Bring a rubber lens hood or dark jacket for indoor decks; shoot extra frames as light changes quickly |
| Night neon | 35mm f/1.8, 24–70mm f/2.8, or a good phone camera | Not practical | Mixed light sources, moving people, narrow streets | Use a fast lens, raise ISO, and experiment with slow shutter only where it is safe and respectful |
DIY vs Private Photo Tour for Tokyo Night Shoots
Shooting Tokyo by yourself is rewarding if you enjoy scouting, waiting for the right moment, and adjusting camera settings in busy places. However, night portraits are much harder than cityscapes because tripods are impractical, lighting changes constantly, and crowds move through your frame.
| Decision Point | DIY Photography | Private Photo Tour |
|---|---|---|
| Best For | Cityscapes, street scenes, architecture, and flexible wandering. | Portraits of yourself, couples, solo travelers, and special-trip memories. |
| Cost | Free, except for transport and any observation deck tickets. | Paid, but you get help with route, posing, framing, and edited photos. |
| Tripod and Selfie Difficulty | High in neon areas. Tripods are usually impractical, and selfies can look rushed. | Lower, because someone else handles the camera while you focus on the experience. |
| Low-Light Skill Needed | Medium to high, especially in Shinjuku and Shibuya. | Lower for the traveler, since the photographer manages the difficult lighting. |
| Flexibility | Very high. You can stay longer, change streets, or wait for rain reflections. | Depends on the tour route and schedule. |
| Best Choice If | You enjoy scouting, shooting, and experimenting with settings. | You want strong photos of yourself without managing gear in crowded streets. |
If you mainly want to photograph buildings, streets, and cityscapes, DIY is usually enough. If you want to be in the photos yourself, especially at night in Shibuya or Shinjuku, a private photo tour can reduce the stress of posing, lighting, and working around crowds.
👉 Check availability for the Tokyo: Private Shibuya Neon Lights Photo Tour
Frequently Asked Questions
What is the best Tokyo photo spot for first-time visitors?
Senso-ji Temple at sunrise is one of the best Tokyo photo spots for first-time visitors because it is free, easy to reach, visually iconic, and much calmer early in the morning. For skyline photos, Shibuya Sky is the most dramatic paid option, while the Tokyo Metropolitan Government Building is the best free alternative.
Can I use a tripod in Tokyo?
Sometimes, but not everywhere. Open parks may be more flexible if you do not block paths, but many observation decks, crowded streets, narrow alleys, and indoor viewpoints restrict tripods, monopods, gimbals, or selfie sticks. Always check the current rules for each location before bringing a tripod.
Can I use a tripod at Shibuya Sky?
No, you should not plan on using a tripod at Shibuya Sky. As of 2026, tripods, selfie sticks, large bags, loose hats, and similar items are not allowed on the rooftop area. Cameras generally need a strap or must fit in your pocket. Other major observation decks also often restrict tripods, though the exact rules vary by facility.
Is Shibuya Sky worth it for photographers?
Shibuya Sky is worth it if you want an open-air skyline view and can book a good time slot. It is especially strong around sunset, but it has two drawbacks: sunset tickets are popular, and the rooftop can close during bad weather or strong winds. If you want a free or weather-safer backup, use the Tokyo Metropolitan Government Building instead.
What time should I visit Shibuya Sky for the best sunset photos?
Choose an entry slot that gives you enough time to enter, store restricted belongings, and reach the rooftop before golden hour. Sunset is the most popular time, so check availability as early as your ticket platform allows and confirm the current release schedule before planning around one exact slot.
Where can I take Tokyo Tower photos for free?
Shiba Park and Zojoji Temple are two of the easiest free places to photograph Tokyo Tower. Shiba Park gives you greenery and open space, while Zojoji Temple lets you frame Tokyo Tower behind traditional temple buildings.
Where should I shoot Tokyo neon at night?
Choose Shinjuku if you want alleys, nightlife, lanterns, and dense neon. Choose Shibuya if you want crowds, digital billboards, and the famous Scramble Crossing. For a less chaotic alternative, try Ginza, Yurakucho, or Akihabara depending on the mood you want.
Are Tokyo’s neon streets safe for night photography?
Tokyo is generally very safe at night, including busy areas such as Shinjuku and Shibuya. Still, use common sense with expensive gear, avoid blocking walkways, and be careful about photographing people clearly in nightlife districts. In Kabukicho, avoid taking direct photos of touts or intoxicated people. Read more about how to navigate Kabukicho safely before your shoot.
What camera settings should I use for night photography in Tokyo?
For handheld night shots in Shinjuku or Shibuya, start around ISO 1600–3200, aperture f/1.8–f/2.8 if your lens allows, and shutter speed around 1/60–1/125. For intentional motion blur on Shibuya Crossing, try a slower shutter speed such as 1/4–1/15 second with stabilization or by bracing the camera against a solid surface.
Is Bunkyo Civic Center open for skyline photos?
Not at the time of this update. The 25th-floor observation lounge is closed for renovation as of 2026 and is scheduled to reopen in early December 2026. Until the official page confirms it has reopened, use the Tokyo Metropolitan Government Building or another open observation deck instead.
Final Verdict: Which Tokyo Photo Spots Should You Prioritize?
If this is your first Tokyo photography trip, start with Senso-ji at sunrise, choose either Shibuya Sky or the Tokyo Metropolitan Government Building for sunset, and finish with Shinjuku or Shibuya for neon at night. That route gives you the strongest variety without trying to cover too many neighborhoods in one day.
Choose sunrise at Senso-ji if: You want iconic temple photos, empty streets, and a calm start to your day. This is the single most reliable spot for clean, crowd-free architecture shots.
Choose Shibuya Sky for sunset if: You are willing to book ahead, accept the weather risk, and want an open-air skyline view. It is the strongest paid option for photographers who want dramatic city views without shooting through glass.
Choose the Tokyo Metropolitan Government Building if: You are on a budget, want a free skyline option, or need a backup when rooftop decks are closed, sold out, or too expensive.
For neon photography: Visit Shinjuku if you want moody alley shots and intimate neon. Visit Shibuya if you want scale, movement, crowds, and billboards.
For solo travelers and couples who want portraits: Shooting yourself in neon areas is difficult due to mixed lighting, tripod restrictions, and moving crowds. A private photo tour is not necessary for cityscape photography, but it can make a real difference if you want strong photos of yourself in these locations.
👉 Check availability for the Tokyo: Private Shibuya Neon Lights Photo Tour
Prices, opening hours, transport details, rooftop rules, observation deck closures, ticket conditions, photography rules, and tour inclusions can change. Always check official sources and your selected booking page before finalizing your Tokyo photography route.
Hi, I’m Kai. I’m a Tokyo-based travel writer, tourism industry insider, and the author of a published guidebook for international visitors to Japan. With over 10 years of professional experience at a leading Japanese tourism company, my mission is to help you skip the tourist traps and navigate Japan’s best destinations like a local. I believe the perfect day trip is like a traditional kaiseki meal: a beautiful balance of precise planning and unforgettable seasonal discovery. When I’m not out conducting field research, you’ll usually find me drafting new itineraries with one of my favorite fountain pens!