
Mount Daisen looks simple on paper: one main trail, a well-marked route and a summit at 1,709 m. In practice, the Natsuyama Trail is a six-hour walk dominated by wooden and stone steps, and the climb asks more of your legs than the phrase “beginner-friendly” suggests.
The good news is that the route is easy to follow and does not require technical climbing. The honest version is that this is a real mountain day, not a scenic stroll. When I climbed the Natsuyama Trail during an autumn holiday a few years ago, what surprised me most was how relentlessly the wooden and stone steps continued, and how much fatigue had built up in my calves by the time I reached the summit.
Planning to hike without a car? Relying on the bus from Yonago can make an early start and a six-hour hike difficult to fit together. Staying near the trailhead gives you more flexibility without rushing the descent. Check available dates and room options for Hotel Daisen Shirogane on Klook if you are considering an overnight stay before the hike.
Quick Verdict: Is the Mount Daisen Hike Worth It?
Yes, if you have a full day, a reasonable level of fitness and a dry, snow-free trail. The views from Misen Peak over the Sea of Japan and the Yumigahama Peninsula are the reward, and the route itself is straightforward enough for hikers with limited mountain experience.
No, if you are looking for an easy walk with a view, have knee or ankle problems that worsen on long descents, or want to attempt the standard route in snow or ice without winter equipment and experience.
Best for: fit beginners with some hiking experience, travelers who enjoy mountain scenery, and anyone with a full day to spare.
Not ideal for: travelers expecting a short scenic walk, people who struggle with prolonged climbing and descent, and anyone treating the route as a winter hike without the necessary skills.
If you want to start early, staying near the trailhead is the simplest way to avoid building your whole day around a sparse bus timetable.
Mount Daisen Hike at a Glance
| Item | What to Know |
|---|---|
| Trail | Natsuyama Trail (夏山登山道), the main route to the summit |
| Summit reached | Misen Peak, 1,709 m |
| Highest point | Kengamine, 1,729 m, but the ridge to it is closed |
| Duration | About 6 hours round trip including breaks; roughly 3 hours up and 2 hours 30 minutes down |
| Distance | About 4 km one way on the Natsuyama Trail; the 8.2 km figure refers to the JNTO loop from Bakuroza |
| Difficulty | Beginner-accessible in suitable, snow-free conditions, but physically demanding |
| Terrain | Beech forest, then long sequences of wooden and stone steps; steeper, rougher ground around the 7th station |
| Water | No water sources on the main climb |
| Toilets | Trailhead and summit shelter; a portable toilet booth only at the 6th station |
| Season | Snow usually covers the mountain from late November to late April |
| Current restriction | The summit boardwalk main line is closed for renovation; the Ishimuro Course is open as a signed alternative (as of November 2026) |
Is the Mount Daisen Hike Difficult?
It helps to separate two kinds of difficulty. Technically, the Natsuyama Trail is not hard. The path is obvious, the junctions are signed, and there is no scrambling or exposure that requires a rope. Navigationally, it is one of the simpler mountain routes in the region.
Physically, it is a different story. The trail climbs roughly 900 m over a long series of steps, and the descent repeats the same movement for another two and a half hours. That combination is what catches people out.
The mistake I see first-time visitors make is reading the official “beginner-friendly” label as a promise that the day will feel easy. The label describes the route, not the effort. A fit walker with a steady pace will enjoy it. Someone who last climbed a mountain years ago, or who spends most of the day sitting, will find the stairs punishing.
Can Beginners Hike Mount Daisen?
Yes, with conditions. You should be able to walk for five to six hours with breaks, handle repeated stair climbing, and still have enough leg strength left for the descent. Recent hiking experience helps, but it does not need to be mountainous. Regular hill walks, long city walks or a few stair-heavy sessions in the weeks before your trip are useful preparation. If you are based in the capital and want to build up your fitness, starting with some easy hikes near Tokyo can be a good stepping stone.
Be more cautious if you have knee, hip or ankle problems that flare up on downhill sections, if you have not walked more than two hours in recent months, or if you are attempting the route in wet, icy or snowy conditions. The trail is not exposed to cliffs for most of its length, but the constant steps load the legs in a way that flat walking does not.
Children who are used to hiking can manage the route, but the six-hour estimate assumes steady progress. Families should plan extra time, carry more water than they think they need, and be ready to turn around at the 6th station.
Why the Stairs Make the Hike Feel Harder Than Expected
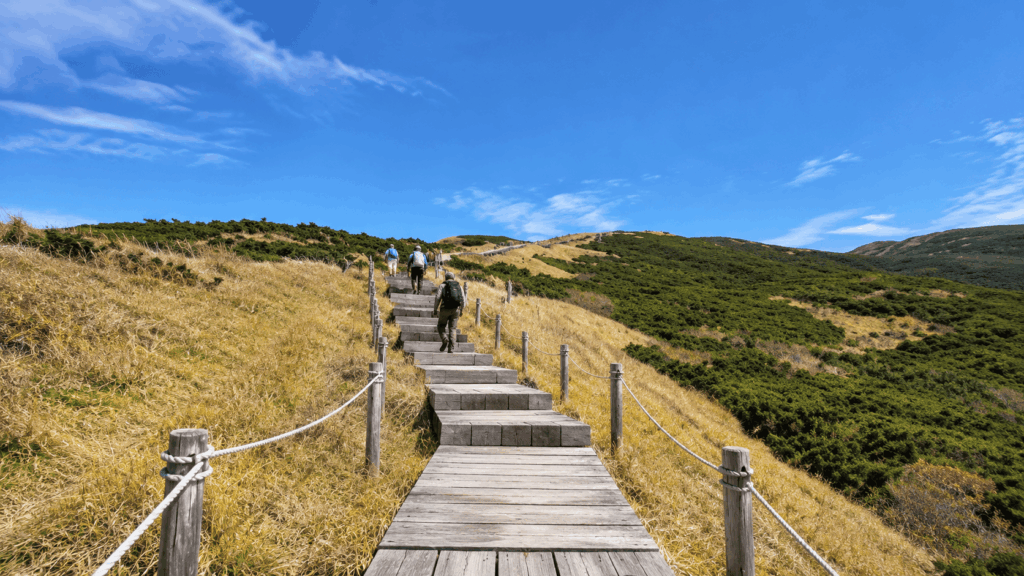
The Natsuyama Trail is not a gentle dirt path with occasional steps. From the first section onward, wooden and stone steps form most of the climb. Each step is small, but the repetition adds up: your calves, thighs and hip flexors work through thousands of contractions, and the descent loads the same muscles in reverse.
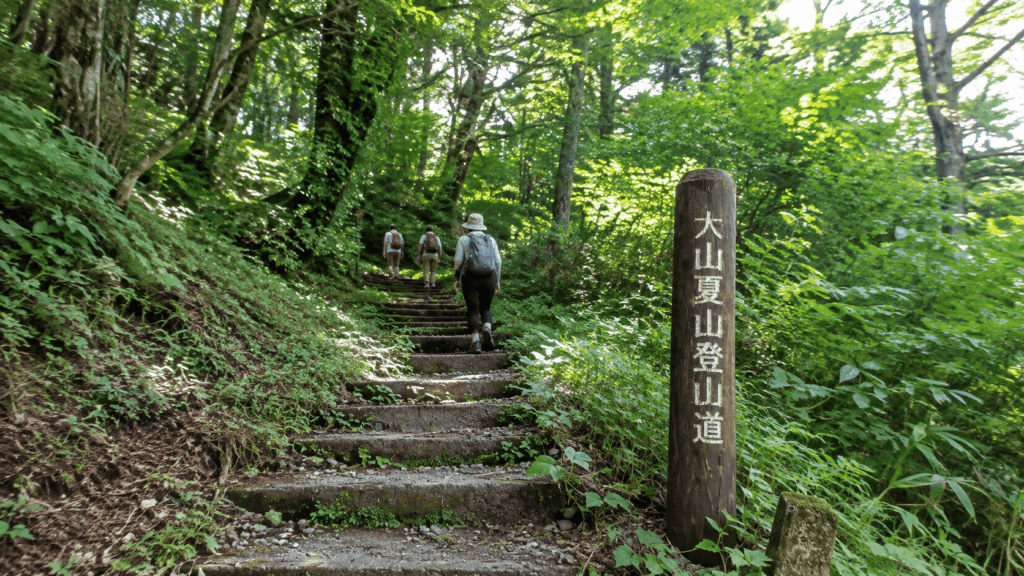
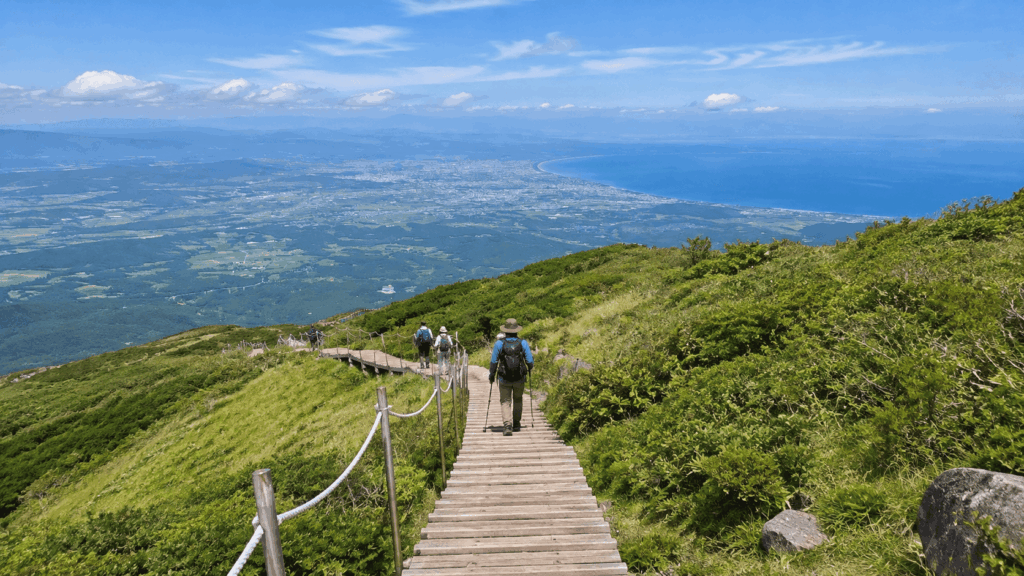
That is why the hike often feels harder on the way down than on the way up. The climb is tiring but rhythmic. The descent demands control, and tired legs tend to get sloppy near the end. Recent hikers consistently mention sore knees and heavy legs after the descent, and many say trekking poles helped. Many hikers use poles, and it is easy to see why by the time you reach the lower stations.
The station markers are genuinely useful here. Treat each one as a chance to check your breathing, adjust your layers and decide whether your pace is sustainable. If you are already struggling before the 3rd station, the summit is probably not the right goal for the day.
Which Trail Should You Take to Misen?
For a first visit, the Natsuyama Trail is the default choice. It is the route the local tourism association recommends for beginners, it starts near Daisenji Temple, and it leads directly to Misen Peak, the summit that ordinary hikers reach.
Do not confuse Misen with Kengamine. Kengamine is the highest point on Mount Daisen at 1,729 m, but the ridge leading to it has been closed because of dangerous erosion and rockfall. The route to Misen is the one to plan for.
There is also a loop option via the Gyojadani Trail, and a signed detour around the closed summit boardwalk via the Ishimuro Course. Both are worth knowing about, but neither should be added casually on a first hike.
Natsuyama Trail — The Standard Route to Misen
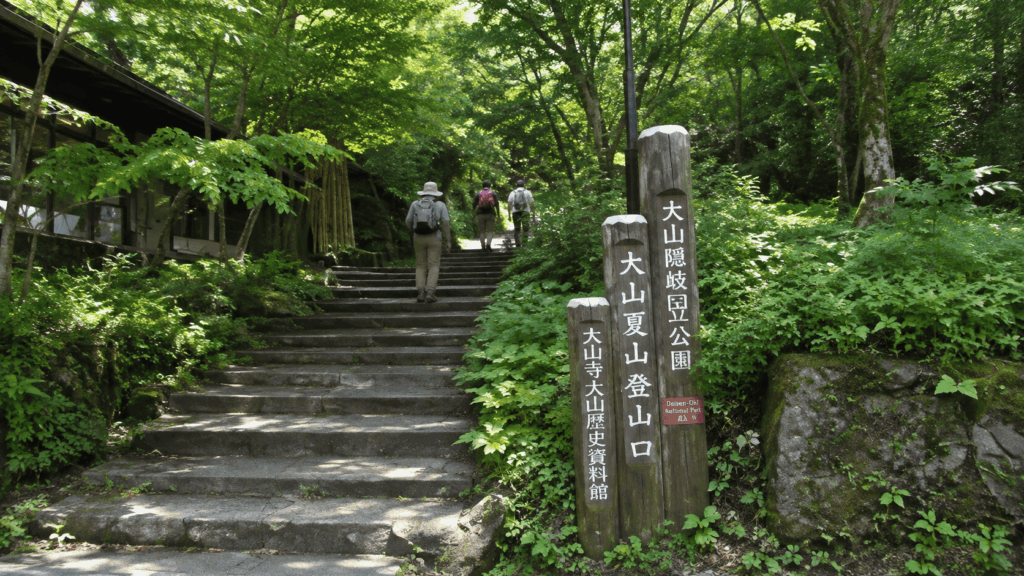
The route begins near the Natsuyama trailhead above Daisenji Temple. The first section passes through one of western Japan’s largest beech forests, with the trail alternating between dirt, stone steps and wooden steps. The forest is dense enough to shade the lower route in summer, but it also hides the scale of what is ahead.
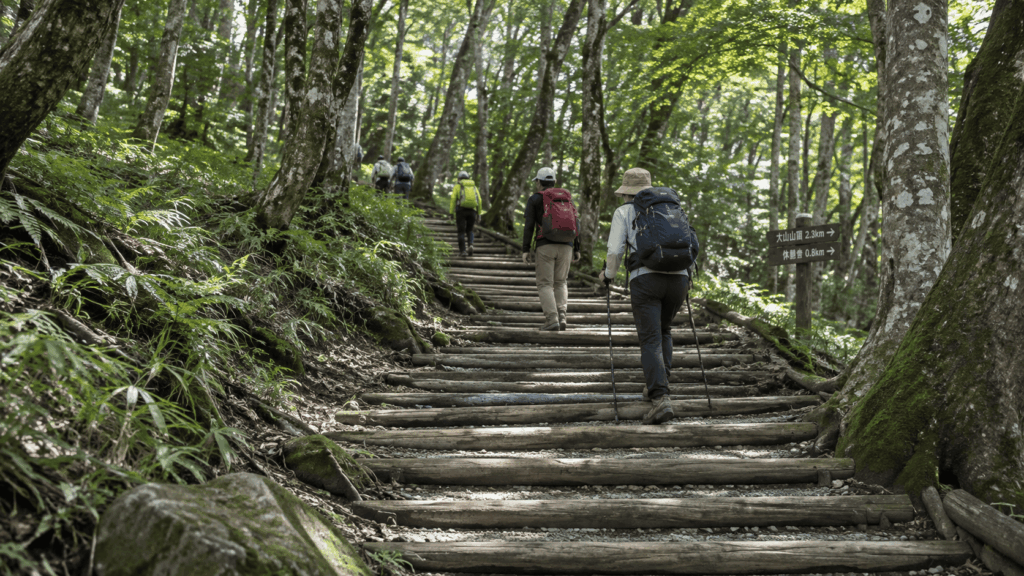
Around the 3rd station, the gradient stays steady. The 6th station is the first real landmark: a small shelter, a view of the Daisen North Face and Sankoho Peak, and a portable toilet booth. There is no water here, and no tap. From the 6th station, the trail becomes steeper and rougher around the 7th station, where loose stones and rockfall are a genuine concern. Above the 8th station, the route reaches a boardwalk and the dwarf Japanese yew community, then continues to the summit plateau.
As of November 2026, the main summit boardwalk is closed for renovation. The Ishimuro Course remains open and is the signed way around the closure. That means the final approach may not match older photos or older route descriptions. Follow the signs on the day rather than a downloaded map from a previous year.
Misen vs Kengamine — Which Summit Can You Reach?
Misen Peak, at 1,709 m, is the summit most hikers reach on Mount Daisen. It has the summit shelter, the views and the social media photos. Kengamine, at 1,729 m, is the true highest point, but the connecting ridge is closed and should not be treated as an extension of the hike.
This matters because some English-language sources describe Mount Daisen as a 1,729 m peak without explaining the closure. If your goal is “the highest point in Chugoku,” you cannot legally or safely reach it on the standard route. If your goal is a satisfying mountain day with the best accessible views, Misen is the correct target.
What About the Gyojadani Trail?
The Gyojadani Trail allows a loop rather than an out-and-back. The JNTO route starts at the Bakuroza parking lot, climbs the Natsuyama Trail to Misen, then descends via the Gyojadani fork toward Ogamiyama-jinja Okumiya Shrine and Daisenji Temple. JNTO lists the full loop at 8.2 km and about six hours.
That distance is longer than a simple round trip, and the junctions near the top require attention. If you are confident with a map and have energy left, the loop adds variety and passes the Okumiya shrine. If this is your first visit, or visibility is poor, the out-and-back route is the more forgiving choice.
How Long Does the Mount Daisen Hike Take?
The local tourism association gives a standard time of three hours up and two hours 30 minutes down, or about six hours round trip including breaks. The climb is broken into three roughly equal sections: trailhead to the 3rd station, 3rd to 6th station, and 6th station to the summit.
Those are standard estimates, not guarantees. Weather, crowds, photo stops and the condition of the trail all add time. On a busy autumn weekend, the narrow sections near the top can slow to a queue, and the summit boardwalk can be crowded enough that finding a seat takes longer than expected.
| Section | Approximate Time | Trail Conditions | Practical Advice |
|---|---|---|---|
| Trailhead to 3rd Station | About 60 minutes | Beech forest, stone and wooden steps | Settle into a rhythm; do not race the early section |
| 3rd to 6th Station | About 60 minutes | Steady stairs, occasional views through the trees | Use the 6th station as a real checkpoint for weather and energy |
| 6th Station to Misen | About 60 minutes | Steep and rougher around the 7th station, then boardwalk higher up | Watch for loose stones; expect wind and cooler air |
| Descent | About 150 minutes total | The same steps in reverse, roughly 50 minutes per section | Save leg strength; trekking poles help some hikers |
Kai’s tip: Use the numbered station markers as fatigue checkpoints, not just distance markers. At the 3rd station, check whether your breathing has settled and whether your layers are right. At the 6th station, make a real decision about the summit: look at the time, the cloud and how your legs feel. If you are already counting steps, turning around there is a sensible day out, not a failed one.
Trailhead to the Sixth Station
The first two hours are the most deceptive part of the hike. The beech forest is beautiful, the steps are shaded, and the gradient feels manageable. It is easy to go too fast because the summit still feels close on the map.
The 3rd station arrives after about an hour, and the 6th station after another hour. The 6th station shelter is small, with just enough space for a short break, and the portable toilet booth is the only facility on the climb. There is no water, so treat this as a place to eat something, adjust your clothing and look at the north face rather than a place to refill.
Sixth Station to Misen Summit
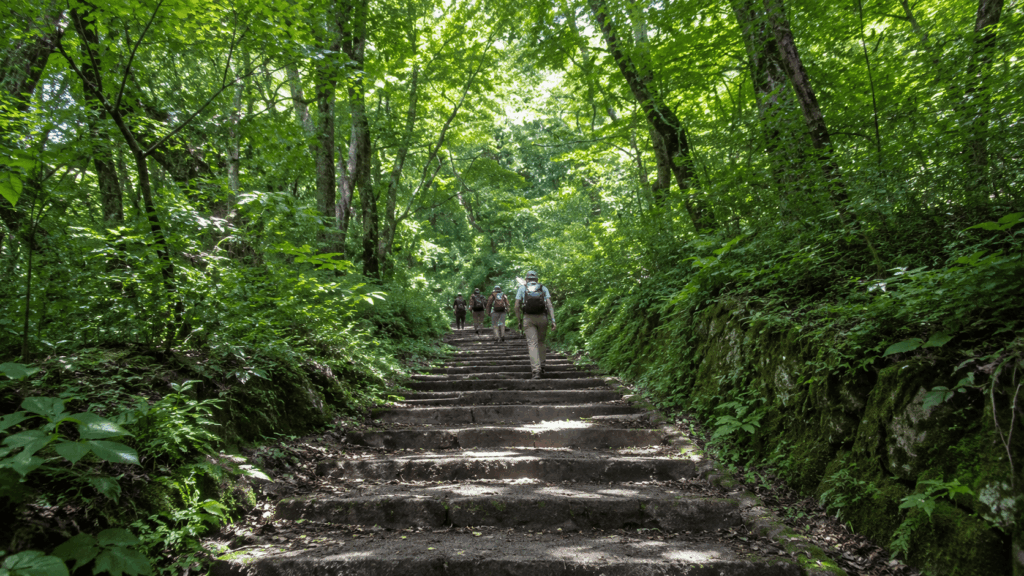
The final third is where the hike earns its reputation. From the 6th station, the trail steepens toward the 7th station, with rougher footing and loose stones. The 8th station brings relief: the boardwalk levels out, the dwarf yews appear, and the summit plateau is close.
Do not assume that reaching the 6th station means the rest is easy. The upper section is shorter but more demanding, and the weather can change quickly. Wind, cloud and a sudden drop in temperature are common even when the forest below feels warm.
How Much Time Should You Allow for the Descent?
Allow two and a half hours for the descent, and do not plan to shave it. The steps that felt manageable on the way up become jarring when your legs are tired, and the final hour is where most people feel the accumulated load. If you are relying on public transport, work backward from the return bus rather than forward from your start time.
A six-hour hiking estimate plus a 15-minute walk back to the Daisenji bus stop leaves little margin on a short winter day. In autumn, the afternoon light fades earlier than the clock suggests, and the forest sections become dim well before sunset.
What Is the Mount Daisen Hike Actually Like?
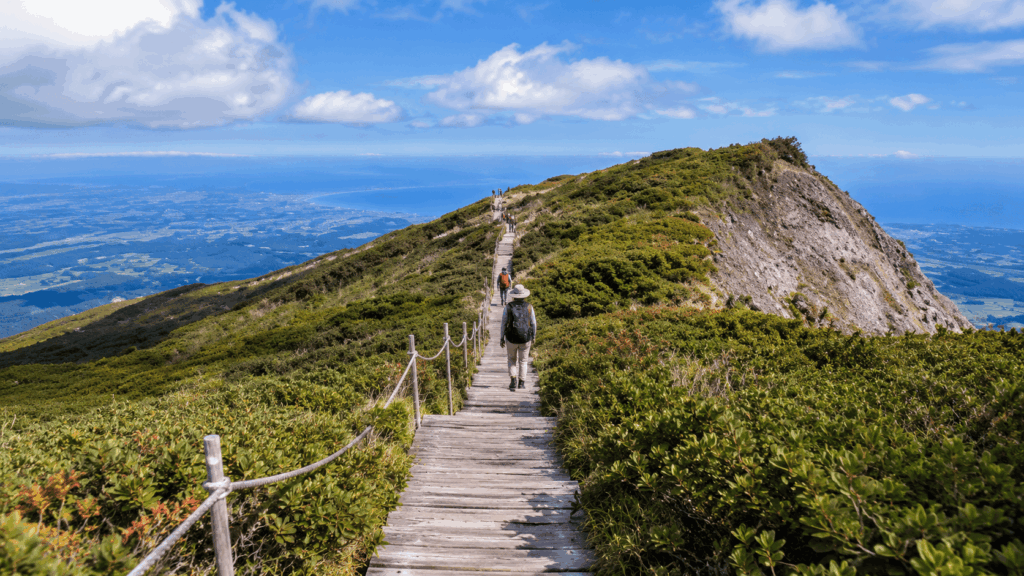
The Natsuyama Trail is often described as a staircase, and that is fair, but it is not only a staircase. The lower route runs through a beech forest so large and dense that it feels like a different mountain from the exposed summit plateau. The middle section opens up at the 6th station, where the Daisen North Face and Sankoho Peak suddenly fill the view. The upper section moves onto boardwalks and dwarf yews, with the Sea of Japan appearing beyond the ridge.
That variety is what makes the hike worth the effort. It is also why the experience changes so much with weather. On a clear day, the summit feels generous. In cloud, the same plateau can feel exposed, cold and disorienting, even though the path itself remains easy to follow.
The Beech Forest and the Relentless Stair Climb
The first hour passes through one of western Japan’s largest beech forests. The trees are tall, the canopy is thick, and the ground is a mix of roots, stone and timber steps. In autumn, the leaves turn gold and brown, and the forest becomes the main attraction for many visitors who never reach the summit.
The catch is that the forest hides the gradient. You are climbing steadily, but the view does not open up, so the effort feels smaller than it is. By the time you reach the 3rd station, you may have used more energy than you planned. This is the section to walk conservatively.
The Sixth Station View and the Upper Mountain
The 6th station is the first place where the mountain feels like a mountain. The north face rises ahead, Sankoho Peak stands to the side, and the valley below drops away. The shelter is small, and the portable toilet booth is the only facility between the trailhead and the summit.
This is also the best place to make an honest decision. If the cloud is thickening, if the wind is stronger than expected, or if your legs are already heavy, turning back here is a reasonable outcome. You will still have seen the best of the forest and the north face, and you will avoid the most tiring part of the descent.
Misen Summit, Dwarf Yews and the Lunch Crowds
Above the 8th station, the trail levels onto boardwalks and passes through the largest community of dwarf Japanese yew trees in Japan. The trees are low and wide, and the area is a designated National Natural Monument. In autumn, the red berries on the dwarf yews are one of the small details that make the summit plateau distinctive.
The summit itself is broad and open, with views toward the Yonago plain, the Sea of Japan and the Yumigahama Peninsula when the weather cooperates. There is a shelter, and in season a small shop, but neither is a restaurant. The summit can also be busy. During the October holiday period, I found the boardwalk crowded enough that finding a comfortable place to eat lunch took real effort.
Kai’s tip: Do not plan your lunch around a seat at the summit. On autumn weekends and holiday periods, the boardwalk and the area around the shelter fill up, and the available seating is limited and often exposed to direct sun. Eat earlier at the 6th station, or carry something you can eat standing up, and treat a summit seat as a bonus rather than part of the plan.
Current trail work adds another reason to stay flexible. The main summit boardwalk is closed for renovation, and the signed Ishimuro Course is the way around it. The route may not match older photographs, and temporary closures can occur during helicopter work. Follow the signs and give other hikers room at the narrow points.
When Is the Best Time to Hike Mount Daisen?
For most visitors, the best window is the snow-free season from late spring to autumn. Summer is green and warm but humid, and the beech forest offers welcome shade. Autumn brings the best colors and the biggest crowds. Winter is a different activity entirely, requiring winter equipment and experience.
Snow typically covers the mountain from late November to late April. That is a general pattern, not a fixed opening date. Early snow, late snow and icy sections can extend or shorten the usable window, so check the current trail and weather conditions rather than relying on the calendar alone.
Autumn Foliage and Holiday Crowds
The autumn colors usually peak from late October to early November, with variation by altitude and year. The beech forest turns first, followed by the upper slopes, so the mountain rarely changes color all at once. The Daisenji area and the lower trail are often at their best slightly earlier than the summit plateau.
The trade-off is crowd pressure. Holiday weekends in October bring queues at the narrow sections near the top and a busy summit boardwalk. Starting early helps more than any other single decision. If you arrive at the trailhead after mid-morning on a holiday weekend, expect to share every viewpoint and to wait at the tighter sections.
Weather, Fog and Winter Conditions
Mountain weather on Daisen changes faster than the forecast for Yonago suggests. The summit can be in cloud while the trailhead is sunny, and wind on the plateau can make a mild day feel cold. A waterproof shell, a warm mid-layer and a hat are worth carrying even in fine weather.
Winter conditions are not an extension of the summer hike. Snow and ice on the stairs turn a straightforward route into a serious undertaking, and the standard advice for beginners does not apply. If you are visiting between late November and April, plan for winter conditions or choose a lower walk instead.
On a separate stay, I joined the hotel’s stargazing session and watched fog move in until the stars disappeared. It was a useful reminder that mountain weather is not something you can schedule, whether you are on the summit or sitting outside at night.
How to Get to Mount Daisen and Where to Park
Public transport to Mount Daisen starts at JR Yonago Station. Nihon Kotsu buses run from the Yonago Station bus terminal to the Daisenji bus stop in roughly 50 to 60 minutes for about 730 yen. The catch is frequency: there are only a handful of services a day, and the timetable, not your fitness, often decides how long you can spend on the mountain.
From the Daisenji bus stop, the Natsuyama trailhead is about 15 minutes on foot. The Daisen National Park Center near the bus stop is a useful place to check trail conditions and pick up a map before you start. If you are staying at Hotel Daisen Shirogane, the trailhead is about five minutes from the hotel.
Getting to the Trailhead from Yonago
At the time of writing, the first bus from Yonago Station left around 7:20 and reached Daisenji around 8:12. Add the 15-minute walk and you are starting the trail around 8:30. Six hours later puts you back at the trailhead around 14:30, with a 15:20 departure from Daisenji as a realistic target. There is also a later afternoon or early evening service on some days, but it should not be treated as a safety net.
That schedule works for a steady hiker with no long breaks. It does not work for a slow start, a long summit lunch and a leisurely descent. If you miss the mid-afternoon bus, you may face a long wait or an expensive taxi. Check the current timetable on the day before you travel, and build in a buffer rather than cutting it fine.
Parking and Starting Early
Drivers have more flexibility. The Bakuroza parking area is large, and the lot closest to the trailhead fills first on busy mornings. Arrive early on autumn weekends, and check locally for current fees, winter closures and any event-day restrictions.
Kai’s tip: If you are picking up a packed breakfast or hiking lunch from your accommodation, confirm the pickup time before you plan your start. At Hotel Daisen Shirogane, the hiking bento is normally available from 7:00, with some seasonal exceptions from 6:30, and it must be reserved by 17:00 the previous day. A 6:30 trailhead start and a 7:00 pickup do not fit together, so settle that detail the night before rather than at the front desk in the morning.
Should You Stay Near Mount Daisen Before Hiking?
A day trip from Yonago is possible, but it is a scheduling exercise. Staying near the trailhead does not make the mountain easier. What it does is remove the parts of the day that have nothing to do with hiking: the early train, the bus connection, the luggage and the rush to finish before the return service.
That distinction matters. A hotel near the trailhead will not reduce the six hours of walking or the stair-induced fatigue. It will give you a calmer start, somewhere to leave your main bag, and a bath before the next train.
| Factor | Day Trip from Yonago | Staying Near the Trailhead |
|---|---|---|
| Early start | Dependent on the first bus | Walk to the trailhead from your room |
| Transport dependence | High; the return bus sets your deadline | Low; you can start and finish on your own schedule |
| Luggage | Carried to the trailhead or left at the station | Left at the hotel before and after the hike |
| Morning preparation | Rushed between train, bus and trailhead | Unhurried; breakfast and packing at the hotel |
| Post-hike recovery | Limited; you still have to travel | Bath and rest before moving on |
| Extra cost | Lower | One additional night |
| Best for | Confident hikers with a car or a tight budget | Public transport users, first-timers and anyone hiking as the main purpose of the trip |
Day Trip from Yonago vs Staying Near the Trailhead
Choose the day trip if you are a fast, experienced walker, you have a car, or you are comfortable with a fixed return time. Choose the overnight stay if you are relying on buses, if this is your first big hike in Japan, or if you want to start early enough to avoid the autumn crowds.
Families and travelers with large luggage get the most from staying near the trailhead. The ability to leave a suitcase behind and carry only a day pack changes the day more than most gear choices.
For hikers relying on public transport or planning an early start, Hotel Daisen Shirogane is worth comparing if you want more control over your hiking day without depending on the first bus from Yonago.
Why I’d book this one
- Early-start convenience: The hotel is about five minutes from the Natsuyama trailhead, making it easier to start before the main crowds without arranging an early bus connection.
- Practical luggage arrangements: The hotel advertises luggage storage before check-in and after check-out, which is useful if you want to carry only a day pack on the mountain.
- More flexibility after the descent: Staying nearby reduces pressure to finish before a fixed return bus and gives you the option of resting or arranging a bath, subject to the accommodation plan and current hotel conditions.
See current room availability, booking conditions and guest reviews for Hotel Daisen Shirogane on Klook before deciding whether the extra night is worth it for your hiking schedule.
Why Hotel Daisen Shirogane Worked Well for My Hikes
Hotel Daisen Shirogane is about five minutes from the Natsuyama trailhead, and its practical setup mattered more to me than its comfort. I could park at the hotel, leave unnecessary luggage in the large hall, and walk to the trailhead with a light pack. On an earlier stay, the hotel also changed my breakfast into a rice-ball lunch for the summit, which solved the problem of finding food early in the morning.
That breakfast change is part of my past experience, not a guaranteed current service. What the hotel currently advertises is more specific: luggage storage before check-in and after check-out, 30 free parking spaces, a hiking bento for 800 yen that must be reserved by 17:00 the previous day, and post-checkout bathing for 700 yen. Some accommodation plans include the bath, so the condition depends on the plan you book.
The parking is useful for drivers, but it is not unlimited. Hikers can normally park from around 7:00 with advance notice, and the lot holds 30 cars. In winter, the hotel directs guests to a paid prefectural lot. If you are arriving late on an autumn weekend, confirm the parking arrangement in advance.
If those logistics matter more to you than luxury, this is the practical case for staying here. Current room types, plan inclusions and seasonal conditions are best checked directly with the hotel before booking.
After the Hike: Bathing and Stargazing
The hotel’s bath uses soft water from the Daisen area rather than natural hot spring water. After a stair-heavy descent, the difference matters less than the fact that it is warm and available. The bath is open from 6:00 to 23:00, with cleaning from 10:00 to 11:00, and check-out is at 10:00. If you want to bathe after checking out, the current charge is 700 yen unless your plan includes it.
The hotel also runs a stargazing session, which is reservation-based and entirely weather-dependent. On the night I joined, fog arrived and the stars never really appeared. It was still a pleasant way to spend an evening, but it is not an activity you can count on. Treat it as a bonus rather than a reason to book.
Should You Hike Mount Daisen Without a Guide?
Self-guided hiking is a reasonable choice on the Natsuyama Trail. The route is well signed, the main junctions are obvious, and the biggest risks are fatigue, weather and a late start rather than navigation. That said, “well signed” does not mean “no preparation.” You still need a map, water, appropriate clothing and the discipline to turn around.
A guide adds interpretation and local judgment. It does not remove the physical effort, and it does not guarantee safety in bad weather. The decision should be about what kind of day you want, not about outsourcing responsibility for your own fitness.
| Factor | Self-Guided | Local English-Speaking Guide |
|---|---|---|
| Cost | Bus fare and your own gear | From 30,000 yen per group for an English-speaking guide |
| Navigation | You follow the signs and your map | Guide handles the route and junctions |
| Planning responsibility | All yours, including timing and weather | Shared; the guide advises on pace and conditions |
| Nature and culture | What you read or notice yourself | Explanation of the beech forest, shrines and mountain history |
| Flexibility | High; change your plan at any point | Lower; the day follows the guide’s schedule |
| Weather decisions | You decide when to turn back | Guide makes the call, including cancellation |
| Best for | Confident hikers who want freedom and lower cost | First-time visitors who want context, company and local judgment |
Self-Guided Hiking: Who Is It Best For?
Self-guided hiking suits travelers who have walked in mountains before, can read a map or use an offline navigation app, and are comfortable making weather decisions without help. It also suits anyone who wants to stop frequently, take photographs or change plans midway.
If you have never hiked in Japan, the route is still manageable, but do not underestimate the time needed to reach the trailhead and the limited bus service. (If you have done the Kurama to Kibune hike in Kyoto, expect Daisen to be a much longer, steeper version of those wooden and stone steps.) The navigation is easy; the logistics are the part that catches people out.
When an English-Speaking Local Guide May Be Worth It
Sando Inc. runs a private English-speaking hike called Mt. Daisen trivia hiking. At the time of writing, the English guide costs from 30,000 yen for a group of one to ten people, with 1,000 yen for each additional person. The tour runs for about six hours, generally from 9:00 to 15:00, between mid-May and October, and requires booking at least 14 days in advance. Lunch is not included, and the meeting point is the Daisen Tourism Bureau.
The value is in the explanations, the preparation advice and having someone local make the weather call. The guide can talk about the beech forest, the shrines and the mountain’s history in a way that a signboard cannot. What the guide cannot do is carry your legs up the stairs or guarantee clear skies.
If you are weighing it up, the tour details, current price and availability are best confirmed with the operator before you commit. It is an optional addition, not a requirement for the hike.
What to Pack and Check Before You Go
The Natsuyama Trail has no water source, limited toilets and a summit that can be much colder than the trailhead. Most of the preparation is about covering those three gaps rather than buying specialist equipment.
Essential Gear, Water and Toilets
Wear shoes with a proper tread and some ankle support. The steps are uneven, and tired feet roll easily on the descent. Bring a waterproof and windproof shell, a warm mid-layer, a hat and enough water for a six-hour walk. The exact amount depends on your body, the temperature and how much you sweat, so carry more than you think you need rather than aiming for a fixed number.
Carry lunch and snacks from the valley. There is no shop on the route, and the summit shop is not reliable. A map or offline navigation app, a charged phone and a power bank are sensible. A basic first-aid kit and a portable toilet kit are worth the small weight, especially if you are hiking outside the busiest season.
The toilet situation is simple but sobering. There are toilets at the trailhead and at the summit shelter, but the 6th station has only a portable toilet booth, and you must bring and dispose of your own kit. The summit toilet uses recycled rainwater and may be unavailable when water is short. Do not plan on either facility being a normal flushing toilet.
The mountain also operates a voluntary climbing cooperation fee of 500 yen per hike, collected between late April and mid-November at the national park center, the Bakuroza parking area and the summit shelter. It is not a ticket and it is not compulsory, but it funds trail and toilet maintenance.
Current Boardwalk Restrictions and Safety Checks
As of November 2026, the main summit boardwalk is closed for renovation, and the Ishimuro Course is open as the signed alternative. The closure began in May 2026 and has no announced end date. Helicopter operations can also close the summit junction temporarily.
This is a closure of a specific section, not of the whole mountain. The Natsuyama Trail remains open, and hikers can still reach Misen. Before you set out, check the Tottori Prefecture construction notice and the signs at the trailhead. Do not rely on a blog post, including this one, for the status on the day.
When to Turn Back — and Easier Alternatives
Turn back if the weather is deteriorating, if you are moving significantly slower than the standard time, or if your legs are already unsteady before the 6th station. None of those outcomes means the day was wasted. The forest and the north-face view are the highlight for many visitors, and the summit is only one version of a good day.
If you decide not to continue, the Daisenji Temple area and the Ogamiyama-jinja Okumiya Shrine are worthwhile on their own. JNTO also lists a foothills walking route of about 7.2 km and two hours, which is shorter than the summit hike but still a proper walk rather than a flat stroll.
Do not treat the 6th station as automatically safe in bad weather. It is a useful turnaround point, not a shelter from a storm. If visibility drops or the wind picks up, descend while the route is still easy to follow.
Frequently Asked Questions
Is Mount Daisen suitable for beginners?
Yes, in the right conditions. The Natsuyama Trail is well signed and does not require technical climbing, so hikers with reasonable fitness and some walking experience can reach Misen Peak. The caveat is that “beginner-friendly” refers to the route, not the effort. The climb is a long series of wooden and stone steps, and the round trip takes about six hours including breaks. If you have knee problems, have not walked for several hours recently, or are hiking in snow or ice, treat it as a more serious undertaking or choose a lower route.
How long does it take to hike Mount Daisen?
The standard estimate is three hours up and two hours 30 minutes down, or about six hours round trip with breaks. The ascent is usually divided into three roughly equal sections: trailhead to the 3rd station, 3rd to 6th station, and 6th station to the summit. Add 30 to 60 minutes if you are hiking on a holiday weekend, taking photographs or moving slowly. If you are using the bus, plan backward from the return departure rather than assuming you can catch a later one.
Can you reach the highest peak of Mount Daisen?
No, not on the standard hiking route. The highest point is Kengamine at 1,729 m, but the ridge leading to it is closed because of dangerous erosion and rockfall. The summit that hikers reach is Misen Peak at 1,709 m. Some English-language descriptions mention only the 1,729 m figure, which creates confusion. Plan for Misen and do not follow older route descriptions that suggest continuing along the ridge.
Can you hike Mount Daisen without a guide?
Yes. The Natsuyama Trail is easy to follow, and the main junctions are signed. What you need is a map or offline navigation, enough water, weather-appropriate clothing and the discipline to turn back if conditions change. A guide is useful if you want explanations of the forest, shrines and mountain history, or if you would rather have someone local make the weather and timing decisions. It does not remove the physical effort or guarantee safety.
Is it better to stay near Mount Daisen before hiking?
It is not required, but it helps in specific situations. If you are relying on public transport, staying near the trailhead removes the risk of missing the first bus and gives you a place to leave your luggage. If you have a car and are comfortable with an early start, a day trip from Yonago is workable. The overnight stay does not make the hike physically easier; it makes the logistics around the hike easier.
Are there toilets and water on the trail?
There are toilets at the trailhead and at the summit shelter, but the 6th station has only a portable toilet booth, and you need your own kit. The summit toilet uses recycled rainwater and may be unavailable when water is low. There is no water source anywhere on the main climb, so carry all the drinking water you need from the valley. Do not rely on the summit shop for supplies.
Final Verdict: Which Mount Daisen Hike Is Right for You?
The right choice depends less on bravery than on legs, timetable and weather. Mount Daisen does not require a heroic version of you. It requires an honest one.
For first-time visitors with reasonable fitness
Take the Natsuyama Trail to Misen as an out-and-back. Start early, carry lunch and water, and aim to leave the summit by early afternoon. If you are using the bus from Yonago, the 7:20 departure and the mid-afternoon return set the shape of the day. If you want a calmer start and somewhere to leave your bag, stay near the trailhead the night before.
For families and slower walkers
Set the 6th station as the goal rather than the summit. The north-face view, the forest and the shelter make a satisfying half-day, and the descent is shorter and less punishing. The JNTO foothills route of about 7.2 km and two hours is another option, but it is a proper walk rather than a flat stroll. Either choice is better than pushing children or tired legs onto the upper stairs.
For travelers on a tight schedule or relying on public transport
Attempt the full hike only if you can catch the early bus and are confident of a steady pace. The return service, not the summit, is the real deadline. If the timetable looks tight, hike to the 6th station and descend, or use a car and start earlier. A missed bus turns a good day into a long wait.
For hikers with knee or ankle problems
Skip the summit and choose the lower forest walk or the Daisenji and Okumiya shrine area. The descent is where the stairs do the most damage, and a six-hour round trip is not the place to test a joint. Trekking poles help some hikers, but they do not solve an underlying injury.
For confident hikers and repeat visitors
Consider the Gyojadani loop if the weather is stable and you have energy left after the summit. It adds variety and passes Ogamiyama-jinja Okumiya Shrine, but it also adds distance and junctions. Check the current status of the summit boardwalk and the Ishimuro detour before you go, since the final approach may differ from older maps.
For travelers who want context or company
A local English-speaking guide is worth considering if you want to understand the beech forest, the mountain’s religious history and the landscape rather than simply tick off the summit. It is a private, six-hour outing, usually available from mid-May to October, and it must be booked well in advance. Treat it as an enhancement, not a safety guarantee.
What I would tell a friend visiting for the first time is this: decide before you start what a good day looks like. If it is the summit, leave early and keep the descent in mind. If it is the forest and the north face, the 6th station is enough. Mount Daisen rewards either plan, as long as the plan matches the weather and your legs.

Hi, I’m Kai. I’m a Tokyo-based travel writer, tourism industry insider, and the author of a published guidebook for international visitors to Japan. With over 10 years of professional experience at a leading Japanese tourism company, my mission is to help you skip the tourist traps and navigate Japan’s best destinations like a local. I believe the perfect day trip is like a traditional kaiseki meal: a beautiful balance of precise planning and unforgettable seasonal discovery. When I’m not out conducting field research, you’ll usually find me drafting new itineraries with one of my favorite fountain pens!