
The Kurama to Kibune hike is one of the easiest half-day escapes from central Kyoto — and one of the most misleading. The distance is short, the trail is well marked, and on a dry day in spring or autumn it is genuinely lovely. It is also a real mountain path, with stone steps at the start, exposed cedar roots in the middle and a steep, uneven descent at the end. That combination catches people out.
This guide covers the route, the realistic timing, the cable car decision and the return leg, based on the temple’s own section-by-section estimates and on what the walk actually feels like underfoot.
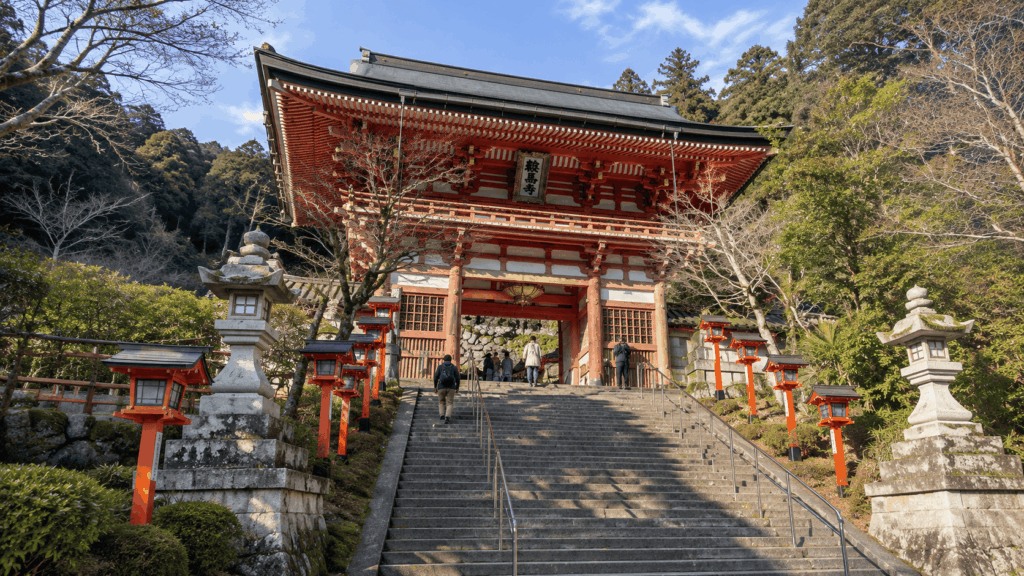
The short answer: if you walk regularly and can handle uneven ground, do it — start at Kurama, take the cable car if you want to save your legs for the roots and the descent, and allow 2–3 hours on the mountain plus transport. If you have knee trouble, only thin-soled city shoes, or you are visiting on a snowy or icy day, skip the crossing and visit Kifune Shrine by bus instead.
Prefer to explore Mount Kurama with an English-speaking guide? A private guided hike offers cultural explanations along the way, with a Kurama Temple & Kifune Shrine option for those who want to cross the mountain. Check current dates, route options and traveler reviews for the guided Kurama hike before deciding whether the extra guidance is worth it for your trip.
Quick facts
| Item | Details |
|---|---|
| Distance | About 3.9 km from Kurama Station to Kibuneguchi Station, the figure most route guides quote |
| Walking time | Roughly 2 hours of walking; 2–3 hours including temple and shrine stops |
| Difficulty | Short but uneven — stone steps, exposed roots, a steep descent. Not a flat stroll |
| Start | Kurama Station (Eizan Railway) |
| Finish | Kibuneguchi Station, via Kifune Shrine |
| Best direction | Kurama to Kibune for most first-time visitors |
| Cable car | Optional. Cuts the first climb, not the roots or the descent |
| Best conditions | A dry day in spring or autumn |
If you would rather walk it with someone who can explain the mountain’s history and legends in English, a private guided version of this route is available — but the trail is perfectly doable on your own, and most readers will not need it.
Kurama to Kibune Hike: Map, Distance and Time
The route runs north over Mount Kurama from Kurama Station to Kifune Shrine, then down to Kibuneguchi Station on the Eizan line. You do not need a printed map for the mountain section — the path is signposted and hard to lose — but you do need to understand how the walk is broken up, because the official timings are often quoted without saying what they include.
The official route map
Two maps are worth having on your phone. The first is the Kyoto official Kurama and Kibune area map, which shows the two villages, the railway stations and the road between them. The second is Kurama-dera’s own mountain map, published on the temple’s access page, which marks the gate, the cable car stations, the main hall and the west gate where the trail leaves the temple grounds.
What neither map shows well is the texture of the ground. A line on a map looks the same whether it crosses paving or a lattice of cedar roots. Treat the map as a way to confirm the order of places, not as a difficulty rating.
How long the hike really takes
Kurama-dera publishes its own section-by-section walking estimates. They are the most reliable starting point, and they add up to about 118 minutes of walking — before you stop for a single photo.
| Section | Approx. time | Terrain / what to expect |
|---|---|---|
| Kurama Station → Niomon Gate | 3 min | Paved lane through the village, then a short slope to the gate |
| Niomon Gate → Yuki-jinja Shrine | 5 min | Stone steps under trees; the mountain fee is paid at the gate |
| Niomon Gate → Main Hall (walking) | About 30 min | Continuous stone steps and switchbacks through the cedar forest |
| Niomon Gate → Main Hall (cable option) | About 15 min total | 2 min walk to Sanmon Station, 2 min ride, 10 min walk up from Tahoto Station |
| Main Hall → Mao-den | About 30 min | Narrow forest trail; this is where roots and uneven ground begin |
| Mao-den → Kifune Shrine | About 20 min | Steep descent on steps and packed earth |
| Kifune Shrine → Kibuneguchi Station | About 40 min, or bus | Road following the valley downhill toward the station; the bus covers it in a few minutes |
So when a guide says “2 to 3 hours”, that is not the walking time. It is the realistic block of your day once you add the temple, the shrine, photographs and a rest. If you are a slow walker, or you are visiting in summer heat, plan at the top of that range rather than the bottom.
Separately, the journey from central Kyoto is not part of that figure. Demachiyanagi to Kurama Station takes about 30 minutes on the Eizan Railway, and you still need to get to Demachiyanagi. In practice this is a half-day trip, not a two-hour outing.
Kurama to Kibune or Kibune to Kurama: Which Direction?
Both directions use the same trail. Much like planning the Magome to Tsumago trail, what changes is where the climbing sits, which shrine you reach first, and how tired you are when the ground gets awkward.
Why I usually start from Kurama
When I guide people over Mount Kurama, I start on the Kurama side almost every time — not because the route is easier, but because it lets me spend the group’s energy in a better order. The climb from Niomon Gate to the main hall is the most sustained stretch of the day, and starting at Kurama means you meet it while everyone is still fresh. From there the trail rolls rather than climbs, so the harder footing arrives after the steep part is already behind you.
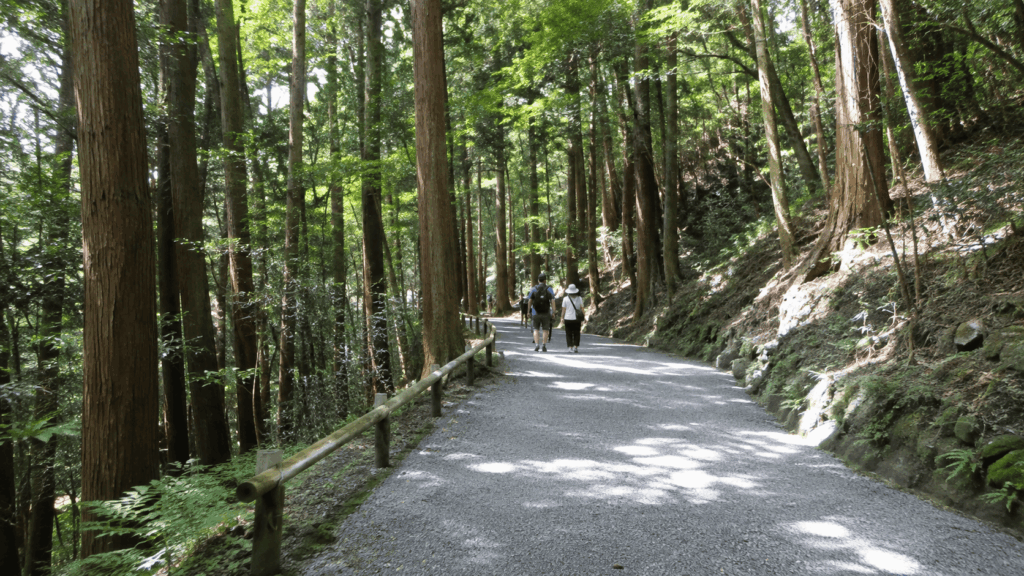
Kai’s tip: Starting at Kurama also means the cable car is available at the exact point where you are most likely to want it, near the beginning. If you start at Kibune, that option does not exist until you are almost finished. Coming down the Kurama side instead puts the steepest steps at the end of the day, when your legs are least interested in them.
When starting from Kibune makes more sense
Kibune first is a legitimate choice, not a mistake. If you want to finish at Kurama Onsen, if you are staying in Kibune, or if you prefer to get the climbing done early and descend into Kurama village at the end, reverse the route. The trade-off is real: you climb the rooted section rather than descend it, which some walkers find easier on the knees and harder on the lungs.
| Route option | Main advantage | Main drawback | Best for |
|---|---|---|---|
| Kurama → Kibune, all on foot | The full pilgrim route, including Yuki-jinja Shrine and the switchback approach | The biggest climb comes first, on stone steps | Confident walkers who want the complete route |
| Kurama → Kibune, using the cable car | Saves the stair climb and leaves energy for the roots and descent | You miss Yuki-jinja Shrine and the forest approach | First-timers, or anyone pacing themselves |
| Kibune → Kurama | Quiet start, finish at Kurama Onsen and a station | Sustained climb on roots, with no cable car until near the end | Repeat visitors and onsen-focused days |
| Kifune Shrine only, no crossing | No trail at all; bus and train do the work | You miss the mountain entirely | Limited time, knee trouble, snow, or travelling with very young children |
What I would not do is promise that one direction is “easier”. The vertical gain is similar. The difference is which muscle group complains, and when.
Should You Take the Kurama Cable Car?
The Kurama cable car is short — about two minutes — and it does not take you to the main hall. It takes you partway up, to Tahoto Station, from where you still walk about ten minutes uphill. That sounds like a poor deal until you compare it with the alternative.
How much walking it actually saves
On foot, Niomon Gate to the main hall is roughly 30 minutes of stone steps. With the cable car, it is about two minutes of walking to Sanmon Station, a two-minute ride, then around ten minutes of steps from Tahoto Station. You are trading a 30-minute climb for a 15-minute one, plus whatever wait you meet at the station.
The fare is a donation of 200 yen for adults and 100 yen for children, one way, on top of the 500 yen mountain fee. Trains run roughly every 20 minutes. The last uphill departure is at 16:20 — and the temple notes that if you take that one, the main hall will already be closed. The last downhill departure is at 16:25 from January through May and September through December, so an afternoon start needs checking rather than assuming.
What you miss if you take it
Yuki-jinja Shrine sits on the walking route, and it is not a minor detour — it is one of the reasons people come to this mountain, with its own festival and its own atmosphere. The switchback approach through the cedars is also the most atmospheric part of the climb. If you take the cable car, you skip both.
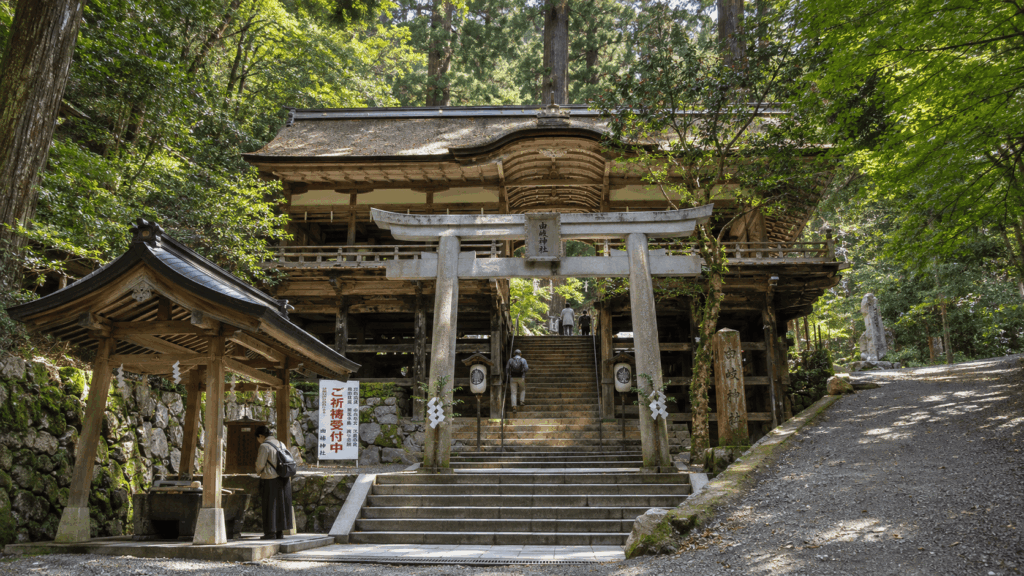
My recommendation
I used the cable car on a visit in autumn 2025, and the thing that struck me was not the time saved — it was how much better the middle of the walk felt. The rooted section and the descent both ask something of your legs, and arriving at them without having already spent 30 minutes on stone steps made a noticeable difference.
So: take it if your priority is finishing comfortably, if you are walking with children or older relatives, or if you are starting after lunch. Skip it if the climb itself is the point, or if you want to see Yuki-jinja Shrine. And check the temple’s notice page before you go — the cable car closes for maintenance on selected mornings, and it has also been suspended at short notice for mechanical faults. The walk still works without it; you just need to know which day you have.
Walking from Kurama to Kibune, Section by Section
The route changes character three times. It starts as a temple approach, becomes a forest trail, and finishes as a steep descent into a village. Knowing which section you are in tells you what to pay attention to.
Kurama Station to Niomon Gate
Leave the station and look for the large red tengu statue — it is the informal meeting point for the village and impossible to miss. From there a paved lane climbs gently through a handful of shops and houses to Niomon Gate, where you pay the 500 yen mountain fee. This is the last place with reliable food and drink before Kibune, so buy water here if you have not already.
Niomon Gate to the main hall
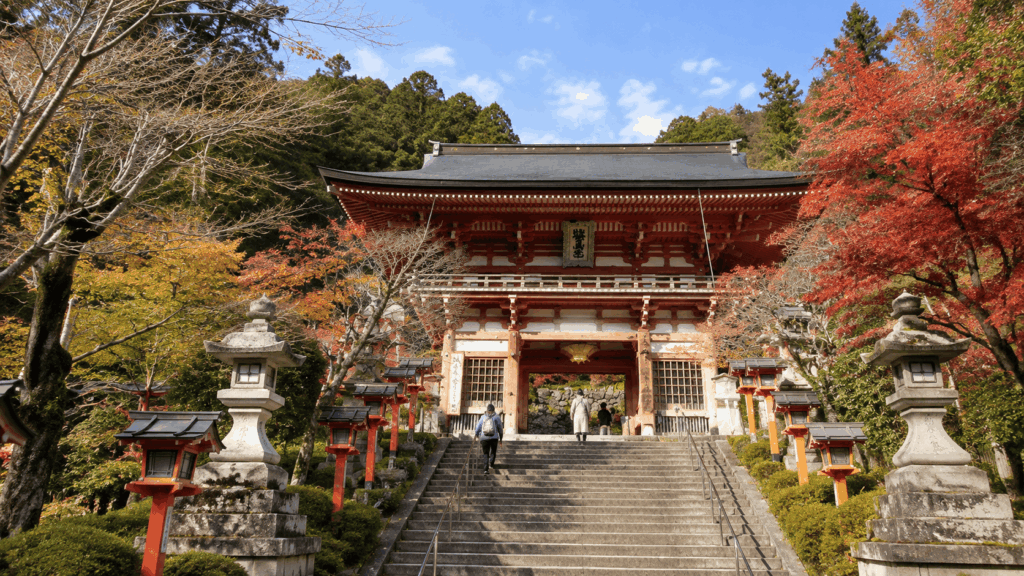
Past the gate, the path forks almost immediately. Straight ahead and up is the walking route through Yuki-jinja Shrine and the switchbacks. To the left is the short climb to Sanmon Station for the cable car. Whichever you choose, the ground is stone and the gradient is steady. This is the section that determines how the rest of the walk feels.
Main hall to Mao-den
The main hall sits on a wide terrace with a view back through the trees, and it is worth ten minutes even if you are behind schedule. Beyond it, the paved approach ends and the mountain trail proper begins. From this point the cable car cannot help you: there is no shortcut, no road and no alternative exit until you reach either Mao-den or the west gate.
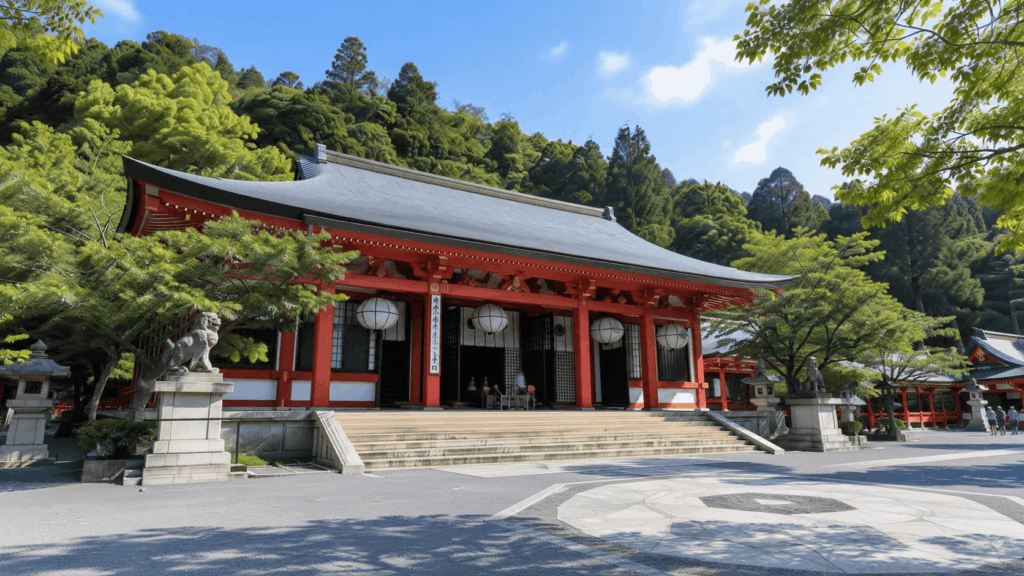
This is also the last sensible place to turn around. If the weather has turned, if someone in your group is struggling, or if you are later than you intended, go back the way you came rather than pushing on. Turning back at the main hall costs you nothing except the view from the other side.
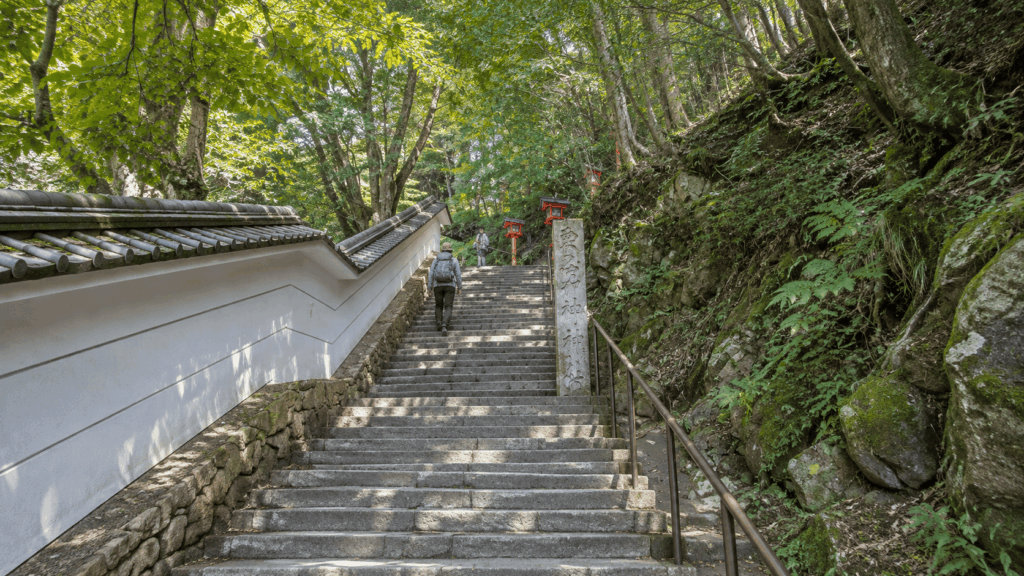
Kinone-michi: the tree root path
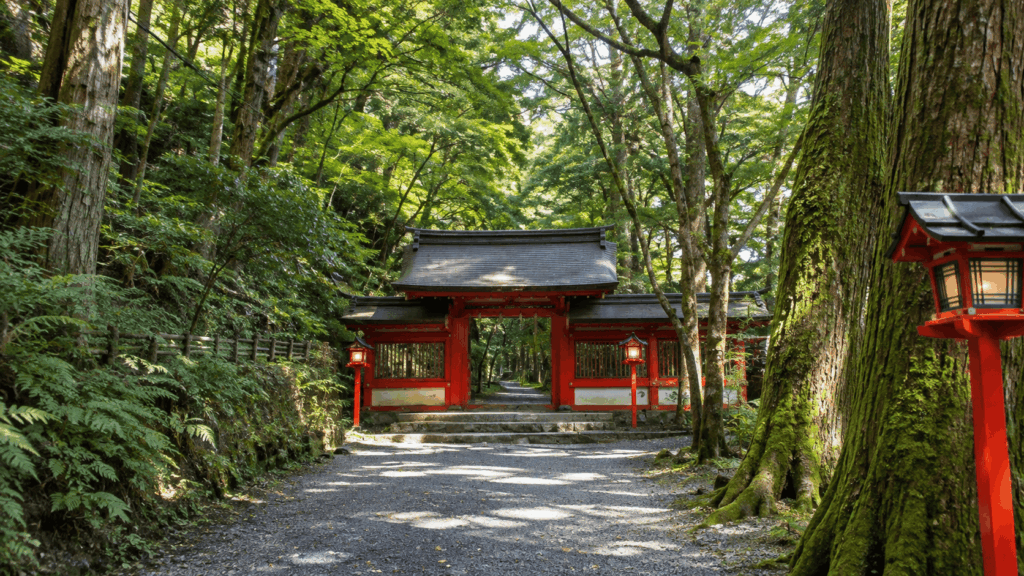
The Kinone-michi — literally the “tree root path” — is the stretch people photograph and then talk about afterwards for a different reason. Cedar roots lie exposed across the trail, polished by footsteps, forming hard ridges and hollows that your foot has to fit around. It is beautiful. It is also the part of the walk where you should stop looking at the trees and start looking at the ground.
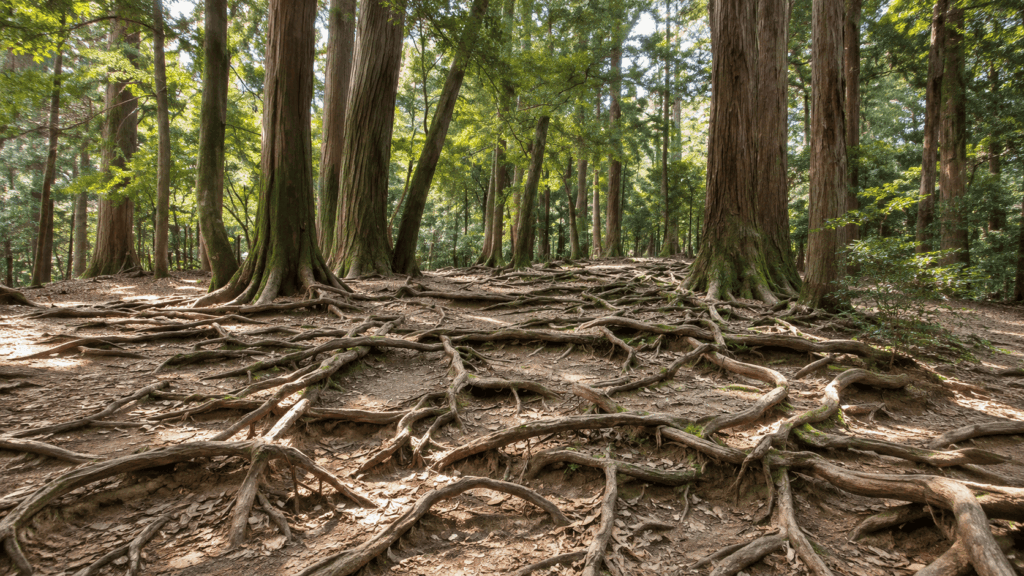
The path is associated with the legend of Ushiwakamaru, the boyhood name of Minamoto no Yoshitsune, who is said to have trained here among the tengu. Treat that as legend rather than history — it is a good story, and the mountain has been telling it for centuries.
Kai’s tip: A friend who joined me on this walk wore thin-soled fashion sneakers, and the roots punished him for it. He did not fall, but he spent the whole section watching his feet instead of the forest, and he was noticeably slower by the end. A shoe with a stiff sole and real tread costs you nothing on the temple steps and makes this half-hour straightforward.
The descent to Kibune
Past Mao-den, the trail turns downhill and stays there. The steps are irregular — some deep, some shallow, some with a root across the middle — and they arrive at the point in the day when your legs have already done the climb and the roots. This is where knee trouble tends to show up, not at the beginning.
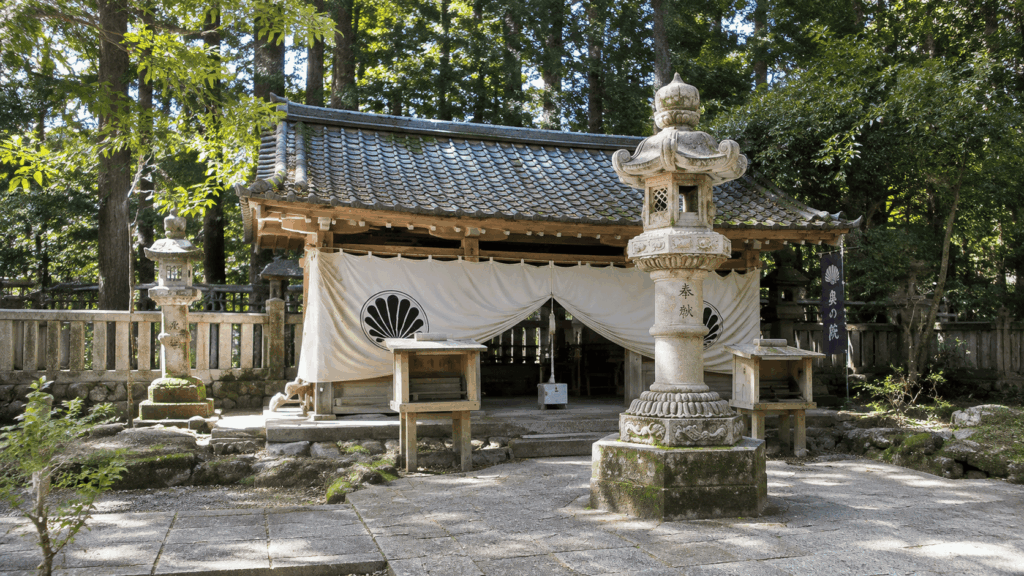
I feel it here myself, mostly in the downhill steps rather than the uphill ones. The fix is unglamorous: shorten your stride, take the steps one at a time instead of bounding down, and use the handrail where there is one. It adds a few minutes and saves your knees for the walk to the station.
Reaching Kifune Shrine
You leave the temple grounds through the west gate and continue down into the Kibune valley. The village appears below you before the shrine does, and the shrine itself — with its red lanterns lining the approach steps — is a short walk along the valley road from where the trail comes out. The lanterns are at the shrine, not at the temple gate; expect a few minutes of village walking in between.
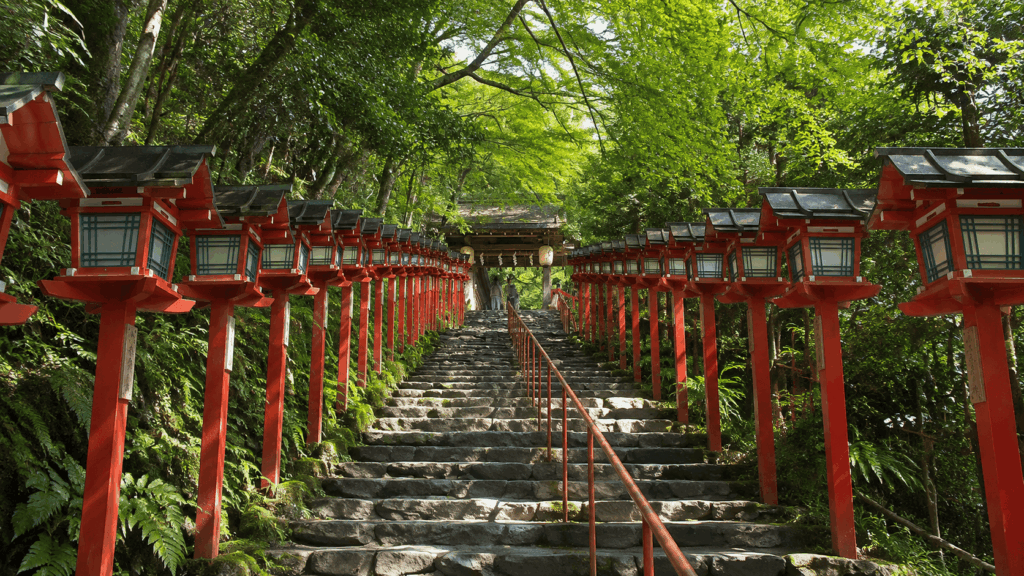
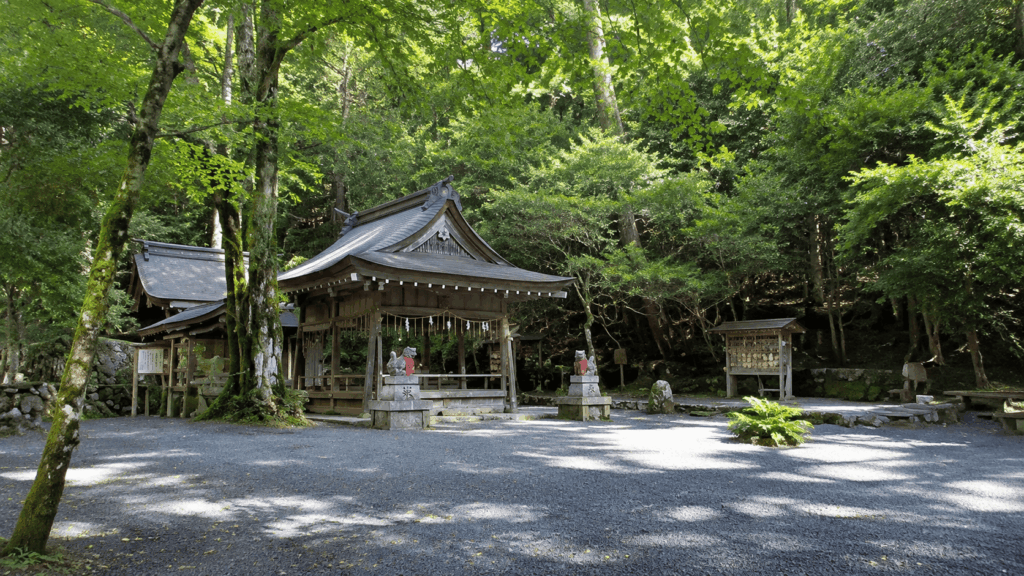
Kifune Shrine is free to enter and open from 6:00 to 20:00 between May and November, and 6:00 to 18:00 from December to April. The main shrine, the inner shrine and the middle shrine are separate buildings along the valley, and the lantern-lined approach belongs to the main shrine.
How Difficult Is the Kurama to Kibune Hike?
The honest answer is that it is short but not easy. It is not a mountaineering route, the signage is good, and thousands of ordinary visitors walk it every year. But “easy” in a guidebook usually means “no technical skills required”, not “flat and smooth”. This trail is neither.
| Section | Main challenge | Practical advice |
|---|---|---|
| Early temple climb | Sustained stone steps with few flat stretches | Set a slow rhythm; the cable car is the alternative if you want to preserve energy |
| Upper forest trail | Narrow path, rolling ups and downs, loose stones | Watch your footing rather than the view; this is where the day’s fatigue starts to show |
| Kinone-michi | Hard exposed roots, polished and uneven | Stiff soles with tread; place your foot on the root, not beside it |
| Descent toward Kibune | Irregular steps, steep sections, tired legs | Shorten your stride, use handrails, allow more time than you think |
Is it suitable for beginners?
Yes, with conditions. If you walk regularly, can manage a sustained climb of stone steps without stopping, and are reasonably steady on uneven ground, this is within your range. If your only experience of walking is city pavements, it is still possible, but treat it as a proper half-day walk rather than a stroll between two villages. For a shorter, more straightforward beginner option in Kyoto, consider the Mount Daimonji hike instead.
What makes it unsuitable is not fitness alone. It is footwear, knee stability and weather. A fit person in smooth-soled shoes on a wet day is in a worse position than an average walker in trail shoes on a dry one.
What shoes should you wear?
Trail running shoes or light hiking shoes are ideal. Anything with a stiff sole and visible tread will do. Avoid thin-soled sneakers, sandals, and anything you would not want to wear on a wet stone staircase. Full leather hiking boots are not necessary and will feel heavy on the temple steps — this is a half-day walk, not an expedition.
Is the descent hard on your knees?
For some people, yes. The descent comes at the end, after the climb and the roots, and it is made of steps rather than a smooth slope. If you have existing knee problems, the cable car will not solve this for you, because it only covers the uphill section. Consider walking to the main hall and returning the same way instead of crossing the mountain.
Who should skip the mountain crossing
Skip it if you have significant knee or ankle instability, if you only have smooth-soled shoes, if there is snow or ice on the trail, if you are starting late in the afternoon, or if you are travelling with someone who cannot manage a long stretch of uneven steps. You can still visit Kifune Shrine by train and bus, and Kurama-dera by cable car, without crossing between them. That is a good day out in its own right, or you could opt for a paved, stroller-friendly alternative in the Kansai region like the Minoh Falls hike.
What to bring
- Water — at least a litre per person in summer
- Shoes with tread, worn in
- A light rain shell, even on a forecast of sunshine
- Cash for the mountain fee, the cable car and the bus
- A small pack — the trail is narrow in places and luggage is a nuisance
- An offline map or screenshot of the route, since signal is patchy in the valley
You do not need trekking poles, gaiters or a stove. This is a walk between two villages with a temple in the middle, not a backcountry route.
Best Time and Season for the Hike
The single biggest factor is not the season but the state of the ground on the day. A dry April morning is easier than a wet October afternoon, whatever the calendar says.
Spring and autumn: the best conditions
These are the seasons I would choose. Temperatures are moderate, the trail is usually dry, and the forest is at its best — fresh green in April and May, colour from late October. The trade-off is crowds, especially in Kyoto’s autumn peak, when the Eizan line runs extra services and the shrine gets busy. Autumn also brings earlier sunsets, which matters if you start after lunch.
Summer: heat, humidity and insects
July and August are humid, and much of the trail is under canopy with little breeze. Start early, carry more water than feels necessary, and expect to sweat through your shirt on the climb. Insect repellent is worth having. The valley at Kibune is cooler than the city, which is why the riverside restaurants exist, but that relief comes at the end of the walk rather than during it.
Winter: snow, ice and slower walking
Winter is where the guidebook description and the reality diverge most. The mountain is higher and colder than central Kyoto, and snow that has not settled in the city can be lying on the trail.
Kai’s tip: The last time I guided a group here in January, the walk took noticeably longer than usual — not because anyone was unfit, but because everyone was picking their way down icy steps one at a time. The cold also made the stops shorter and the cable car queue longer. Snow on the cedars is genuinely beautiful, but it turns a two-hour walk into something that needs a different plan and an earlier start.
If there is snow or ice on the ground, do not cross the mountain. Visit Kifune Shrine by bus from Kibuneguchi Station, or visit Kurama-dera and come back down, and keep the two as separate outings. If you are committed to a winter trip, our Kyoto in winter guide covers what stays open and what closes across the season.
What about rain?
Rain makes the roots and the stone steps slippery, and the clay between them worse. The trail does not close for ordinary rain, but the descent becomes a different proposition. If it has rained heavily overnight, or is raining steadily when you arrive, change the plan: shrine by bus, temple by cable car, mountain another day. A wet Kinone-michi is not the place to test your balance.
Also check current conditions before travelling. The trail has been closed after typhoon damage in past years, and bear sightings are reported in the wider Kyoto area, with the prefecture publishing current advice. Neither is a reason to cancel by default — but both are reasons to check the temple’s notice page and the local authority’s updates rather than assume.
Getting There and Back
Getting to Kurama Station
Take the Eizan Railway from Demachiyanagi Station to Kurama. The journey takes about 30 minutes and costs 470 yen one way. Demachiyanagi is reached from central Kyoto by the Keihan line, or by bus from Kyoto Station — allow 20 to 30 minutes for that leg, more at peak times.
Kurama Station is the end of the line, so you cannot miss your stop. In autumn the railway runs additional services and a special timetable, which is helpful but also means the trains are full.
Getting back from Kifune Shrine
This is where a lot of people go wrong. The walk from Kifune Shrine to Kibuneguchi Station is about 30 to 40 minutes, generally downhill along the valley road — still a tiring stretch after the mountain hike.
The alternative is Kyoto Bus route 33, which runs between Kibuneguchi Station and the Kifune bus stop. It is a short shuttle of a couple of kilometres, not a service into central Kyoto, so you still change to the Eizan line at Kibuneguchi. The timetable changed on 28 September 2026, and buses are not frequent, so check the current schedule on the day rather than relying on an old blog post.
Whichever you choose, work backwards from the last bus and the sunset. The valley gets dark early, and the walk to the station is on a road without much lighting.
What the day costs
Budget for the Kurama-dera mountain fee of 500 yen, the cable car donation of 200 yen if you use it, 470 yen each way on the Eizan line, and a few hundred yen for the bus. That is roughly 1,600 to 2,100 yen per person before food, which is modest for a full half-day.
Do not assume a transport pass will save you money here. Most Kyoto passes are built around city buses and subways, and this route uses a private railway and a separate bus company. Check the coverage before buying — for many travellers, paying as you go is cheaper.
Self-Guided or Guided: Which Is Better?
The mountain does not require a guide. The path is marked, the distances are short, and the main risk is your own footing. What a guide adds is context and logistics, not safety in any meaningful sense.
| Consideration | Self-guided | Guided |
|---|---|---|
| Cost | Mountain fee, cable car and transport only | Tour price, which usually includes the temple fee |
| Navigation | Straightforward but you manage it yourself | Handled for you, including the return leg |
| Cultural explanation | Signboards and whatever you have read | English commentary on the temple, the tengu legends and the shrine |
| Pace | Entirely yours | Set by the group, though private tours tend to adapt |
| Who it suits | Confident walkers who want freedom and a lower cost | Travellers who want the stories explained and the planning removed |
When self-guided is enough
If the weather is dry, you are comfortable on uneven ground, and you can read a map, walk it yourself. You will save money, you can stop for as long as you like at the main hall, and you can change your mind at Mao-den without negotiating with anyone.
When a guided tour is worth considering
A guide earns their fee when you want the mountain explained rather than simply crossed. Kurama is a place where Buddhism, Shinto and mountain worship sit on top of each other, and the signboards do not tell that story in English. If you are travelling with someone who would rather not manage the route, or you have limited time and want the logistics handled, a private tour is a reasonable purchase.
The guided tour worth checking
The main English-language option is a private hike run by DeepExperience and sold through GetYourGuide. It runs about four hours, is limited to your group of up to six, and is guided in English or Japanese. It starts near the large tengu statue by Kurama Station and finishes either back at Kurama or at Kifune Shrine, depending on the option you choose.
The temple fee is included. Transport is less clear — the listing mentions transportation to and from Kurama, but the scope is not obvious, so confirm what is covered before booking rather than assuming your train fare is included. Cancellation terms also differ between the platform and the operator’s own page, so check the terms on the booking screen. And be aware that a guide does not change the trail: you will still be walking on roots and down steep steps.
If you want the mountain’s stories explained in English rather than just a route to follow, this private guided hike is the option worth comparing. It is particularly relevant for travellers who value cultural context and a more personal experience over the freedom and lower cost of walking independently.
Why I’d book this one
Recent traveler reviews point to a few reasons this guided experience appeals to visitors:
- Engaging cultural explanations: Travelers highlight the guides’ ability to explain the mountain’s history, temple traditions and local legends in a way that adds meaning to the walk.
- A more flexible pace: The private format makes it easier to ask questions and adapt the experience to your group’s interests and walking pace.
- A well-organized experience: Reviews mention knowledgeable guides and thoughtfully planned stops, helping visitors focus on the surroundings rather than managing every detail themselves.
See live availability, current prices, route options and recent traveler reviews for the private Kurama guided hike on GetYourGuide. For the mountain crossing described in this guide, check that you are selecting the Kurama Temple & Kifune Shrine option, and review the meeting point, transportation coverage and cancellation terms before confirming.
Frequently Asked Questions
How long does the Kurama to Kibune hike take?
Plan for two to three hours on the mountain. The walking itself is closer to two hours, and Kurama-dera’s own section timings add up to roughly 118 minutes, but that excludes stops. Once you add the main hall, Kifune Shrine and photographs, three hours is realistic. The journey from central Kyoto adds another 30 minutes each way on the Eizan line, so treat the whole outing as half a day rather than a morning.
Is the Kurama to Kibune hike difficult?
It is short but not flat. There is a sustained climb of stone steps at the start, a rooted forest path in the middle and a steep, irregular descent at the end. If you walk regularly and have shoes with grip, it is well within reach. If you have knee problems, or you only have smooth-soled shoes, it will feel harder than the distance suggests.
Should I take the Kurama cable car?
Take it if you want to preserve energy for the roots and the descent, or if you are walking with children or older relatives. It replaces about 30 minutes of stone steps with a two-minute ride and a ten-minute walk, for a 200 yen donation. Do not take it if you want to see Yuki-jinja Shrine or walk the switchback approach, and do not expect it to shorten the mountain section — it only covers the first climb. The last uphill departure is at 16:20, which is after the main hall closes, so afternoon visitors need to check the time.
Can you hike from Kibune to Kurama instead?
Yes, and it is a legitimate choice. You climb the rooted section rather than descending it, finish at Kurama Onsen and Kurama Station, and start in a quieter village. The trade-off is that the cable car is not available until near the end of your walk, so all the climbing is on foot. The total ascent is similar in either direction; what changes is when your legs get tired.
Can you do the Kurama to Kibune hike in winter?
Sometimes, but not automatically. If the trail is dry and free of snow and ice, a winter crossing is possible and the cedar forest is quiet and beautiful. If there is snow or ice, skip the crossing — the steps and roots become genuinely hazardous, and the walk takes far longer than the summer estimate. In that case, visit Kifune Shrine by bus from Kibuneguchi Station and visit Kurama-dera separately. Check the temple’s notices and the local weather forecast on the morning you plan to go, not the week before.
How do I get back to Kyoto from Kibune?
Walk about 40 minutes to Kibuneguchi Station, or take Kyoto Bus route 33, which shuttles between the Kifune bus stop and Kibuneguchi Station. From Kibuneguchi, the Eizan line connects back to Demachiyanagi. Route 33 does not run into central Kyoto, so you will change trains regardless. The bus timetable changed in September 2026 and services are not frequent, so confirm the last departure before you start the descent.
Final Verdict: Who Should Do This Hike?
The Kurama to Kibune hike rewards people who arrive with the right expectations. It is not a secret trail and it is not a wilderness expedition. It is a short, beautiful, genuinely uneven mountain path between a temple and a shrine, and the satisfaction comes from crossing it on foot rather than from the difficulty.
Choose this hike if you walk regularly, you have shoes with tread, and you are in Kyoto for at least three full days. Start at Kurama Station, take the cable car if you want to protect your legs, and allow the full half-day. On a dry spring or autumn day, this is one of the best things you can do outside central Kyoto.
Choose a different plan if you have knee or ankle instability, you are travelling with someone who cannot manage a long stretch of steps, or the trail is snowy or icy. Visit Kifune Shrine by bus and Kurama-dera by cable car as two separate stops. You will see both places without the part that hurts.
For first-time visitors: go Kurama to Kibune. Take the cable car if you want to save energy, or walk up via Yuki-jinja Shrine if you want to visit it — the cable car bypasses the shrine. Yuki-jinja is about five minutes uphill from Niomon Gate on the walking route and is one of the more memorable places on the mountain.
For families: the cable car makes this manageable with children old enough to walk a couple of hours, but the rooted section and the descent need close attention. If your children are young enough to need carrying, take the bus to Kifune Shrine instead and leave the crossing for another year.
For travellers on a tight schedule: do not attempt this on a day with a fixed afternoon booking in central Kyoto. The walk plus transport plus the return bus is a five-hour block once you include waiting, and the last cable car and the bus timetable do not negotiate.
For repeat visitors: reverse the route and finish at Kurama Onsen. You will climb the roots instead of descending them, and you get a hot spring at the end — a better use of a second visit than repeating the same direction. If you want a longer, more challenging temple trek, our Mount Hiei hike guide covers the next step up.
For anyone who wants the mountain explained: the private guided option is worth the money, not because the trail is dangerous but because the layers of Buddhist, Shinto and mountain worship here are invisible without someone talking you through them. Everyone else can walk it alone with a map and a pair of decent shoes.
Fees, cable car operations and bus timetables were checked in November 2026. Confirm the current details before you travel.
Hi, I’m Kai. I’m a Tokyo-based travel writer, tourism industry insider, and the author of a published guidebook for international visitors to Japan. With over 10 years of professional experience at a leading Japanese tourism company, my mission is to help you skip the tourist traps and navigate Japan’s best destinations like a local. I believe the perfect day trip is like a traditional kaiseki meal: a beautiful balance of precise planning and unforgettable seasonal discovery. When I’m not out conducting field research, you’ll usually find me drafting new itineraries with one of my favorite fountain pens!