
Mount Daimonji (Daimonji-yama), a peak on the western side of the Nyoigatake massif, is the mountain you have probably been looking at all week without realising it: the huge 大 character burned into the hillside above Kyoto every 16 August. The hike is short, starts within the city, and rewards far more than the effort it asks. But the right route depends entirely on what you want from the day.
If you want the view, climb from Ginkaku-ji to the fire bed and stop there. It takes roughly 30–45 minutes up to around 330 m, with the city laid out below you. The summit sits at about 465 m, only some 20 minutes further, but the panorama is not better — you are simply higher and further back. If you want a proper walk in the forest rather than a viewpoint, start on the Nanzen-ji side or follow the Kyoto Trail from Keage Station and give it half a day. What I tell guests before we set off is simple: short does not mean flat. The gradient starts early, and the descent is where most people slip.
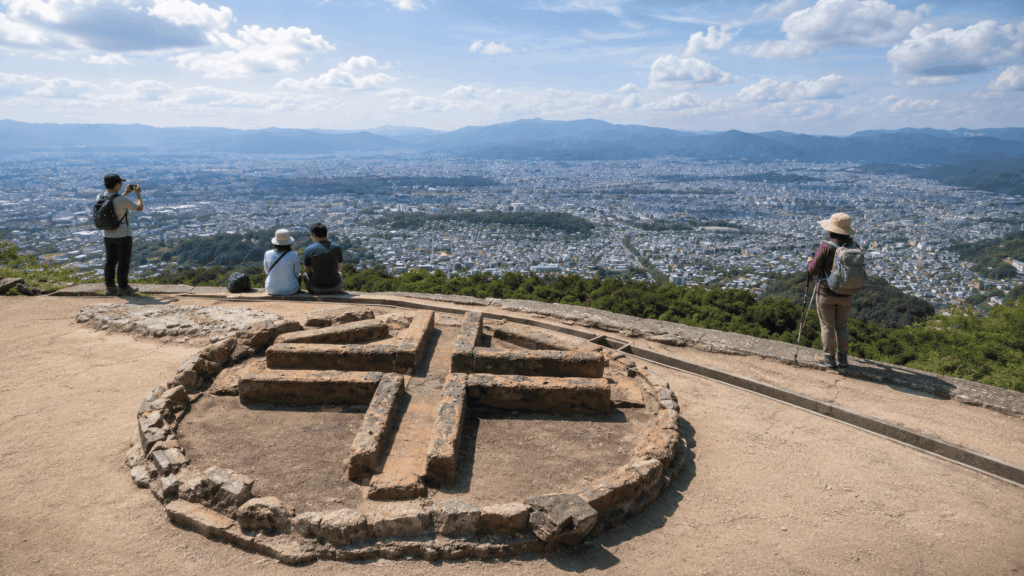
Quick answer
- Best route for the classic view: Ginkaku-ji trailhead to the fire bed and back — about 1–1.5 hours round trip including a break.
- Best route for a longer walk: the Nanzen-ji side trails, or the Kyoto Trail from Keage Station to Ginkaku-ji (about 6.2 km, half a day).
- Do you need the summit? No. The fire bed is the highlight; the extra 20-minute climb is for people who want the summit itself.
- What to wear: shoes with real grip. Trainers are fine on dry ground, not on wet stone or loose gravel.
- Best for: travellers who want a half-day of nature, a city panorama, and a leg-stretch between temples.
- Not ideal for: anyone expecting a flat city stroll, visitors with limited mobility, or travellers carrying large luggage.
A guided hike is not necessary for the standard Ginkaku-ji round trip, and that money is better spent on a good lunch. If you specifically want to walk the longer Nanzen-ji to Ginkaku-ji traverse with someone who knows the junctions and can explain what you are looking at, that is a different calculation, and there is a guided option further down.
For the longer Nanzen-ji–Mount Daimonji–Ginkaku-ji walk, an English-speaking guide can take the route-finding and timing decisions off your hands. Compare the itinerary, available dates and inclusions for this seven-hour guided hike before deciding whether you would rather go independently.
Which Mount Daimonji Route Should You Choose?
There are four routes worth considering, and they are not variations of the same walk. Two are short out-and-backs from Ginkaku-ji, one is a forest approach from the Nanzen-ji side, and one is a one-way traverse on the waymarked Kyoto Trail. Difficulty in the table assumes dry weather, a normal walking pace and at least one rest stop. In rain or after heavy overnight rain, add time and treat every stone step as slippery.
| Route | Start / Finish | Typical Time | Difficulty | Best For | Main Trade-off |
|---|---|---|---|---|---|
| Ginkaku-ji to the fire bed and back | Ginkaku-ji trailhead / same trailhead | 1–1.5 hrs round trip, including a break | Short but steep | First-time visitors, city views, limited time | Best view for the least effort, but very little forest walking |
| Ginkaku-ji to the fire bed and summit | Ginkaku-ji trailhead / same trailhead | 2–2.5 hrs round trip | Steeper and longer | Walkers who want to stand on the summit | An extra climb for a summit that is mostly trees, not views |
| Nanzen-ji-side forest hike | Nanzen-ji area / back the same way, or on to Ginkaku-ji | 2.5–4 hrs, depending on where you enter and exit | Sustained climb | Half a day of forest, fewer people, temple-to-mountain walking | Junctions are not obvious and the time is hard to predict |
| Keage to Daimonji to Ginkaku-ji | Keage Station / Ginkakuji-michi | About 6.2 km; half a day | Moderate, half-day | A one-way traverse that links subway, mountain and temples | You finish somewhere else, and you need to check current trail notices first |
Best for a Short Hike: Ginkaku-ji to the Fire Bed
This is the route almost everyone means when they search for a Mount Daimonji hike, and for most visitors it is the correct choice. You start a few minutes from the Ginkaku-ji bus stop, climb through cedar and broadleaf forest, and arrive at the fire bed — the concrete ledges that form the 大 character — in well under an hour. City guidance puts the fire bed at about 30 minutes from the trailhead and the summit at about 60; in practice most people take 30–45 minutes to the fire bed, because the middle section is steeper than the first few minutes suggest.
The most common complaint in reviews is not the distance. It is the gradient, and the fact that a walk described as short turns out to involve continuous climbing. Go in expecting twenty to thirty minutes of real effort rather than a stroll, and the route feels entirely reasonable. Go in expecting a flat path to a viewpoint, and it will feel harder than it is.
Best for a Longer Adventure: The Nanzen-ji-Side Trails
The eastern hills behind Nanzen-ji are where the hike becomes a walk. Instead of a single climb to a viewpoint, you get a longer stretch of forest, stone steps, and occasional openings where the city appears through the trees. When I guide guests on Mount Daimonji, this is usually where we start, and the difference is immediate: fewer people, more shade, and a sense of leaving the city rather than popping up above it.
Be honest with yourself about the trade-off. The Nanzen-ji side does not have one clearly signposted official trailhead the way Ginkaku-ji does. Entrances vary, junctions are easy to miss, and the time to the fire bed or summit depends heavily on where you start. If you want a predictable hour, take the Ginkaku-ji route. If you want the walk itself, take this side and allow more time than you think you need.
Best for Reaching the Summit: The Full Daimonji Hike
The summit is about 465 m and roughly 20 minutes beyond the fire bed. It is a legitimate goal if standing on top matters to you, or if you want to continue into the network of trails behind the mountain. What it is not is a better viewpoint. From the fire bed you look straight down the slope at the city; from the summit you are higher, further back, and largely looking through trees. Choose the summit for the walk and the summit itself, not for the photograph.
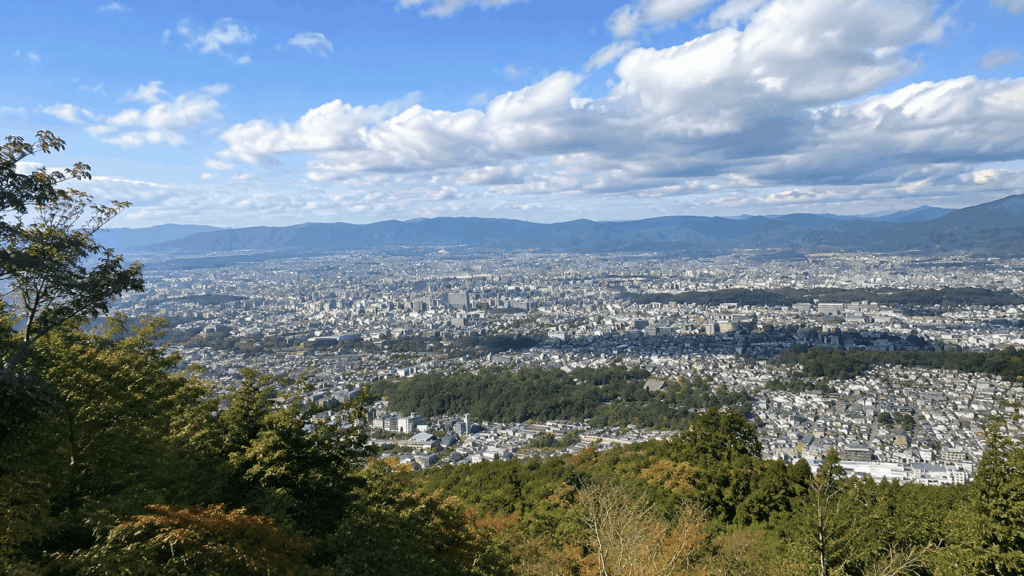
If you are combining the summit with a descent to Ginkaku-ji, plan it as a one-way walk rather than an out-and-back, and decide your exit before you start. The Keage Station to Ginkakuji-michi traverse is about 6.2 km and comfortably fills half a day at an unhurried pace.
How to Hike Mount Daimonji from Ginkakuji
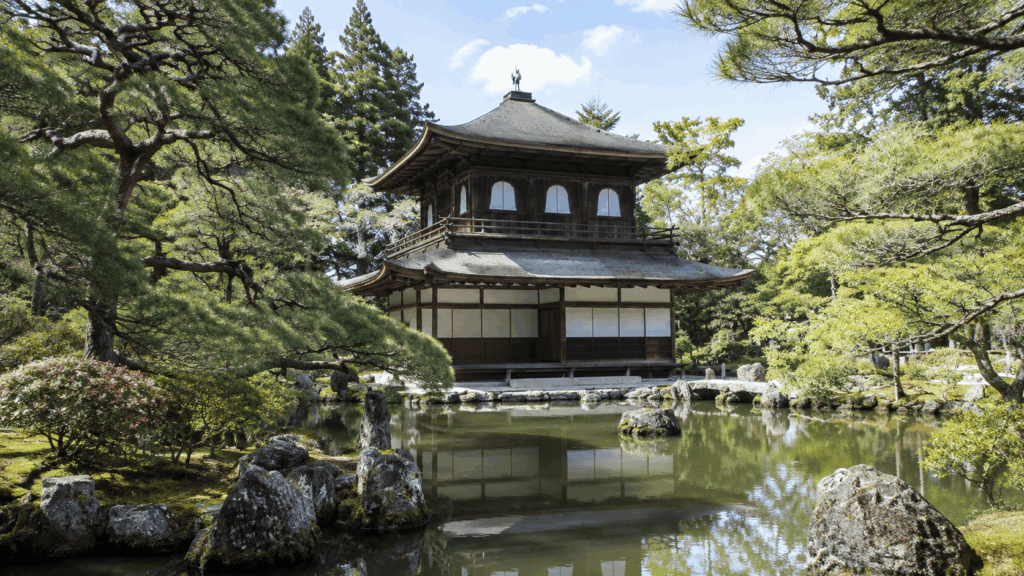
This is the most straightforward approach and the one to choose if you have half a morning and want a guaranteed view. You do not need to enter Ginkaku-ji’s paid grounds, and you do not need a map to start — but you do need to know which side of the temple to walk around, because the signposting at the bottom is modest.
Getting to the Trailhead
Take Kyoto City Bus 5 or 17 from Kyoto Station to the Ginkakuji-michi stop; the ride is roughly 30–40 minutes and costs the flat city fare (¥230 at the time of writing). From the stop, walk east along the approach road toward the temple gate, then keep left and follow the lane around the northern side of the temple grounds. Look for the torii of Hachi-jinja, a small shrine tucked against the hill. Keep right at the torii without entering the shrine grounds to reach the hiking route.
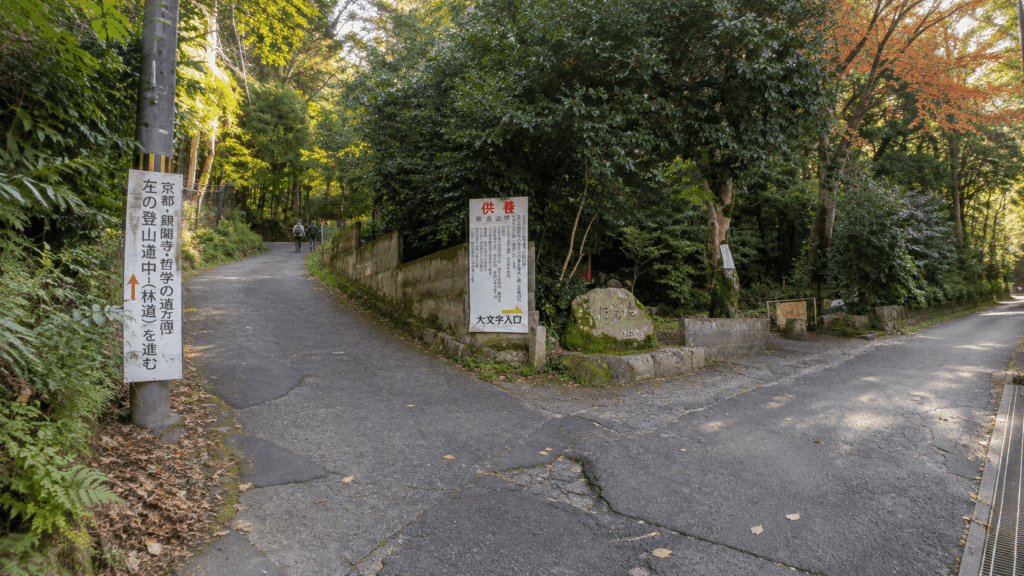
Sort out logistics here rather than higher up. There are public toilets around the Ginkakuji-michi stop and the temple approach, and convenience stores and vending machines for water, but there are no toilets and no water once you are on the trail. If you are arriving straight from a train with a suitcase, this is not the hike to do before checking in — the path is narrow, uneven, and there is nowhere sensible to leave a bag.
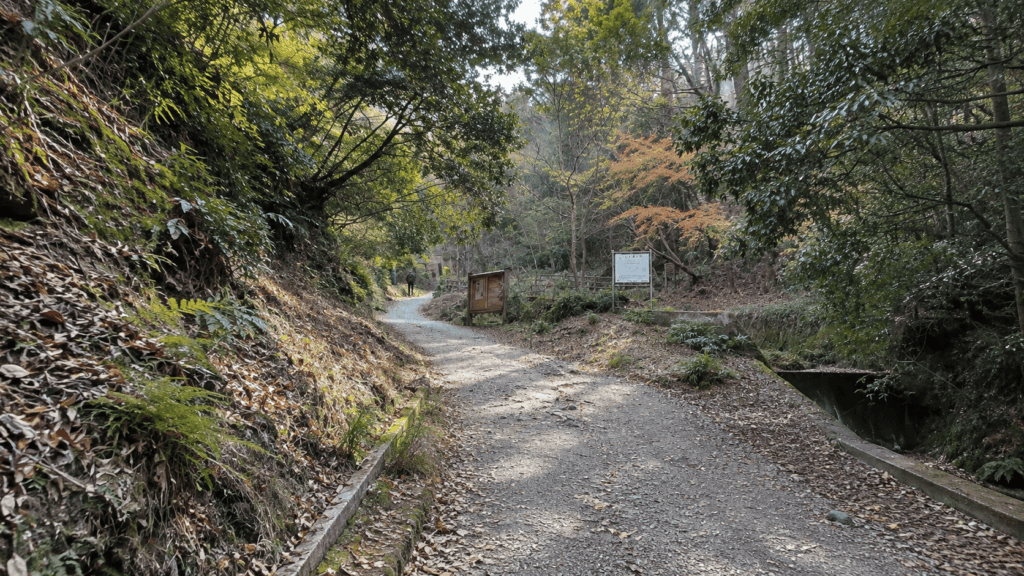
From Ginkaku-ji to the Fire Bed
The route begins as a paved lane between houses and temple walls, turns into stone steps, and then settles into a dirt trail under tall trees. The first stretch is gentle enough to be misleading. The middle section is where the climb concentrates: a sustained run of steps and eroded dirt that gets your breathing up and does not let go until the trees open.
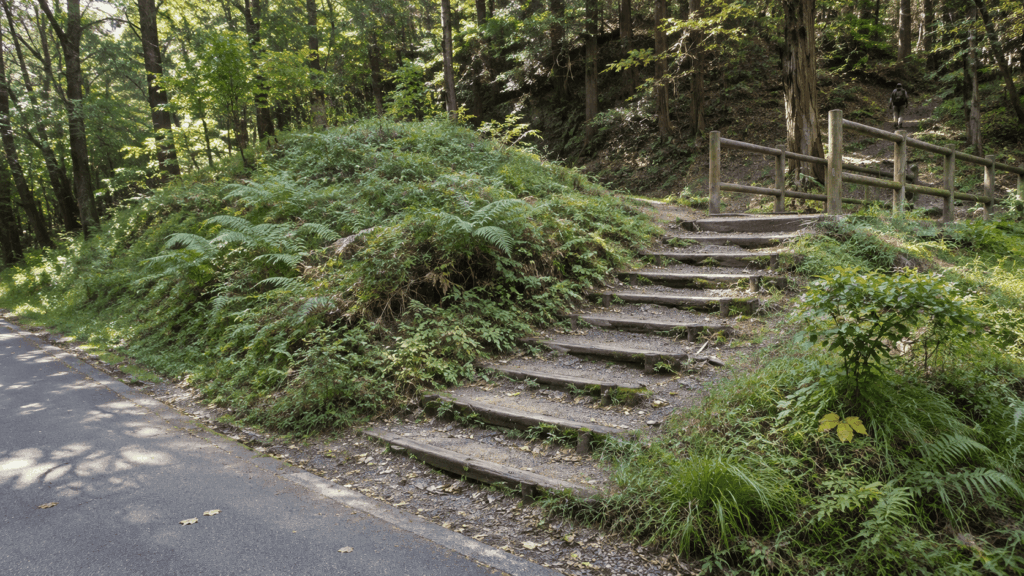
Then the fire bed appears suddenly — not a viewing platform but a series of concrete ledges cut into the slope, arranged as the strokes of the character. Seventy-five individual fire beds make up the 大, lit on 16 August during Gozan Okuribi, the send-off fires of Obon. Standing beside the ceremonial fire beds and looking down on the whole grid of the city is the reason this hike is worth doing. Allow 30–45 minutes up, and do not be surprised if it takes longer on a hot or humid day.
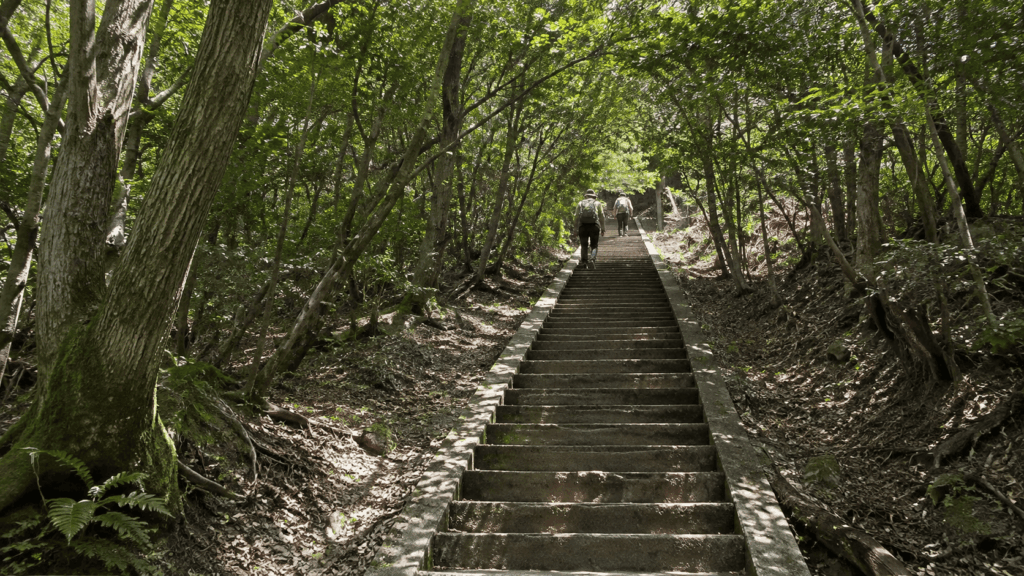
Returning to Ginkaku-ji
You come down the same way. Descents on this trail are slower than people expect: the stone steps are worn smooth in places, and loose gravel sits on top of hard-packed dirt. Take the corners slowly and use the handrails where they exist. Most people are back at the trailhead in 20–30 minutes.
Once you are down, you are a two-minute walk from Ginkaku-ji and the northern end of the Philosopher’s Path, which makes this the easiest version of the hike to slot into a sightseeing day. If your legs are still fresh and the afternoon is open, walking the canal south toward Nanzen-ji is a far better use of the remaining time than adding a second mountain.
Hiking Mount Daimonji from the Nanzenji Side
“Nanzen-ji side” is the phrase travellers use, but it is worth being precise about what exists on the ground. There is no single official trail called the Nanzen-ji route. What you have is a network of paths entering the eastern hills from around Nanzen-ji and Keage, and one officially waymarked line through the area: the Kyoto Trail Higashiyama Course, which leaves from Keage Station, passes Himukai Daijingu, and continues over the mountain toward Ginkaku-ji. Everything else on this side is a combination of local paths whose entrances and junctions vary.
That distinction matters because it changes what you should expect. The Ginkaku-ji route is a known quantity: one trailhead, one path, one viewpoint. The Nanzen-ji side is a walk you plan rather than a route you follow.
What Makes the Nanzen-ji-Side Hike Different?
The first difference is time in the forest. From Ginkaku-ji you are on the mountain for an hour; from this side you can be under trees for two or three, with the city reduced to glimpses through the canopy. The second is the company. The Ginkaku-ji trail is busy with visitors in a way that is obvious within five minutes; on the Nanzen-ji side you are more likely to pass local walkers, trail runners, and the occasional school or kindergarten group than a line of tourists.
The third difference is the shape of the day. Starting here lets you link Nanzen-ji’s grounds — the Sanmon gate, the brick aqueduct of the Suirokaku — directly into a mountain walk, and finish at Ginkaku-ji or on the Philosopher’s Path. It is the most satisfying way to connect the temples of Higashiyama with the hill above them, and it is the version of the hike I would choose for myself.
Trail Conditions and Steep Sections
Expect a sustained climb rather than a stepped approach. On this side the gradient begins early and continues, with exposed roots, rock, and sections of dirt that hold water after rain. The path is walkable in ordinary conditions, but it is a forest trail, not a maintained park path: widths vary, edges crumble, and there are stretches where a stumble would mean more than a scraped knee. Fallen trees are part of the picture here, some cleared to the side of the trail and some still lying where they came down.
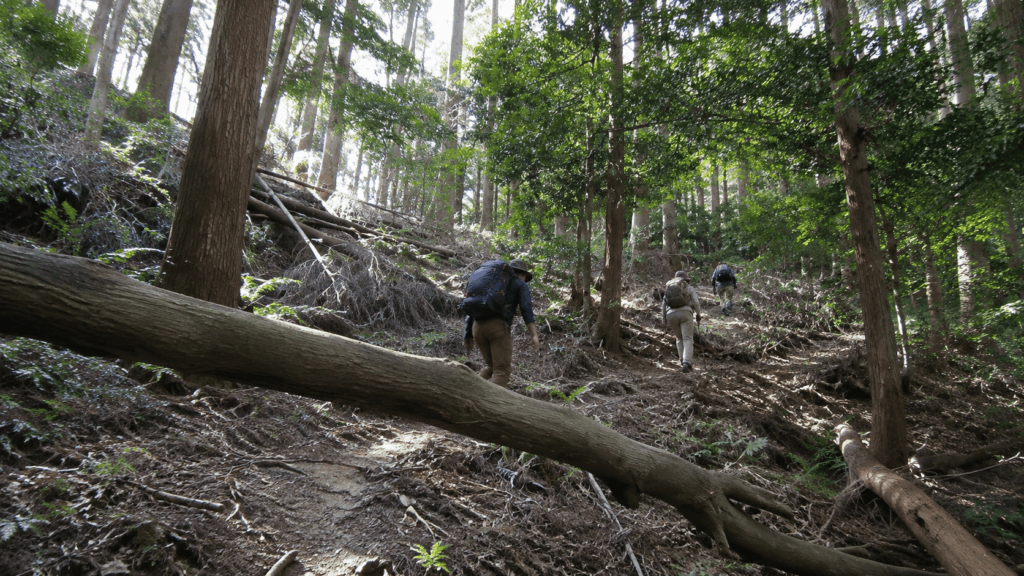
Kai’s tip: On the Nanzen-ji side the climbing starts almost immediately — there is no flat lane to warm up on the way there is behind Ginkaku-ji. The stretch where storm-damaged trees lie beside the path is the clearest reminder that this is a working forest, not a city park. Settle into a slower pace for the first fifteen minutes and the rest of the climb is far more enjoyable; push hard at the start and you will be stopping every few minutes.
Route Navigation and Current Trail Warnings
If you want a line you can actually follow, use the Kyoto Trail Higashiyama Course from Keage Station. It is waymarked with numbered posts, and the numbering is what makes official warnings readable: a notice referring to “No. 33–34” means the section between Himukai Daijingu and Shichifuku Shian-dokoro, not the whole mountain.
As of early November 2026, the Kyoto City trail notice dated 25 September 2026 warns of fallen-tree risk between markers No. 33 and No. 34, with the affected ground cordoned off by rope. Because of that work, Himukai Daijingu has temporarily allowed walkers to pass through its precinct as a detour — a courtesy, not a permanent right of way. The shrine and the Kyoto Mountaineering Federation have both stated that precinct access returns to prohibited once the tree work is finished. Walk quietly, do not treat the grounds as a sightseeing stop, and expect the arrangement to have changed by the time you visit.
Two practical consequences. First, check the current notices before you set out rather than relying on this page: trail closures on this course change with weather and maintenance, and a route that was open last month may not be. Second, do not assume that a closure between two markers closes the whole Nanzen-ji side. Equally, do not assume your chosen path avoids it. If the notices are unclear, the Ginkaku-ji round trip is the safe choice.
Fire Bed vs Summit: Where Is the Best View?
This is the decision that shapes the second half of your hike, and most guides leave it vague. The short answer: the fire bed is the viewpoint. The summit is a summit.
| Feature | Fire Bed (Hidoko) | Summit |
|---|---|---|
| Elevation | Around 330 m | About 465 m |
| View of Kyoto | Open, head-on panorama over the city grid; the reason people climb | Higher and further back; often partly screened by trees |
| Extra climbing required | None beyond the approach | About 20 minutes more up, plus the descent |
| Best for | Views, first-time visitors, short itineraries, photography | Walkers who want to stand on the summit or continue along the ridge |
| When to turn back | If light, time or weather is turning, or your legs are done | Only continue with 45 minutes to spare and water left |
Why the Fire Bed Is the Highlight
The fire bed is not a platform built for tourists. It is a set of concrete ledges cut into the hillside in the shape of the character 大 — seventy-five individual fire beds in total, lit on the evening of 16 August to send ancestral spirits home during Obon. Standing on the edge of one of those ledges, with the whole basin of Kyoto below and the logic of the character suddenly obvious under your feet, is a genuinely different experience from looking at a photograph of it.
It is also, unambiguously, a famous place. This is not a secret viewpoint, and on a fine weekend you will share it. The reward is proportional to the timing, not to the obscurity.
Is the Summit Worth the Extra Climb?
Yes, if the summit is the point. No, if the view is the point. Twenty minutes beyond the fire bed buys you altitude, a different angle, and the satisfaction of having walked the whole thing — not a better panorama. Walkers who continue often describe the summit as anticlimactic after the fire bed, and they are right. Walkers who enjoy it are usually the ones who came for the walk, or who want to carry on into the trails behind the mountain rather than turn around. If a true summit panorama is what you want, our Mount Hiei hike guide might be a better fit for your itinerary.
My Favorite Way to Enjoy the View
The fire bed rewards taking your time. I like to buy an onigiri and a bottle of coffee before setting off, climb in the morning while the path is quiet, and enjoy the view from a safe spot away from the ceremonial fire beds rather than turning straight around. Twenty minutes of that is worth more than another twenty minutes of climbing.
Two caveats. The fire beds are ceremonial structures, not seating — do not climb or sit on them, move aside for other walkers, and follow whatever signage or instructions are in place on the day, since rules around eating and lingering are not something to assume. And take everything out with you, including the coffee bottle. There is no bin on this mountain.
How Difficult Is the Mount Daimonji Hike?
Mount Daimonji is usually described as beginner-friendly, and that description is defensible — but only in the sense that the shortest route is short. It is not an easy walk. The climb is continuous, the surface is uneven, and the descent demands more attention than the ascent. Distance and physical effort are not the same thing here.
Is Mount Daimonji Beginner-Friendly?
If you allow enough time, carry water and wear shoes with good grip, this is a very good first hike in Japan: short, close to the city, with a clear destination and no navigation required. If you skip them, the same mountain becomes an unpleasant hour of sweating followed by a slippery descent, which is the version that shows up in negative reviews. If you prefer a genuinely flat, paved nature walk, consider something like the Minoh Falls hike in Osaka.
Can Children Hike Mount Daimonji?
Local kindergarten groups do walk this mountain, and seeing them is one of the pleasures of a weekday morning here. That is an observation, not a guarantee. Children who are used to walking will manage the Ginkaku-ji route; children who are not will need hands held on the steps and considerably more time. The fire bed has drops at its edges, which is the part to watch closely. Judge it by your child’s stamina and the weather on the day, not by the fact that other people’s children are up there.
Can You Hike in Sneakers?
On a dry day, with a sole that still has tread, ordinary trainers are adequate for the Ginkaku-ji round trip. The trail is dirt and stone rather than scree, and thousands of people walk it in whatever they wore to the temple. What trainers will not save you from is wet stone, loose gravel on a hard surface, or a long descent with tired legs.
Kai’s tip: The footwear question is not really about the climb — it is about the way down. Worn, flat-soled shoes are fine on the ascent and treacherous on the descent, because the trail’s stone steps are polished smooth in the middle where everyone walks. If your shoes are smooth underneath, or it rained in the last day, choose the shorter round trip or bring something with grip. I have watched more people slip in the last ten minutes of this walk than in the whole climb.
Best Time to Hike Mount Daimonji and What to Bring
This is not a mountain that needs expedition planning, but it is a mountain where small omissions turn into a bad afternoon: no water, wrong shoes, or starting too late in the day. The variables worth thinking about are heat, humidity, rain, and daylight.
Best Seasons and Time of Day
Spring and autumn are the comfortable months, with moderate temperatures and clearer air. Summer in Kyoto is hot and humid, and the climb concentrates the heat — start early and carry more water than you think you need. Winter is quiet and often clear, but the steps can hold frost or ice, and the fire bed is exposed to wind.
Time of day matters more than season for most visitors. Mid-morning on a weekday gives you the best combination of light, cooler air and thinner crowds. Late afternoon is beautiful but risky: the forest darkens well before the city does, and the descent is the part you do not want to do in failing light.
Kai’s tip: When I am guiding, I aim for a weekday morning and avoid weekends and the Obon period entirely — the difference at the fire bed is the difference between a viewpoint and a queue. One caveat I have learned the hard way: going too early has its own cost, because the forest section stays dim for a while after sunrise and the stone steps are hard to read in flat light. Somewhere around mid-morning is the sweet spot.
What to Wear and Pack
You do not need hiking gear. You do need to be deliberate about four things: grip, water, layers, and a way to navigate that does not depend on a signal.
| Item | Why It Matters | Practical Advice |
|---|---|---|
| Grippy walking shoes | Worn stone steps and loose gravel on the descent | Any shoe with visible tread; avoid smooth-soled fashion trainers and sandals |
| Water | No taps or shops anywhere on the trail | At least one litre per person in summer; refill before you leave the city |
| Weather-appropriate clothing | Humidity on the climb, wind at the fire bed | Light layers rather than a heavy jacket; you will sweat on the way up |
| Offline map | Signal is patchy and junctions on the Nanzen-ji side are unclear | Download the map before leaving your hotel, not at the trailhead |
| Small snack | Blood sugar dips on a short, steep climb more than people expect | An onigiri from a convenience store is the local solution |
| Rain protection | Showers arrive fast and the trail becomes slippery immediately | A lightweight shell or a compact umbrella; stone steps get dangerous when wet |
Safety Rules and Trail Closures
The single hard rule: 16 August is closed. On the day of Gozan Okuribi, climbing any of the five mountains is prohibited for safety and to allow the lighting preparations, and that includes Mount Daimonji. The other four mountains are closed year-round; Daimonji is the exception on every other day of the year. Do not plan a hike around the fire festival hoping to watch from above.
Beyond that: check the current trail notices before you go, especially if you are walking the Nanzen-ji side or the Keage traverse, where fallen-tree warnings have been in place through autumn 2026. Respect temporary arrangements such as the Himukai Daijingu precinct detour, which exists only while tree work continues. Do not attempt the descent after dark, even in summer, and do not rely on a phone torch as your plan. Carry out everything you bring, keep noise down near the shrines, and give way to local walkers — much of this trail crosses private land and temple grounds that are open through goodwill rather than obligation.
Do You Need a Guide to Hike Mount Daimonji?
For the standard Ginkaku-ji round trip, no. This is a one-hour walk with a clear path and a destination you cannot miss, and paying someone to point you up it is not a good use of your money. Where a guide genuinely adds something is on the longer traverse, at the junctions, and in the cultural context — which is a different product from a navigation service.
When a Self-Guided Hike Is Enough
You are fine on your own if you are doing the Ginkaku-ji to fire bed round trip, if you are comfortable reading a map, and if you want to move at your own pace and stop when you feel like it. Add the summit if you have the time. The route is short enough that a wrong turn costs you minutes, not hours, and the path is busy enough that you will rarely be alone.
Self-guided also means self-responsible: you are the one checking the trail notices, carrying the water, and deciding whether the weather is turning. That is a reasonable trade for most independent travellers.
When a Guided Hike Makes Sense
Consider a guide if you want to walk the Nanzen-ji to Ginkaku-ji traverse, where junctions are genuinely unclear and the time is hard to estimate. Consider one if you are travelling with a group of mixed fitness and would rather someone else manage the pace and the decisions. Consider one if your main interest is what you are looking at — the relationship between the temples, the fire ceremony, and the mountain — because that is the part a good guide can actually teach. And consider one if this is your first mountain walk in Japan and you would rather not spend the day checking whether you are still on the right path.
A Guided Mount Daimonji Hiking Option
There are two kinds of guided hike worth knowing about, and they suit different travellers.
The first is a small-group day tour that walks Nanzen-ji, climbs Mount Daimonji, and descends to Ginkaku-ji, with an English-speaking guide throughout. In the version currently on sale, expect around seven hours, entry to both temples and train fares during the tour; check the latest listing for lunch arrangements. The meeting point is near Kyoto Station and the pace is described as moderate. It is not suitable for anyone with mobility impairments or heart and respiratory conditions, and you should bring your own water. Prices vary by date and operator — expect something in the region of $150 per person — and free cancellation is typically available up to 24 hours ahead.
The second is a private guiding arrangement, usually six hours with a licensed guide, a group cap of around seven, and a meeting point at Kyoto Station or your hotel. Here the guide fee is normally the only thing included: transport, lunch, drinks and temple admission are extra. If you take this route, confirm the start and finish points in writing before you book, because some listings describe the walk as starting near Nanzen-ji while the itinerary actually begins further east near Yamashina and ends at a different station. That is not a reason to avoid the tour; it is a reason to ask.
Neither option makes the mountain safer in any absolute sense, and neither is necessary for the short route. They are worth the money only if the guiding itself — route-finding, pacing, and explanation — is what you want.
If you want the longer temple-to-mountain walk rather than a quick climb to the fire bed, the seven-hour Nanzen-ji–Mount Daimonji–Ginkaku-ji tour is the guided option worth comparing.
Why I’d book this one
- A connected route: The itinerary links Nanzen-ji, Mount Daimonji and Ginkaku-ji rather than treating the mountain as a standalone viewpoint. That makes it a better match for travellers who want both the hike and the temples.
- English-language context: The guide can explain how the temples, hillside and Daimonji fire ritual fit together, adding something beyond simply following the trail.
- Fewer arrangements to manage: Temple visits and transport during the tour are described in the package. Check the current inclusions, lunch arrangements and cancellation terms before choosing a date.
See available dates, the full itinerary and current booking conditions for the Nanzen-ji–Mount Daimonji guided hike to decide whether the extra structure and cultural explanation are worth it for your trip.
How to Fit Mount Daimonji into Your Kyoto Itinerary
The honest answer is that this hike costs you less time than its reputation suggests, provided you choose the short route. The mistake is treating it as a half-day commitment and then discovering you have an afternoon free, or treating it as an hour and then running out of daylight on the Nanzen-ji side.
A Short Morning Hike and Sightseeing Plan
Leave Kyoto Station on the 5 or 17 bus around 8:00, reach Ginkakuji-michi by 8:45, and be at the fire bed before 9:30. Spend fifteen or twenty minutes at the top, descend by 10:30, and you are standing at the gates of Ginkaku-ji with the rest of the day intact. From there, walking the Philosopher’s Path south toward Nanzen-ji is a natural continuation, with temples, cafés and canal views along the way.
This is the version I would recommend to anyone on a three- or four-day trip. It gives you the panorama, the exercise, and a legitimate appetite for lunch, without consuming a day.
A Half-Day Forest Hiking Plan
If you want the walk rather than the viewpoint, start at Keage Station in the morning, follow the Kyoto Trail Higashiyama Course past Himukai Daijingu and over the ridge, and come down to Ginkakuji-michi. The section from Keage to Ginkaku-ji via the mountain is about 6.2 km and comfortably fills four hours at an unhurried pace with stops. Treat this as the main activity of the day rather than something squeezed between temples, and check the trail notices the night before, particularly around markers No. 33–34.
Whichever version you choose, resist the urge to stack a second mountain or a long temple circuit onto the same afternoon. The climb is short but it is still a climb, and most people underestimate how much the descent takes out of their legs. If you are looking for another half-day trail for a different day in your itinerary, our guide to the Kurama to Kibune hike is a great next option.
Frequently Asked Questions
How long does it take to hike Mount Daimonji?
From the Ginkaku-ji trailhead, allow 30–45 minutes to reach the fire bed; city guidance puts it at around 30 minutes, and most visitors take a little longer. The summit is about 20 minutes beyond the fire bed, or roughly an hour from the trailhead. A realistic round trip to the fire bed, including a proper stop at the top, is 1–1.5 hours. Add another 45 minutes to an hour if you continue to the summit. Routes from the Nanzen-ji side or the Keage traverse take considerably longer — plan on two to four hours depending on where you start and finish.
Is Mount Daimonji suitable for beginners?
Yes, if you take the shortest route and set your expectations correctly. The Ginkaku-ji round trip is short, clearly defined, and needs no navigation. It is not, however, a flat walk: the middle section climbs continuously, and the descent over worn stone steps requires attention. Beginners who allow 1.5 hours, carry water, and wear shoes with grip will find it a very manageable introduction to hiking in Japan. Anyone expecting a gentle city stroll will find it harder than advertised.
Can you hike Mount Daimonji in sneakers?
On a dry day, ordinary trainers with intact tread are adequate for the Ginkaku-ji round trip. The risk is concentrated on the descent, where the stone steps are polished smooth and loose gravel sits on hard ground. Smooth-soled shoes, sandals, and anything with worn tread become a genuine hazard after rain. For the longer Nanzen-ji side routes, or in wet conditions, proper walking or hiking shoes are the better choice.
Is the Daimonji fire bed the summit?
No — and this is the most common misunderstanding about this mountain. The fire bed sits at around 330 m, while the summit is about 465 m, roughly 20 minutes of additional climbing. The fire bed has the better view: it faces the city directly and looks straight down over the basin. The summit is higher but further back, and the panorama is often partly screened by trees. If your goal is the view, the fire bed is the destination.
Can you hike Mount Daimonji on August 16?
No. Climbing is prohibited on 16 August, the day of Gozan Okuribi, when the five mountains are lit to send off ancestral spirits. The closure applies to Mount Daimonji as well as the other four mountains and is in place for fire safety and to allow the lighting preparations. Every other day of the year the mountain is open. If you are in Kyoto for the festival, plan to watch the fires from the city rather than from the hillside.
Final Verdict: Which Mount Daimonji Hike Is Right for You?
Mount Daimonji rewards a clear decision more than a long itinerary. Pick the version that matches the day you actually have, not the one that sounds most impressive.
Choose the Ginkaku-ji to fire bed round trip if you want the classic Kyoto panorama, have a morning rather than a day, and would rather spend the afternoon at Ginkaku-ji and on the Philosopher’s Path. This is the right choice for most first-time visitors, and it is the one I would send a friend to do.
Choose the Ginkaku-ji route plus the summit if standing on top matters to you, or if you want to keep walking rather than turn around. Go in knowing that the summit view is not better than the fire bed’s, so that the extra 20 minutes is for the summit itself.
Choose the Nanzen-ji side or the Keage traverse if the walk is the point. This is the version for travellers who have already seen the headline temples, who want two or three hours under trees, and who are comfortable with junctions that are not perfectly signed. Check the current trail notices first — fallen-tree warnings between markers No. 33 and No. 34 were in place through autumn 2026, along with a temporary detour through the Himukai Daijingu precinct.
For families with young children, the Ginkaku-ji round trip is the only sensible option, and even then allow double the time and keep hands held near the edges of the fire bed. Local kindergarten groups do walk this mountain, but that is not a promise that your child will enjoy it.
For travellers on a tight schedule, do the fire bed and nothing more. It is achievable before 10:30 if you start early, which leaves the rest of the day for the northern Higashiyama temples.
For repeat visitors, the Keage to Ginkaku-ji traverse is the version that feels new: same mountain, entirely different walk, and a satisfying way to arrive at a temple you have already seen from the front gate.
Book a guided hike only if you want the longer traverse with the navigation handled, or you want the temples, the fire ceremony and the mountain explained as one story. For the short round trip, save the money, buy an onigiri and a coffee, and enjoy the view from a safe spot away from the ceremonial fire beds instead.

Hi, I’m Kai. I’m a Tokyo-based travel writer, tourism industry insider, and the author of a published guidebook for international visitors to Japan. With over 10 years of professional experience at a leading Japanese tourism company, my mission is to help you skip the tourist traps and navigate Japan’s best destinations like a local. I believe the perfect day trip is like a traditional kaiseki meal: a beautiful balance of precise planning and unforgettable seasonal discovery. When I’m not out conducting field research, you’ll usually find me drafting new itineraries with one of my favorite fountain pens!