
Mount Hiei looks straightforward on paper: 848 m, a World Heritage temple on top, and a cable car at the summit in case you change your mind. The walking is where the nuance lives, and it is the part most guides flatten into a single word — moderate.
The Shiga-side climb from Sakamoto and the Kyoto-side approach from Shugakuin are not two versions of the same hike. One asks for endurance on a long, unbroken ascent. The other asks for attention underfoot, especially on the way down. On the day I walked it, I went up from Sakamoto and came down toward Shugakuin, and the descent, not the climb, is what demanded care.
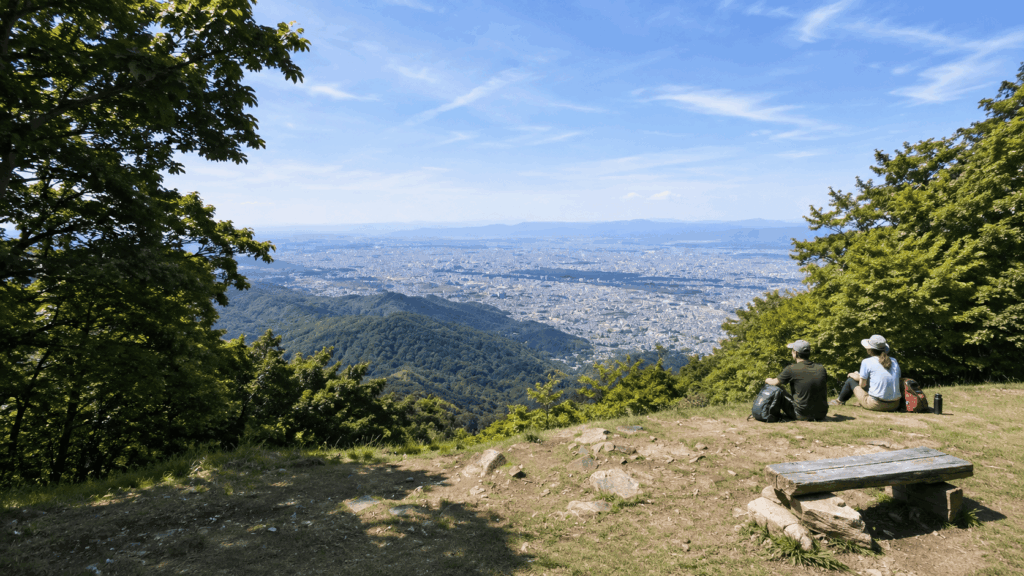
For travelers more interested in understanding Enryakuji’s Buddhist history than completing the full Honzaka ascent, a five-hour private guided walk offers a different way to experience Mount Hiei. It uses cable-car access to explore the mountain’s temple areas rather than climbing the entire pilgrim route. Check available dates, itinerary details and private-group options for the Mount Hiei guided tour.
Mount Hiei Hike: The Short Answer
- Best first route: Honzaka from Sakamoto — 1.5–2 hours up, stone steps and cedar forest, hard to lose.
- What makes it hard: the sustained climb on the Shiga side; the footing on the Kyoto-side descent.
- Time: half a day for Sakamoto → Enryakuji → cable car down. A full day with the summit and lookouts.
- Shoes: grippy soles. Trainers can work on Honzaka when dry; they are a poor match for the Kyoto side.
- Summit: Daihiei (about 848 m) is wooded. The views are at Shimeigatake parking beside Garden Museum Hiei.
- Costs: Enryakuji ¥1,000; Sakamoto Cable ¥960 one way, ¥1,830 return.
- Exit: Sakamoto Cable until 17:30, March–November. Check the timetable before you start.
If you would rather have the route, the forest and the temple explained in English, a private guided mountain walk is an option — though note that the standard guided version walks on the mountain using train and cable car access rather than climbing the full Honzaka route from Sakamoto.
How Difficult Is the Mount Hiei Hike?
A single rating is close to useless here. “”Moderate”” covers both a stone staircase you could climb in trainers and a rutted descent where one bad foot ends the day. Split the question into four.
- Cardio: how long you can keep climbing without a proper break — the Shiga side’s main demand.
- Footing: whether the surface lets you place a foot where you want it — the Kyoto side’s main demand, and worse going down.
- Navigation: whether you can find the next marker without stopping. Honzaka is simple; the Kyoto side involves Kyoto Trail signage and junctions.
- Exit flexibility: what you can do if you are tired, late or the weather turns. Both sides have a cable car, but they go to different places.
Is Mount Hiei Beginner-Friendly?
Yes, with conditions. “”Beginner-friendly”” here means no technical skill, not an easy stroll: several hundred metres of ascent in one sustained push, on stone and packed earth, often in humid cedar forest.
It suits you if you can walk uphill for an hour or two without stopping much, you prefer forest and old stone to open views, and you want the temple and the walk in one day. It does not suit you if you pictured a flat nature trail, you only have thin-soled city shoes and still want the Kyoto-side descent, you expect a panorama within 30 minutes of a car park, or you are hiking on ice without proper gear. If you prefer a shorter, more structured walk in the northern mountains, you might want to read our guide to the Kurama to Kibune hike instead.
Why the Difficulty Changes by Route
Honzaka is a climb: relentless, but predictable underfoot and obvious in direction. Shiga’s official tourism guide is refreshingly blunt about the trade-off — the old pilgrim route is “”not especially well maintained”” now that the cable car carries most visitors. There are no signposts, and you still cannot really fail to reach Enryakuji.
The Kyoto side is a different problem. The official Shugakuin course runs about 6 km and is listed at roughly 3 hours 40 minutes one way including temple time, with sections described as a steep path cut into the valley floor. That explains why it is slower than the distance suggests: you are adjusting your feet, not just gaining height.
Sakamoto vs Kyoto: Which Route Should You Choose?
If you want the climb to be the main event, with a straightforward line and a cable car waiting at the top, take the Shiga side. If you want to start from Kyoto and accept a rougher, more technical path, take the Kyoto side — provided your shoes and your confidence match it.
| Route | Difficulty | Main challenge | Best for | Return option |
|---|---|---|---|---|
| Honzaka Route (Sakamoto side) About 1.5–2 h from Sakamoto-hieizanguchi to Enryakuji |
Moderate, sustained | Continuous stone steps and a long unbroken ascent | First-time hikers who want a real walk plus the temple | Sakamoto Cable, or walk back down the same route |
| Kyoto-side approach (Kirarazaka, from Shugakuin) About 6 km, roughly 3 h 40 min one way including temple time |
Moderate to hard underfoot | Eroded, uneven sections and a steep valley-like path in places | Confident hikers staying in north Kyoto who want a quieter trail | Continue to Enryakuji, then use the Kyoto-side lifts or bus from the summit area |
| Cable-assisted mountain walk | Easy to moderate | Time pressure; walking is confined to the summit and temple areas | Families, limited time, or a wet day | Cable car back the way you came |
Honzaka Route: Better for a First Mount Hiei Hike
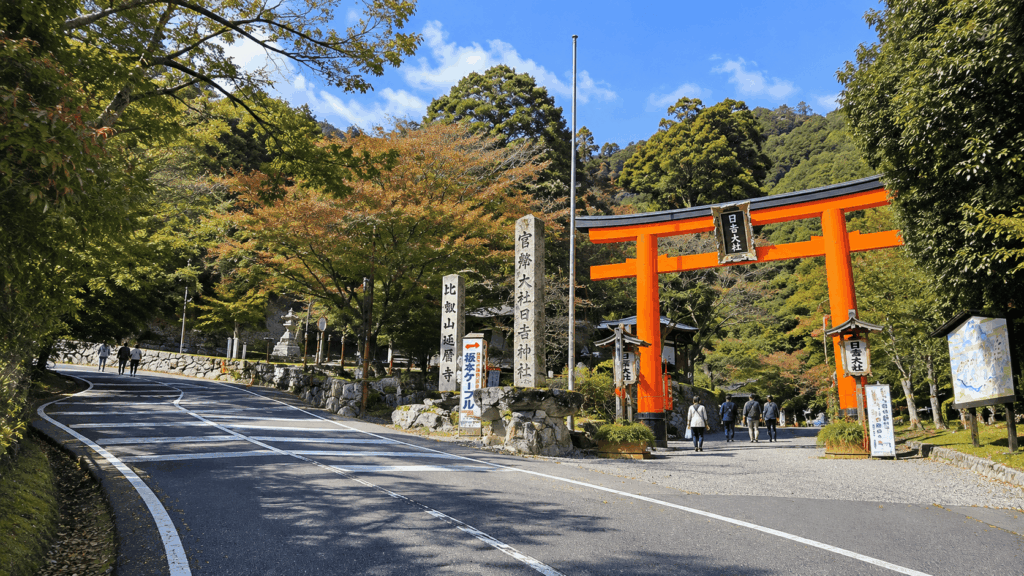
The entrance is easy to miss. From Keihan Sakamoto-hieizanguchi Station it is a five-to-ten-minute walk to Hiyoshi Taisha, and the route begins at the stone steps beside the shrine’s torii gate. No gate fee, no briefing — you simply start climbing. What you get is a proper pilgrim path: stone under cedar, small images at the edges, long stretches where the only sound is your own breathing, and a route where a wrong turn is genuinely hard to make.
The Kyoto-Side Approach: More Demanding Underfoot
The official course starts at Eizan Railway’s Shugakuin Station: about 25 minutes on foot to the Kirarazaka trailhead (roughly five by taxi), following the Otowa River east. It climbs past the old Kirarazaka path, joins the Kyoto Trail at marker Higashiyama 72, passes viewpoint marker Higashiyama 73-3, then continues by the ropeway station and Tsutsujigaoka to the Enryakuji Todo area.
Two cautions. The 3 hour 40 minute figure includes temple time and excludes the train, so it is not directly comparable with the 1.5–2 hour Honzaka number. And the lower half is genuinely rougher; after rain, or on the way down, that difference compounds.
My Recommended Route for First-Time Visitors
Walk up from Sakamoto, see Enryakuji, then decide at the temple whether to continue to Daihiei or turn for the cable car. You get the satisfying part of a mountain climb with a bail-out that does not depend on your legs lasting another three hours.
One caveat: my descent was on the Shugakuin side, and I cannot confirm it followed the official Kirarazaka course for every metre. Treat those notes as a description of conditions on that side of the mountain, not as turn-by-turn navigation. For the official line and current closures, use the Hieizan hiking map and Kyoto Trail notices; access from Kyoto is covered in our separate guide to getting to Mount Hiei.
Hiking Up from Sakamoto: What the Trail Actually Feels Like
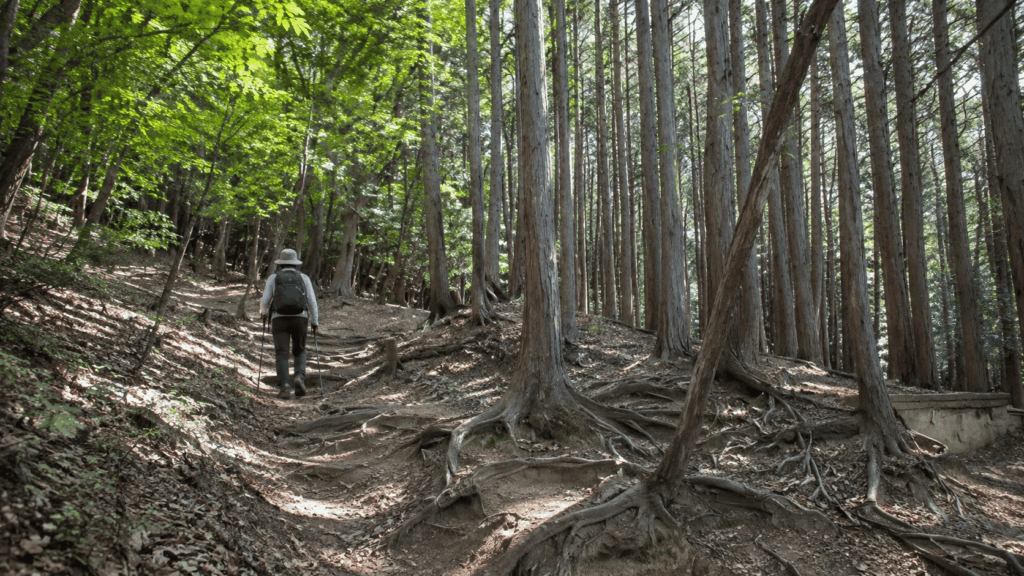
The first ten minutes set the tone. You pass under the torii and meet stone steps taller and steeper than a staircase — not dangerous, but not a warm-up either. Then the route settles into a rhythm: stone, packed earth, a small clearing with a marker, more climbing. The canopy keeps the light low and the air still, and there are few places to sit properly, so most people stop standing up, catch their breath and carry on. The gradient rarely gives you a long flat stretch to recover on.
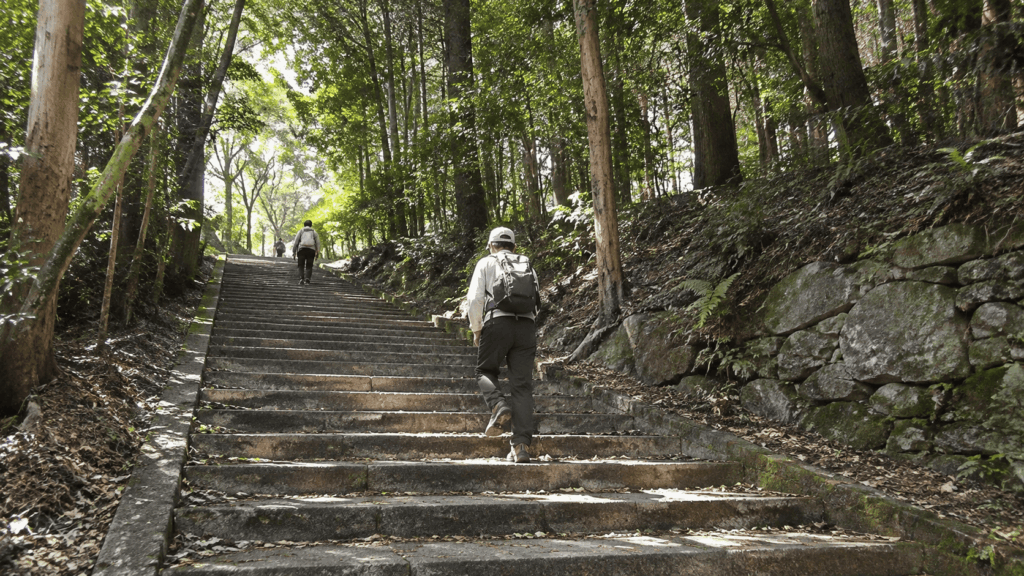
It eases near the temple, which is a relief and a small trap: it is easy to arrive assuming the hard part is over, then spend another two hours on your feet in the Todo area.
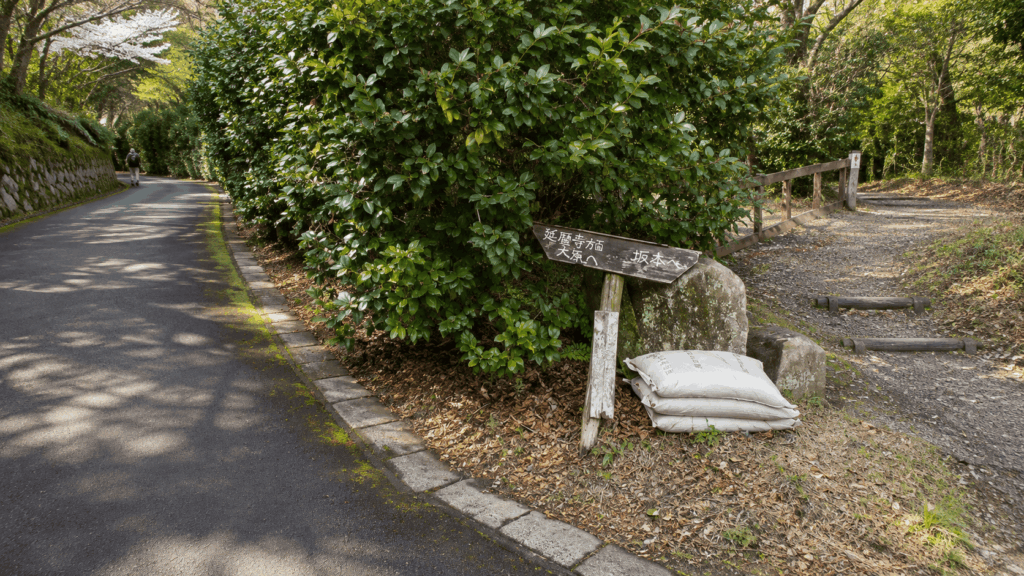
Kai’s tip: The official 1.5–2 hours is a walking figure, not a sightseeing figure. Treat it as the time to reach the temple, then add whatever you want for the halls. Otherwise you arrive in wet clothes, look at your watch, and rush the part you actually came for.
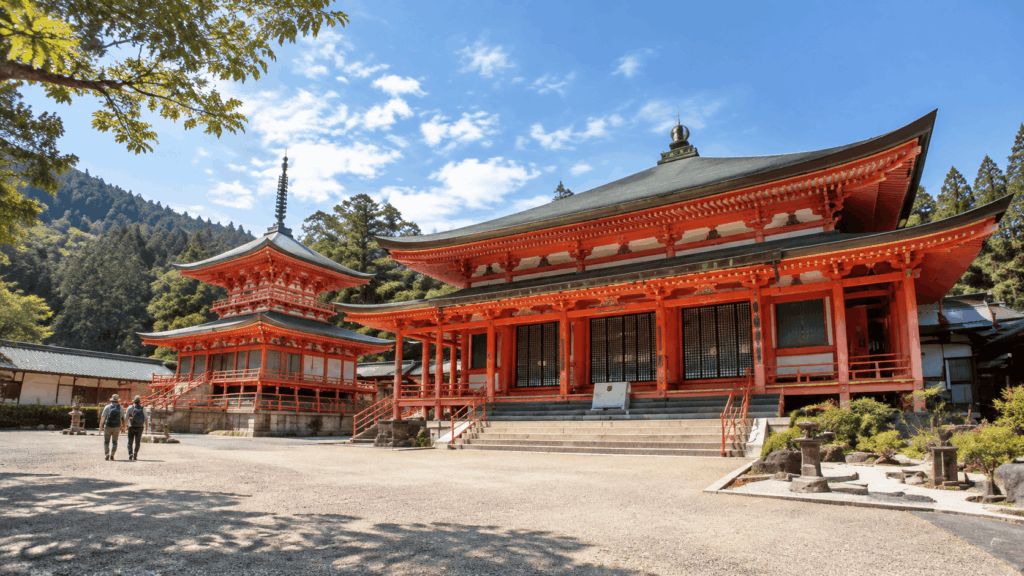
Admission is charged at the Todo reception: ¥1,000 for adults, halls open 9:00–16:00, last reception 15:45. The Konpon Chudo’s interior has been closed since January 2026 for a multi-year restoration; the temporary image and the temple’s “”unending flame”” are on view in the Manpai-do instead. If the temple matters more to you than the climb, check what is currently open before building the day around one building.
Is the Mount Hiei Summit Worth the Extra Walk?
This is where the brochure version and the mountain diverge. Plenty of guides promise a summit panorama. The panorama is real — but not from the point where the elevation is recorded.
Daihiei: The Highest Point, but Not the Best View
From the Todo area it is roughly 1.8 km and about an hour of walking to Daihiei, at about 848 m. The path is quiet and mostly shaded. What waits at the top is a small clearing in the trees, a marker, and no open outlook — on my visit, timber on every side. That is simply what a forested 848 m peak looks like. But if you have climbed an extra hour expecting a postcard view, the let-down is real, and entirely avoidable.
Where to Find Better Views of Kyoto and Lake Biwa
Shimeigatake parking, beside Garden Museum Hiei, looks southwest over the city of Kyoto and southeast over Otsu and the southern end of Lake Biwa. It is a car park rather than a monument to the view, but the outlook is broad — and windy enough that I was glad of an extra layer within minutes of stopping. If a panoramic city view is your main reason for hiking, our Mount Daimonji hike guide offers a shorter climb with a sweeping outlook over Kyoto.
Should You Skip the Summit?
Skip it if your day is built around the temple and you are watching the clock. Go if standing on the high point matters as an achievement, or if you want the quieter forest beyond the Todo crowds. And if photographs are the goal, go to the lookout rather than the trig point — they are different destinations with different payoffs.
Hiking Down Toward Kyoto: Why the Descent Can Be Harder
Climbing uses your lungs. Descending uses your attention, and attention is the first thing to go when your legs are tired.
On the Kyoto side, the path I took was rougher than the Shiga climb in almost every way that matters. There was a large fallen cedar across the route, to be stepped over or worked around at the root end. Further down, sections had been worn into gullies, with loose material sitting on hard ground. Nothing required technical skill. Everything required you to look at your feet.
The person in our group wearing light city trainers was visibly working harder than the rest of us — not because of the distance, but because a thin sole leaves very little margin on that kind of surface. I would not call the descent dangerous in dry conditions. I would call it unforgiving of the wrong shoes, and considerably less forgiving after rain.
Kai’s tip: The gap between a hiking shoe and a street trainer shows up on the descent, not the climb. Going up, grip barely matters; going down, you are braking with every step. Expect the rhythm to change too — stepping over, around and down rather than striding — so your pace drops even when you feel like you are moving fast.
Who Should Avoid This Descent?
Skip the Kyoto-side descent on foot if you only have city shoes, if it has rained heavily in the past day or two, if you would be descending in fading light, or if your footing is already getting sloppy. In each case the cable car is not a compromise; it is the correct decision. I would not talk a first-time visitor in trainers into that descent, and I would not do it myself in the rain.
Trail conditions change. Kyoto Trail publishes notices about closures and fallen trees, and recent advisories have concerned sections well away from the Kirarazaka area — which is exactly why you should check the marker numbers on your own route rather than a general headline. Nothing in this section confirms that a particular obstruction is still there.
How to Get Back Down Mount Hiei Without Hiking the Whole Way
Knowing your exit before you start changes the whole character of the day. There are two lift systems, they serve different sides of the mountain, and they do not connect to the same place.
| Option | Best for | Physical demand | Main reward | Main drawback |
|---|---|---|---|---|
| Hike up, Sakamoto Cable down | First-timers who want the climb but not the descent | Moderate — climb only | Forest and stone on the way up, Lake Biwa views from the cable car | You miss the summit lookouts unless you add them first |
| Hike up, continue to Daihiei, transport down | Peak baggers and photographers | Moderate to high | The high point plus the Shimeigatake outlook | Roughly an extra two hours of walking before the last service |
| Full traverse from Shiga to Kyoto on foot | Experienced hikers with proper boots | High | A genuine crossing of the mountain, on quieter trails | Rough footing, a long day, less flexibility if you fall behind |
| Transport up, walk within the mountain | Families, short trips, wet weather | Low to moderate | Temple and viewpoints without the climb | You skip the pilgrim path entirely |
Taking the Sakamoto Cable Car Down
The simplest exit from Shiga: 2,025 m, the longest cable line in Japan, about 11 minutes between Cable Enryakuji Station near the Todo area and Cable Sakamoto Station in the town below. Departures are at 00 and 30 minutes past the hour, from 8:00 to 17:30 between March and November and 8:30 to 17:00 from December to February. Adult fares are ¥960 one way and ¥1,830 return. The ride also delivers the Lake Biwa view that the wooded summit withholds.
If you’re hiking up Honzaka and planning to ride down, compare the one-way and round-trip Sakamoto Cable Car ticket options on Klook. Check the current mobile voucher instructions and operating timetable before relying on the cable car for your descent.
Returning Toward Kyoto
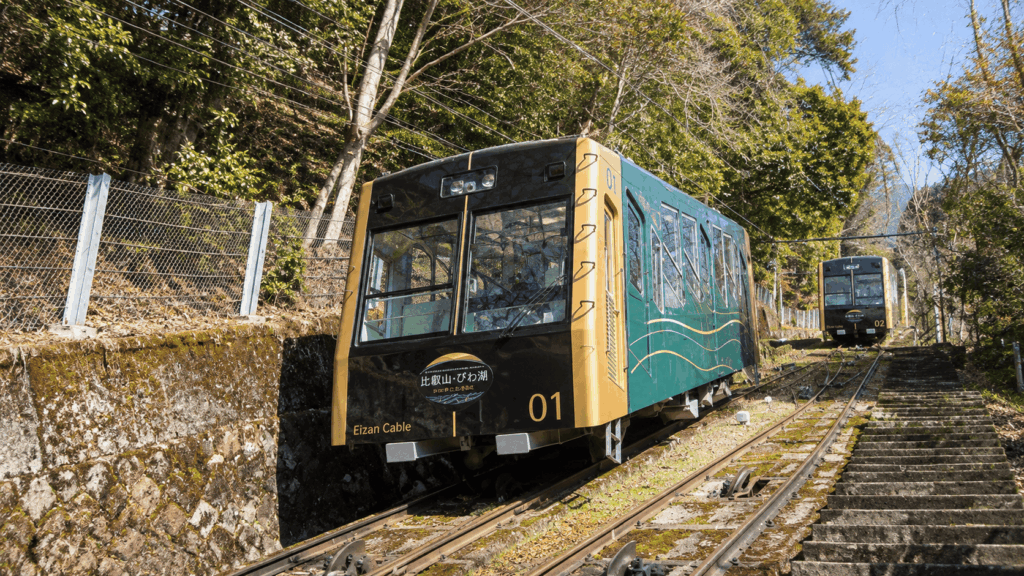
The Eizan Cable and Ropeway connect the summit area with Yase, not Shugakuin: ¥600 for the cable plus ¥400 for the ropeway, landing at Cable Yase Station, from where the Eizan Railway runs back toward Demachiyanagi. Both were suspended from 30 September 2026 for vehicle repairs and resumed on 17 October 2026, and both close seasonally, usually from early January to mid-March, when the mountain shuttle bus stops too. In winter, the Sakamoto Cable, buses, or your own legs are what remain.
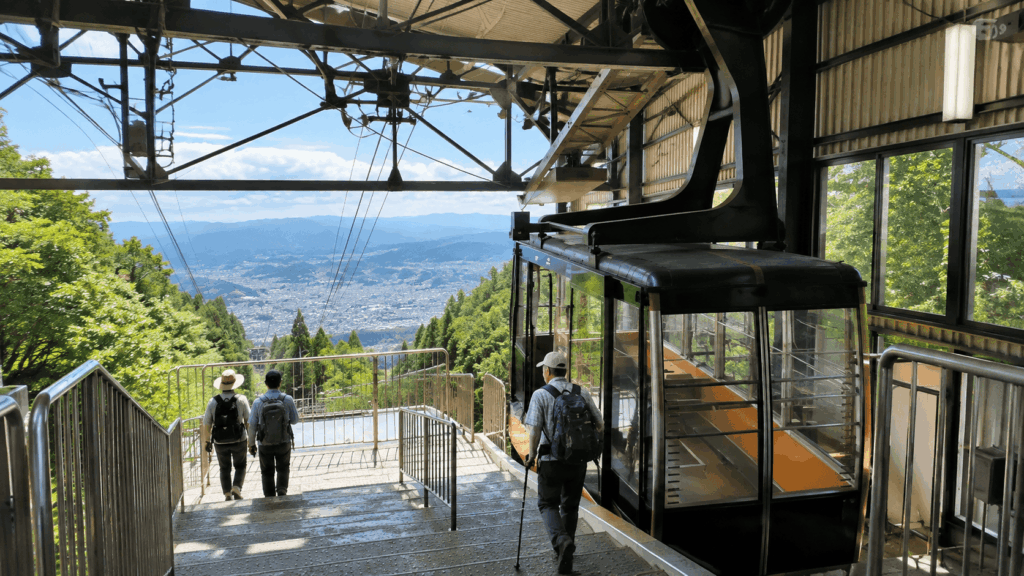
Check the Last Service Before You Start
Not at the temple, and certainly not at the top of the stairs. Check while you are still at breakfast.
Kai’s tip: Work backwards from the last cable car, not forwards from your start time. If the last descent leaves at 17:30, the realistic cut-off for leaving the temple is earlier than it looks once you add the summit detour and a wrong turn. Changing the plan on the way down costs far more energy than changing it over coffee.
What to Wear and Bring for a Mount Hiei Hike
The awkward part of this mountain is that you will probably be hot and cold on the same walk: humid, sweat-inducing climbing followed by windy lookouts.
| Item | Why it matters | Especially important when |
|---|---|---|
| Hiking shoes or trail runners | Grip and foot stability, mainly on descents | Walking down the Kyoto side, or after rain |
| Water | There are few reliable refill points on the trail itself | Summer, and any route longer than Honzaka alone |
| Extra layer | The summit and lookouts are exposed and breezy | Autumn through spring, or any overcast day |
| Offline trail map | Signage thins out away from the main junctions | The Kyoto-side route, or any detour beyond the temple |
| Food or snacks | Options on the mountain are limited and seasonal | Starting before the temple opens, or planning a full traverse |
| Rain protection | Wet stone and wet roots change the difficulty | Any day with rain forecast, and the day after heavy rain |
On my own walk, the layer that felt excessive on the climb was the one I wanted within minutes of stopping at the lookout.
Are Sneakers Enough for Mount Hiei?
For Honzaka alone, in dry weather, with a cable car down: probably yes. For a Kyoto-side descent, a full traverse, or anything after rain: no. The mountain does not require boots. It does require a sole that will hold on wet, angled ground, which is exactly what city shoes are not designed to do.
Weather and Seasonal Safety Tips
Winter is a different mountain: ice on stone steps, and the Kyoto-side lifts and shuttle bus usually out of service from early January to mid-March. Summer is humid rather than dangerous, but the climb costs more water than the temperature suggests. Autumn is the busiest and most beautiful window, which also means cable cars filling and temple areas crowded at midday.
My Recommended Mount Hiei Plan
Plan A: Best for First-Time Hikers
Sakamoto-hieizanguchi → Hiyoshi Taisha → Honzaka → Enryakuji Todo → Sakamoto Cable down. Allow four to five hours including the temple. This is the version I would give a friend with ordinary fitness and one free day in Kyoto: a real climb, a World Heritage temple, and a descent that does not depend on your knees. Switch to something easier if you reach the temple after about 14:30.
Plan B: Best for the Summit and Views
The same route plus Daihiei and the Shimeigatake lookout, adding roughly two hours of walking. Do it only with an early start and a confirmed exit — the extra hour to the summit is the easy part; the last cable car is where the pressure comes from. Skip the summit if you are chasing the view, and go straight to the lookout area instead.
Plan C: Full Shiga-to-Kyoto Traverse for Experienced Hikers
Up from Sakamoto, across the summit area, then down toward Shugakuin. This is the shape of the walk I did, and the most satisfying version when the conditions are right — and the one where footing, daylight and boots all matter at once. Carry a map, know your exit, and check current notices for the section you plan to descend. Do not start it wet, in trainers, or without being able to name your exit route.
Should You Hike Mount Hiei Independently or With a Guide?
Independent hiking is entirely reasonable here: marked routes, public transport access, and difficulty that comes from fitness and footing rather than navigation. If you can read a map, carry water and make a call about the weather, you do not need to pay anyone.
A guide earns its place in a narrower set of situations: you want the forest and the temple explained in English as you walk, you would rather not sequence the transport and route yourself, or you are a small group who want a private day at your own pace. The main option on this mountain is a full-day private walking tour that uses trains and the cable car to reach the mountain, then walks roughly up to 10 km through the Enryakuji area and the surrounding forest, with a Buddhist vegetarian lunch mentioned among the options. It is listed at ¥75,000 for a private group of up to five, with transport, temple admission and garden fees charged separately. Two clarifications: it is a mountain walk rather than a full Honzaka ascent from Sakamoto, and it does not remove the physical demands of walking at this altitude. Confirm the current price, inclusions and cancellation terms with the operator.
If your goal is specifically to climb the old pilgrim path under your own steam, do that independently. If your goal is to understand what you are walking through with the logistics handled, the guided version is the more efficient use of a day.
For travelers who want English-language context on Mount Hiei’s Buddhist history without committing to the full Honzaka ascent, the five-hour Mount Hiei private guided tour is worth comparing with an independent visit. It is a separate option from the longer private mountain walk described above, with a different itinerary and booking conditions.
Why I’d book this one
- More context along the way: Recent travelers mention knowledgeable guides who explain the mountain’s religious history and temple traditions rather than simply leading visitors between sights.
- A structured visit to Enryakuji: The itinerary covers the Todo, Saito and Yokawa temple areas, using cable-car access and transport between precincts instead of requiring the full Sakamoto ascent.
- A clearer choice before committing: The tour still involves substantial walking, slopes and stairs. Review the current route, group arrangements, inclusions and cancellation conditions to decide whether the guided format suits your fitness and schedule.
Mount Hiei Hike: Frequently Asked Questions
How difficult is the Mount Hiei hike?
It depends entirely on the route, which is why a single rating misleads. The Honzaka Route from Sakamoto is a sustained climb of about 1.5–2 hours with no technical sections, but very little flat ground to recover on. The Kyoto-side approach is slower and rougher underfoot, and the descent is more demanding than the ascent. Judge your own plan on climbing endurance, footing, navigation and how easily you can exit.
How long does it take to hike Mount Hiei?
Allow 1.5–2 hours to walk up Honzaka from Sakamoto to the Enryakuji Todo area. The official Shugakuin course on the Kyoto side is about 6 km and roughly 3 hours 40 minutes one way, though that figure includes time at the temple. Adding Daihiei and the lookout area costs about two more hours on foot. A temple-focused day is half a day; a temple-plus-summit day is most of a day.
Can you hike Mount Hiei in sneakers?
On Honzaka, in dry weather, with a cable car for the descent, ordinary trainers are usually enough. For the Kyoto-side route — especially going down — they are not a good choice. Wet roots, eroded ground and loose material all punish a smooth sole. Trail runners or light hiking shoes are the sensible compromise if you are packing only one pair for the trip.
Is there a good view from Mount Hiei’s summit?
Not from the true summit. Daihiei, at about 848 m, is wooded and enclosed, so there is no panorama at the high point itself. The open views are at Shimeigatake parking beside Garden Museum Hiei, looking southwest over Kyoto and southeast over Otsu and Lake Biwa. The Sakamoto Cable also gives you a wide Lake Biwa view on the way down.
Can you hike up Mount Hiei and take a cable car down?
Yes, and for many visitors this is the best version of the day. The Sakamoto Cable connects the area near the Todo halls with Sakamoto town in about 11 minutes, costs ¥960 one way, and runs until 17:30 from March to November. On the Kyoto side, the Eizan Cable and Ropeway drop you at Yase rather than Shugakuin, and both close seasonally, usually from early January to mid-March.
Final Verdict: Which Mount Hiei Hike Is Right for You?
Mount Hiei is a good mountain to walk and a poor mountain to misunderstand. Its reputation for being “”moderate”” hides two very different days, and the difference is not the height — it is which side you go up, and which side you come down.
Choose the Sakamoto approach if this is your first visit, you want the climb to feel like a proper pilgrimage, and you like the idea of a cable car waiting at the end. Honzaka gives you the forest, the stone steps and the temple; the Sakamoto Cable gives you a graceful exit with a Lake Biwa view attached.
Choose the Kyoto-side approach if you are staying in north Kyoto, you have grippy shoes and some hill experience, and you would rather have a quieter trail than an easier one. Go expecting to watch your feet, and do not make it your first hike in Japan.
For first-time visitors to Kyoto: do Plan A. Up from Sakamoto, an unhurried hour or two at Enryakuji, and the cable car down. It delivers the memorable part without turning the day into an endurance test.
For families and travellers on a tight schedule: use transport in both directions and walk only within the summit and temple areas. The garden, the lookouts and the Todo halls make a full, satisfying half day, and nobody has to be helped down a gully.
For photographers: skip the trig point and go to Shimeigatake parking by Garden Museum Hiei. That is where the Kyoto and Lake Biwa views actually are, and the light is better in the late afternoon than at midday.
For repeat visitors and confident hikers: the full traverse is the version worth doing once. Start early, carry a map, check the current trail notices for your descent, and treat the Kyoto-side footing as the real objective of the day rather than an afterthought.
And if you take only one thing from this guide: decide how you are getting down before you decide how far you are going up.

Hi, I’m Kai. I’m a Tokyo-based travel writer, tourism industry insider, and the author of a published guidebook for international visitors to Japan. With over 10 years of professional experience at a leading Japanese tourism company, my mission is to help you skip the tourist traps and navigate Japan’s best destinations like a local. I believe the perfect day trip is like a traditional kaiseki meal: a beautiful balance of precise planning and unforgettable seasonal discovery. When I’m not out conducting field research, you’ll usually find me drafting new itineraries with one of my favorite fountain pens!